Patient Information
On the Patient Information page you will find four tabs to document patient details.
We won't go through every field on each tab, but we will touch on a few to show different field functionality.
Note: Many fields have a Search bar to allow you to search through the pick list values. The list values will begin filtering as soon as you start typing in the Search bar.
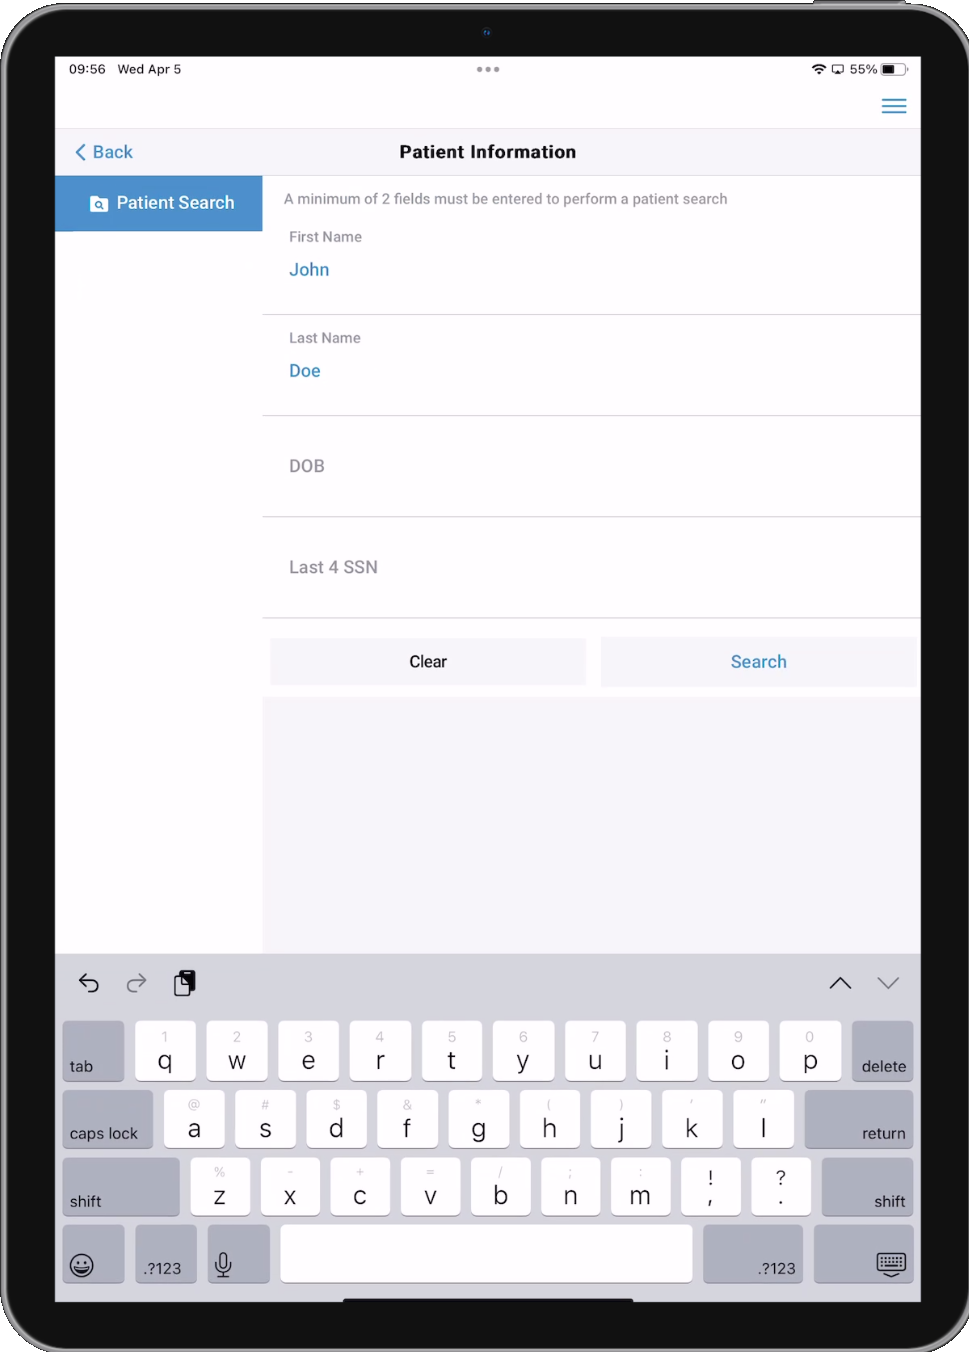
When you enter the Patient Information page for the first time on a chart, the options displayed will be determined by your Service's configurations. If your Service uses the force patient search option, you will only see Patient Search. If your Service does not use the force patient search option, you will still see Patient Search, but will also see Patient Demographics, Patient Medical History, Patient Allergies, and Patient Medication and can jump straight to any of those sections to manually enter information.
Configuration: Service > Chart > Patient > Force Patient Search = Yes.
Configuration: Service > Chart > Patient > Force Patient Search = No.
Important! If you do not document or import any patient information, the PCR will be treated as a "no patient" chart for NEMSIS reporting and billing purposes.
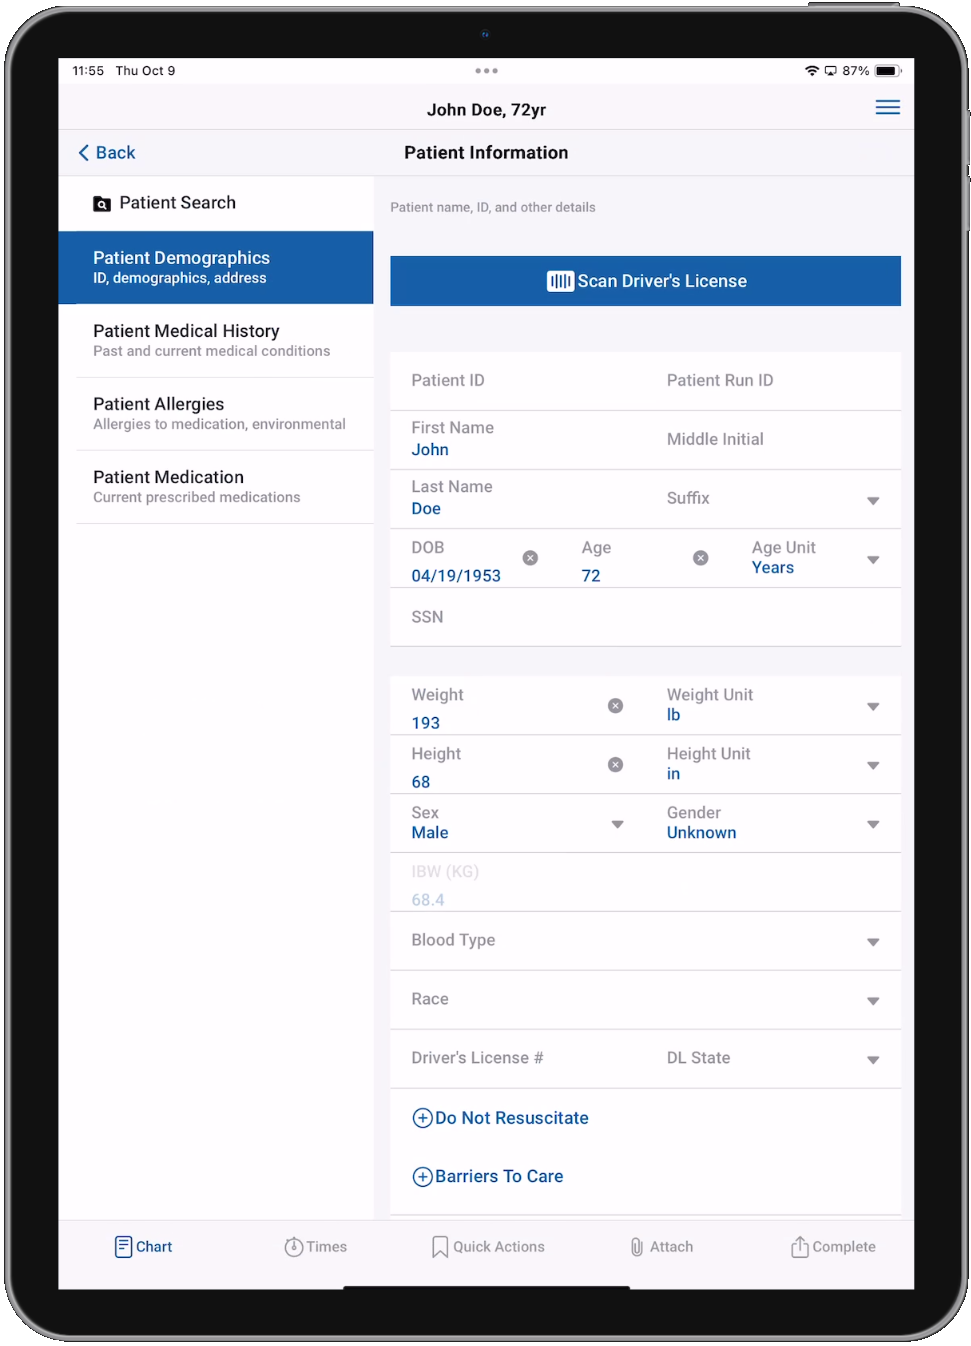
Patient Demographics
Here you will document the patient's name, date of birth, height, weight, gender, and address along with other demographic information. You can tap the Scan Driver's License button to scan the patient's driver's license and automatically import their demographics information. Learn more about the driver's license scanner feature.
You can also use the Patient Search feature to import existing patient's demographics information. If your Service has the configuration enabled, this will also allow you to import medical history, allergies, and medications. Learn more about the Patient Search feature.
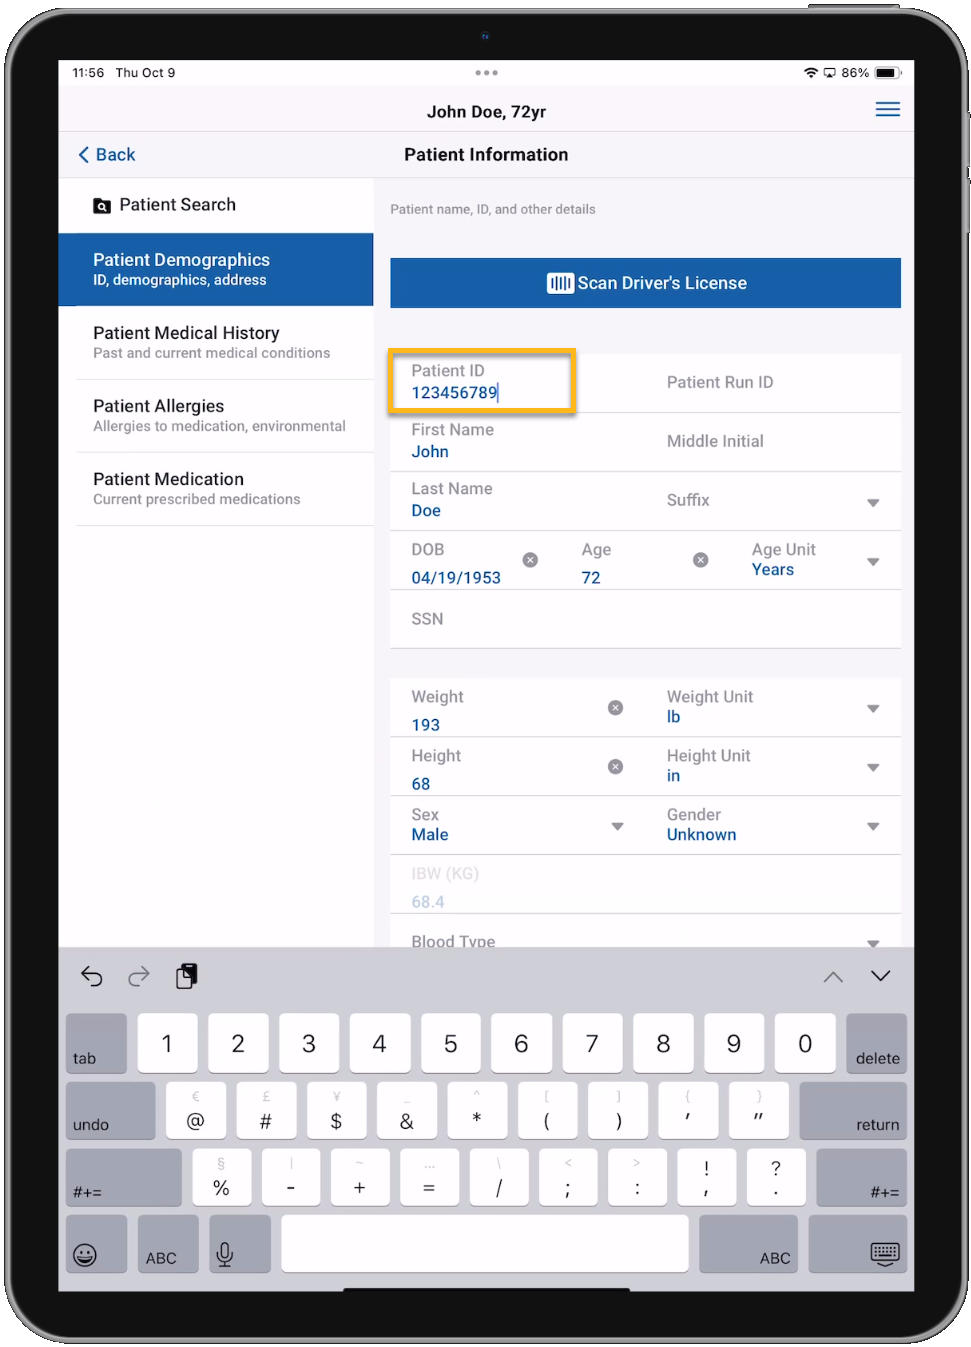
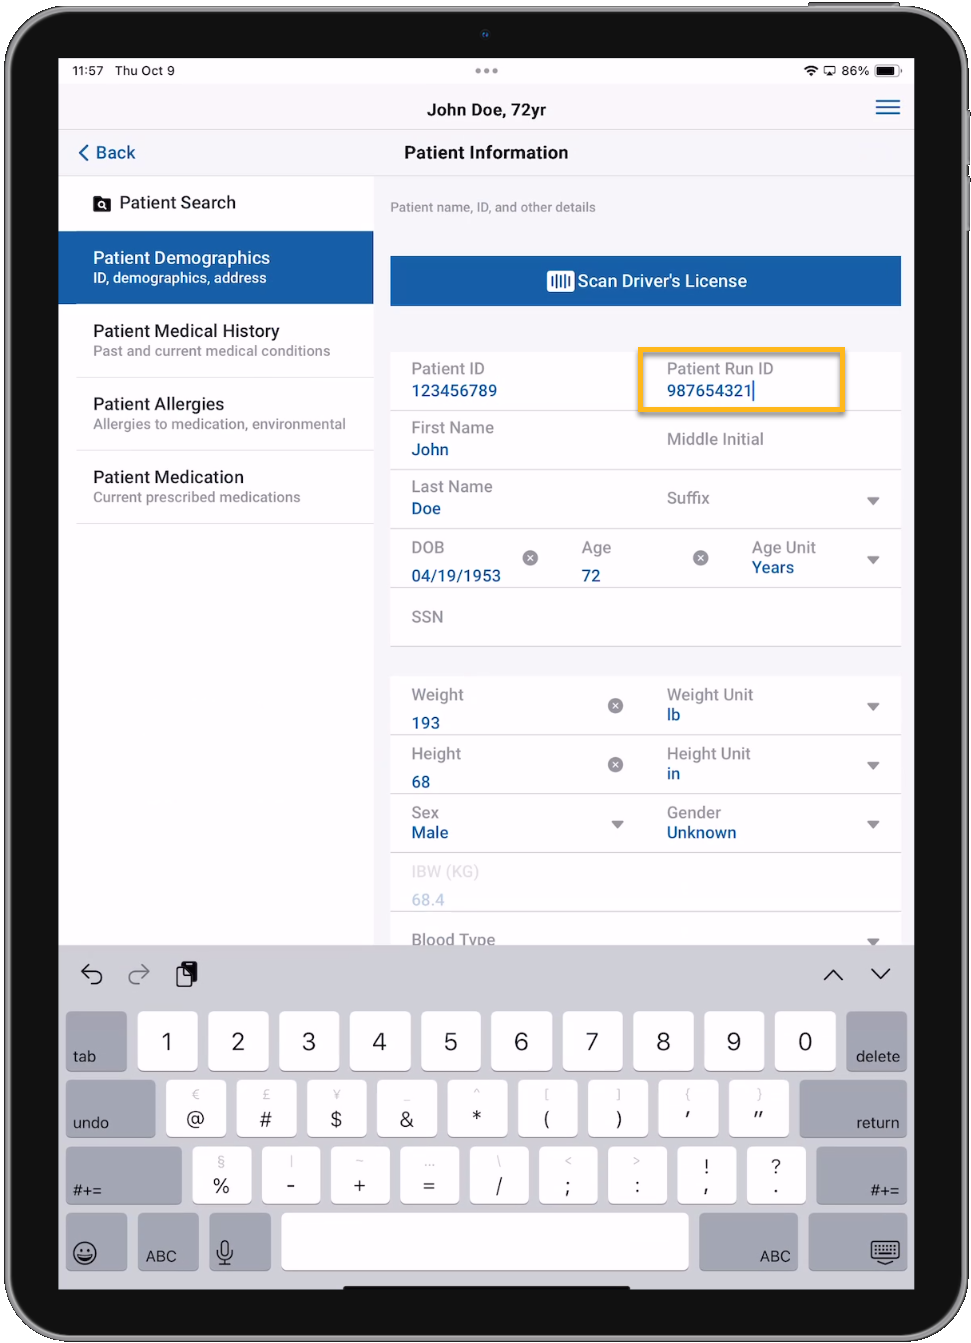
If enabled, you will see the Patient ID and Patient Run ID free-text fields at the top of the Patient Demographics page.
Configurations:
-
Service > Chart > Patient ID = 'Yes' or 'Required'
-
Service > Chart > Pt. Run ID = 'Yes' or 'Required'
If Triage is enabled in your Command Facility configuration and Mass Casualty on the Trip Information page is set to 'Yes', you will see the Triage Color single-select field on the Patient Demographics page.
Configurations:
-
Command Fac. > Chart > Page 1 & Patient Page > Mass Casualty = Yes
-
Command Fac. > Chart > Page 1 & Patient Page > Triage = Yes
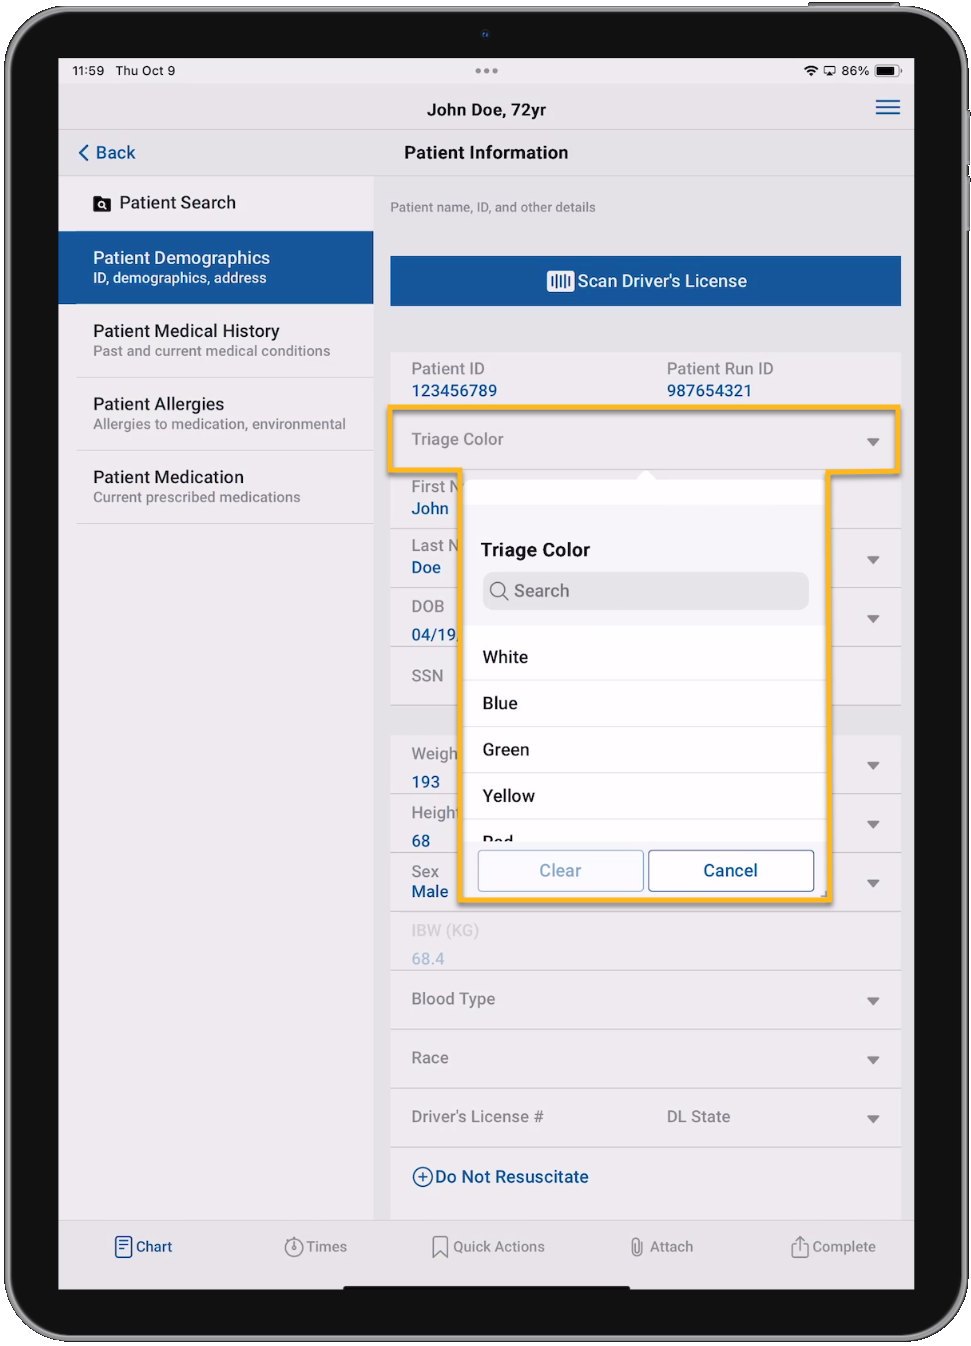
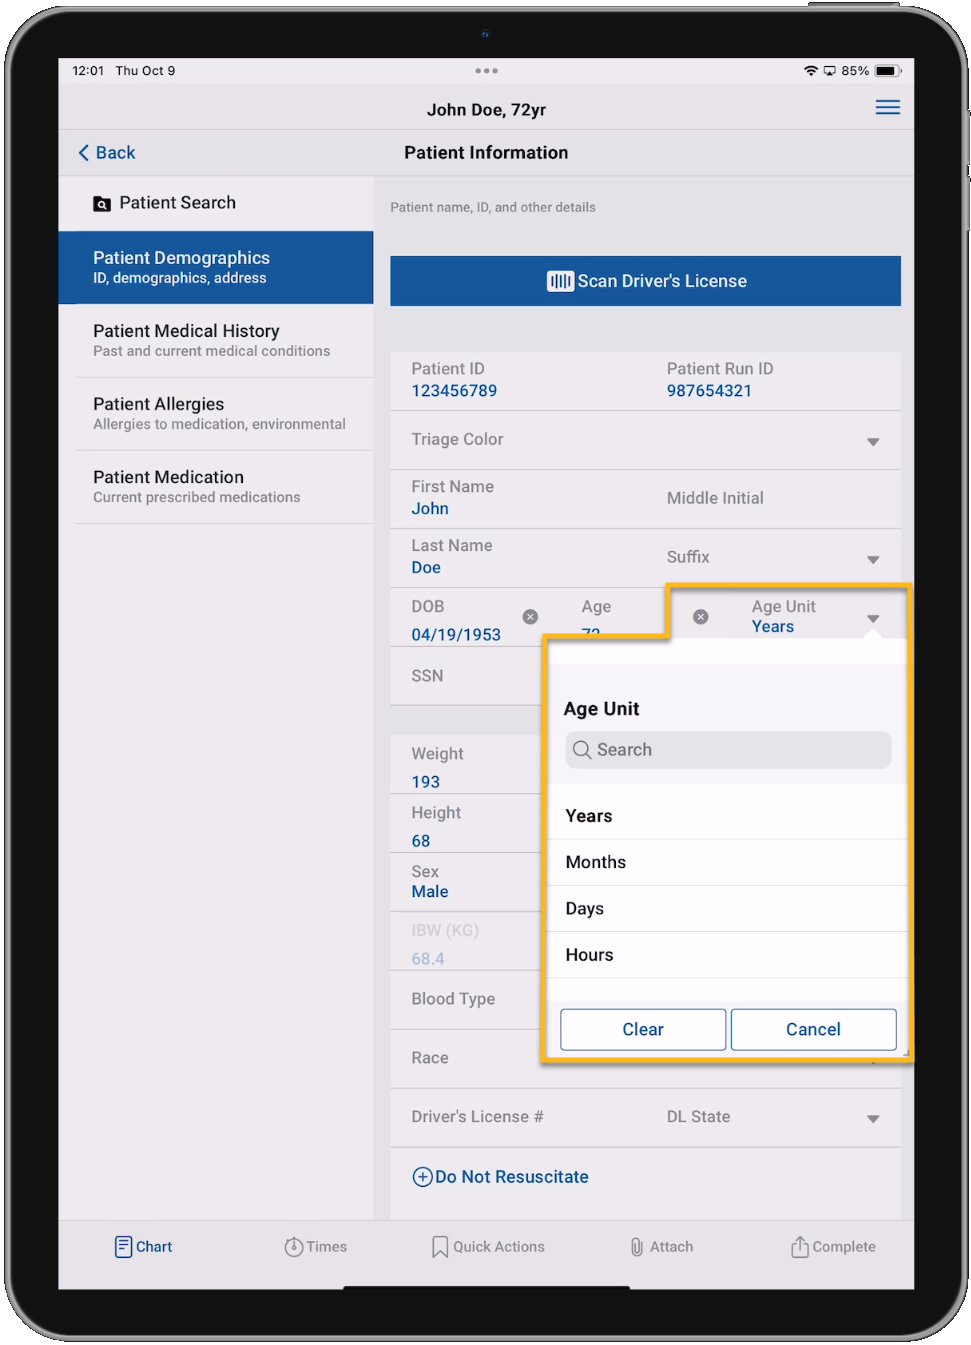
Single-select fields
Single-select fields like 'Age Unit' allow you to choose one value from the list. Tapping Cancel will close the selection window and tapping Clear will remove any selected values from the chart.
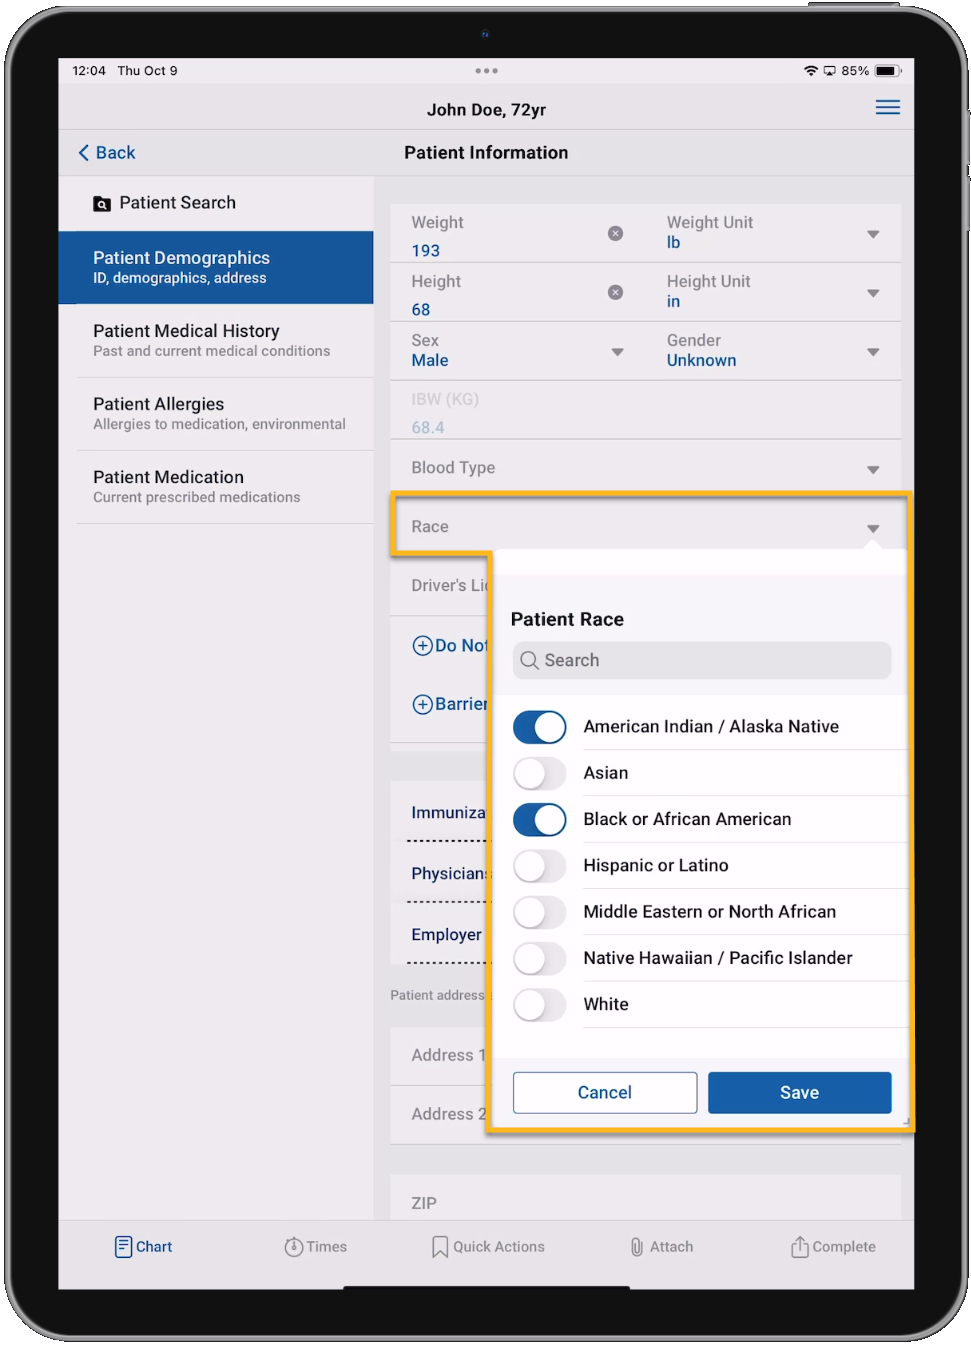
Multi-select fields
Multi-select fields like 'Race' allow you to choose as many values from the list as you need. Tap each value you want to include to toggle it on and then make sure to tap Save.
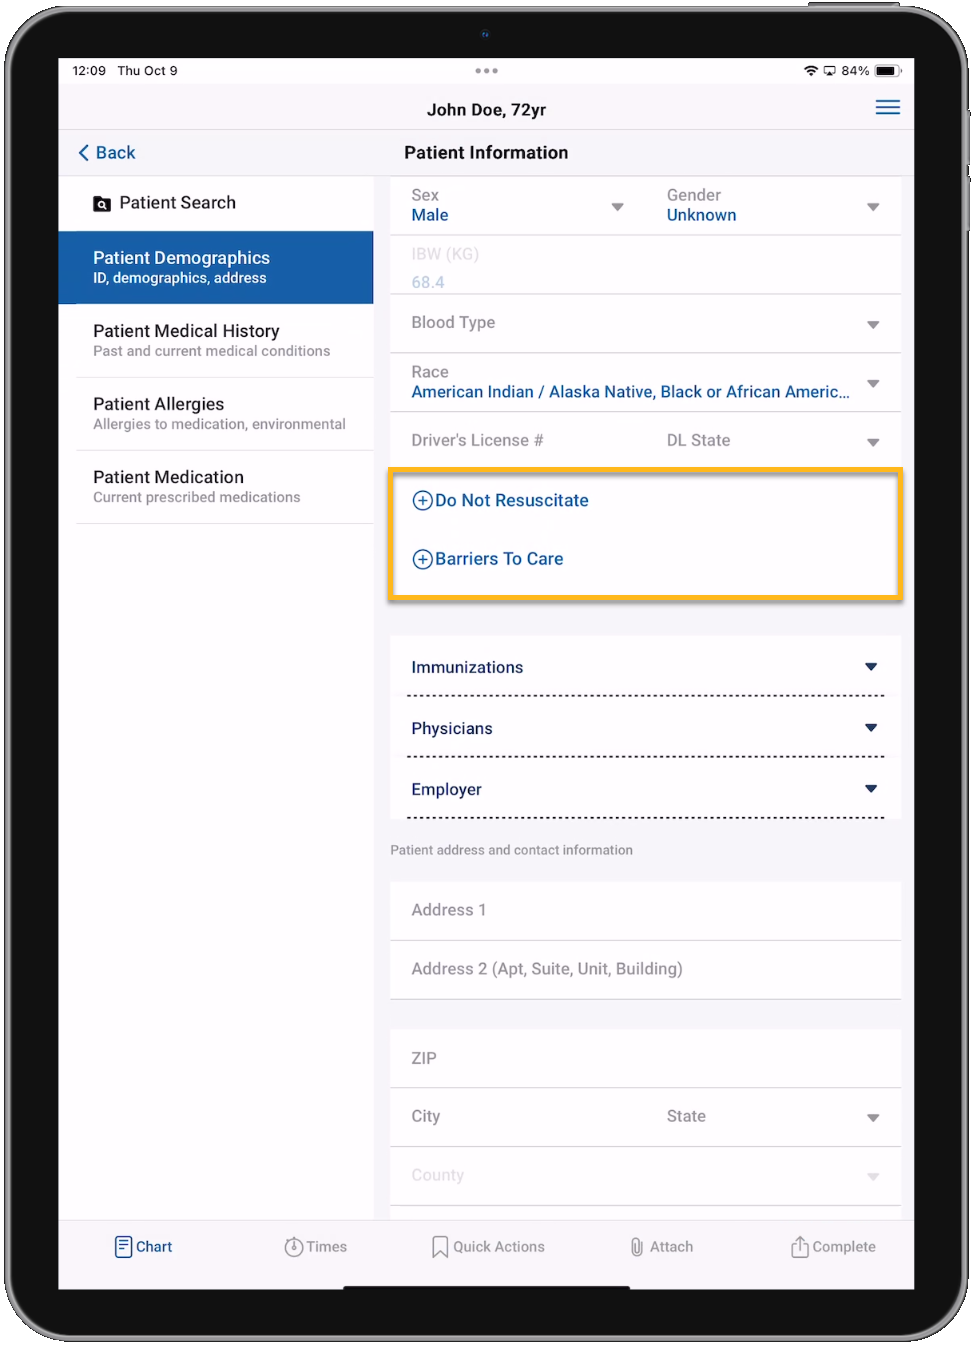
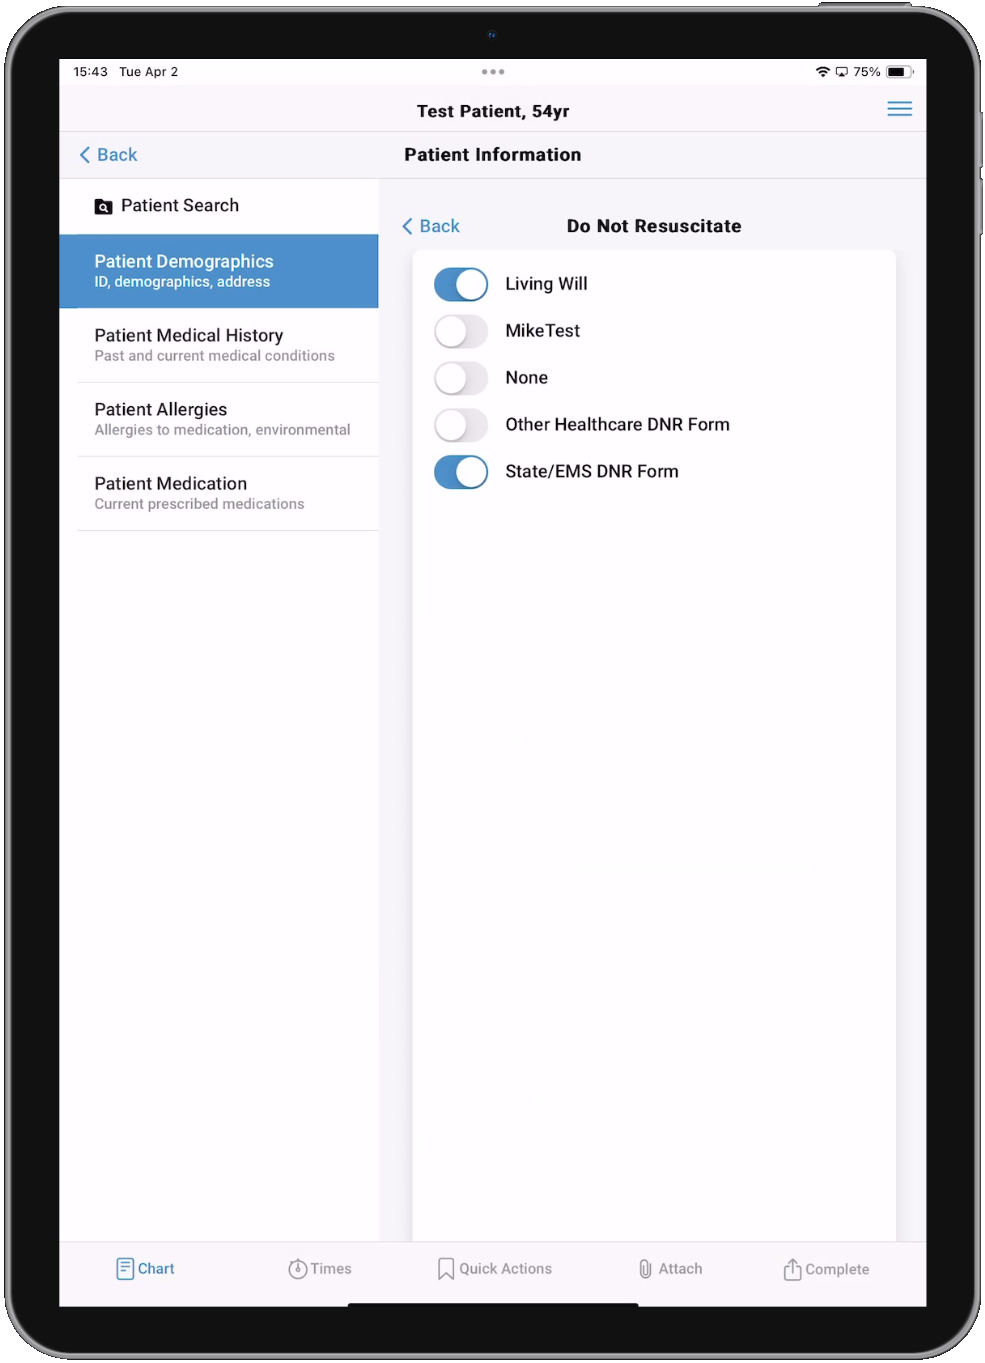
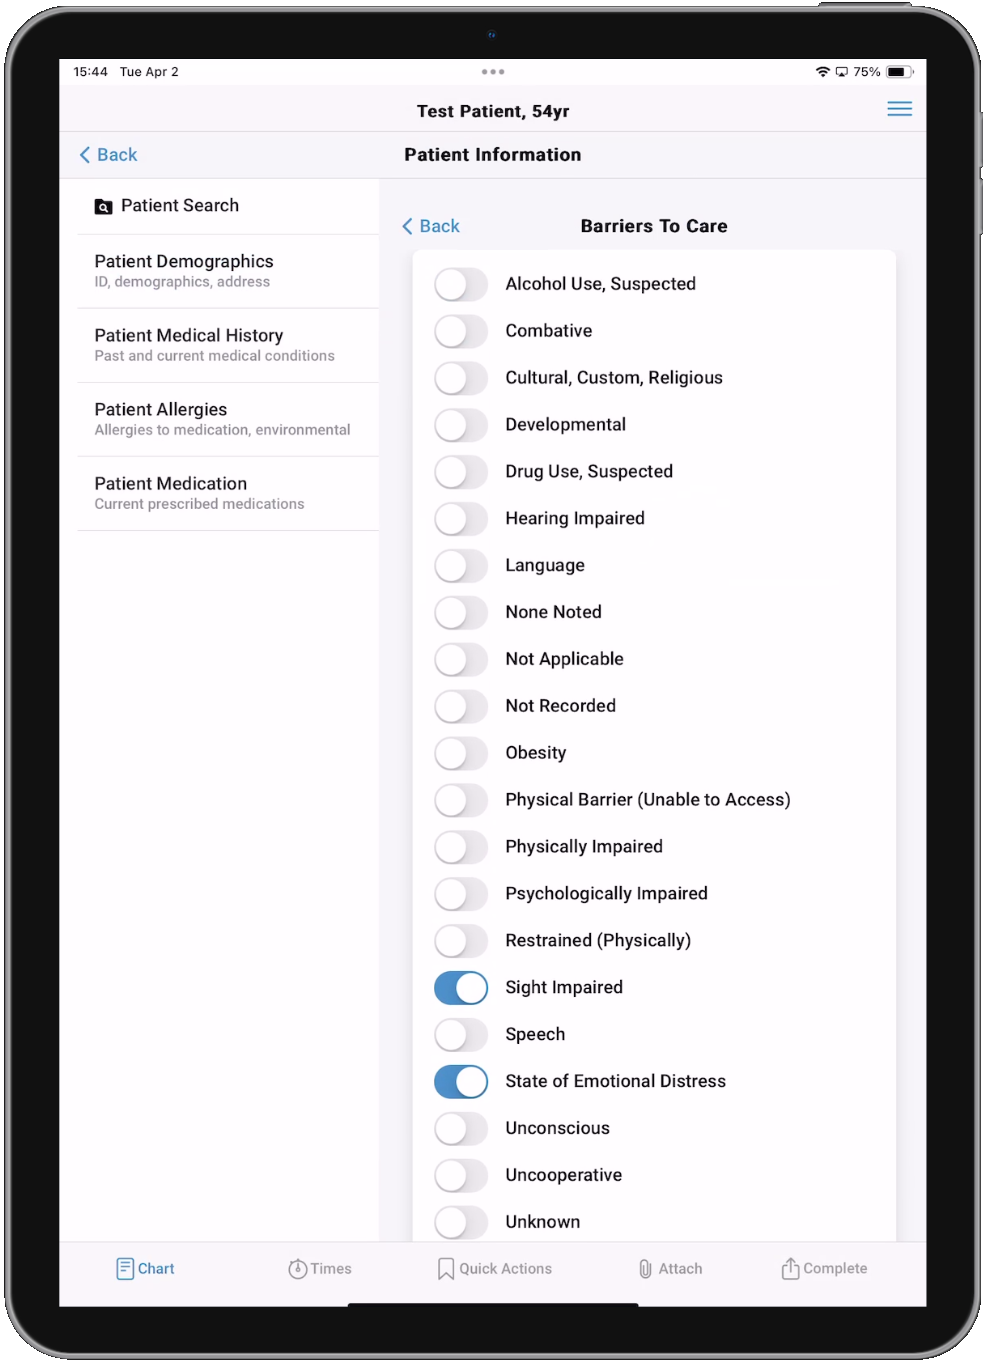
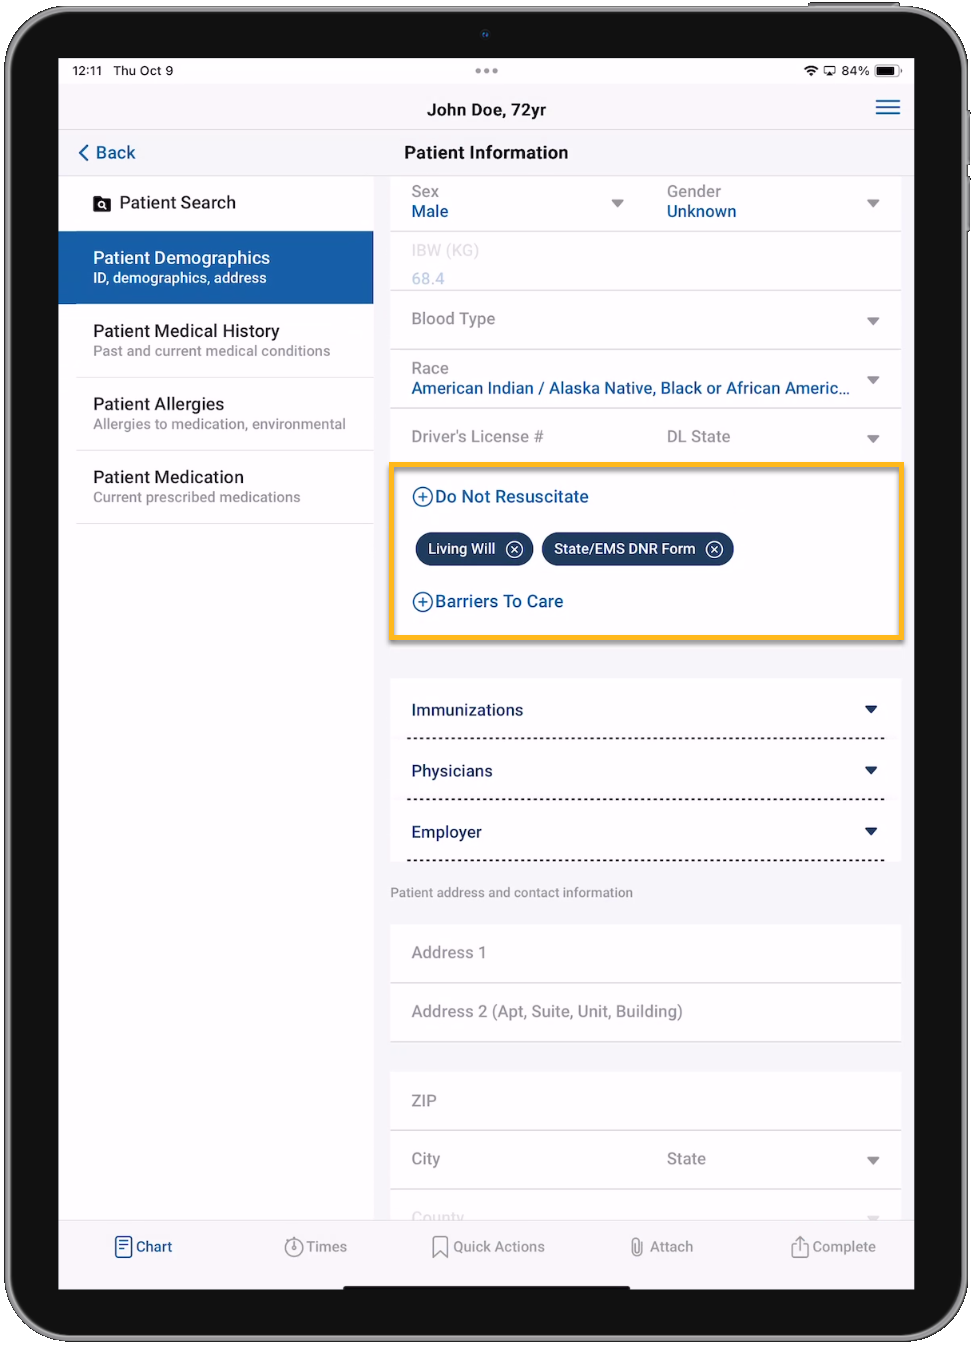
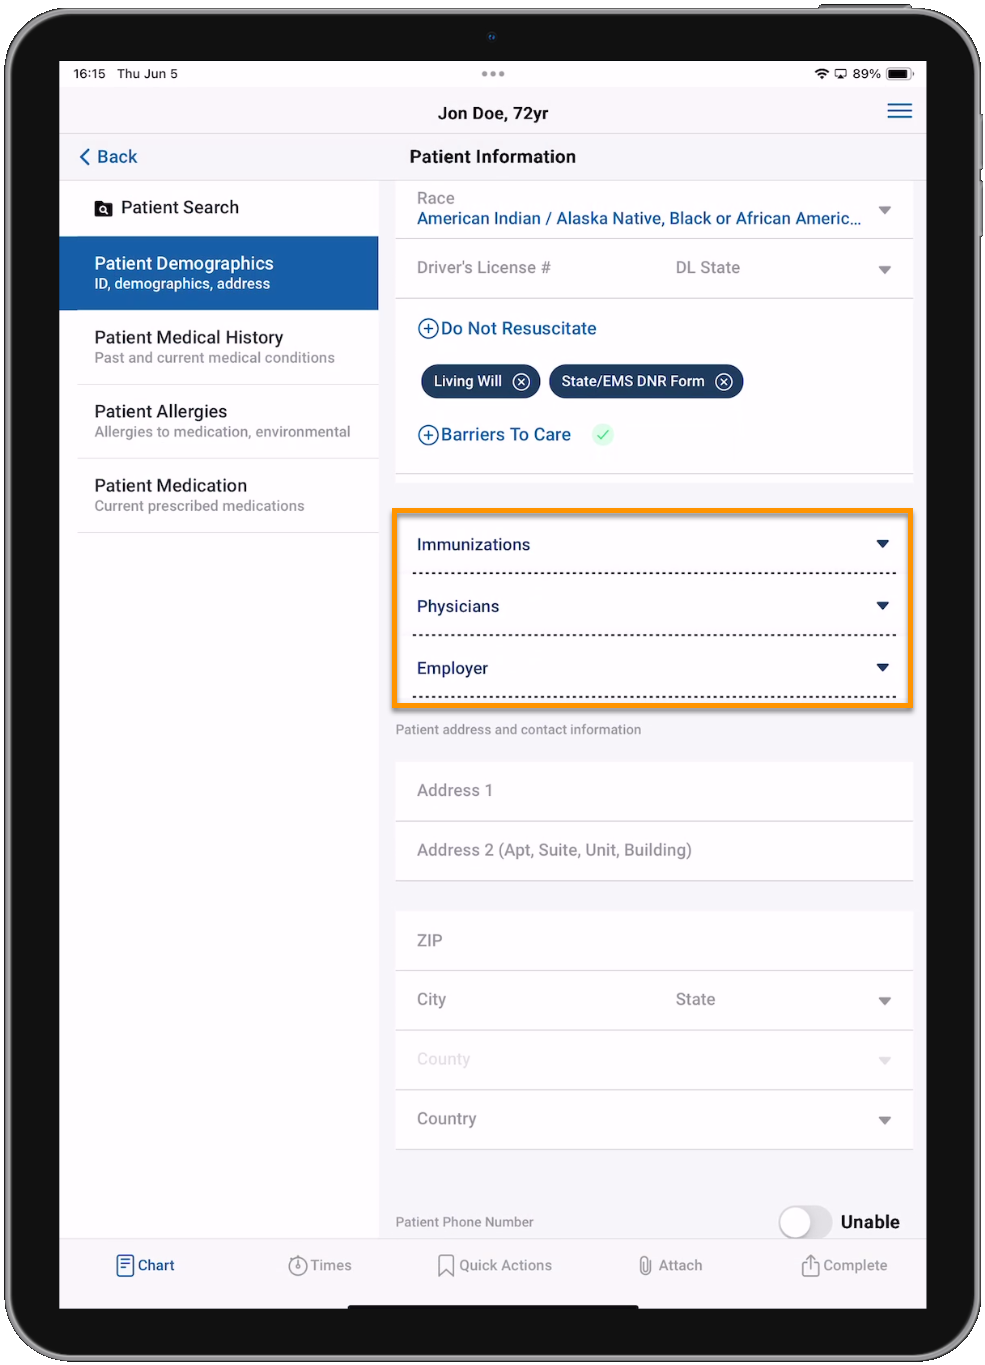
The 'Do Not Resuscitate' and 'Barriers To Care' fields look a little different, but function similar to other multi-select fields. When you tap them, a multi-select picklist displays and you can select as many options as you need. Once you select and save values to those fields, they will display a chip for each selection. If the selections won't fit in the field, they will display a green check mark indicating values have been selected, and you can tap the field to view and edit the values.
Free-text fields
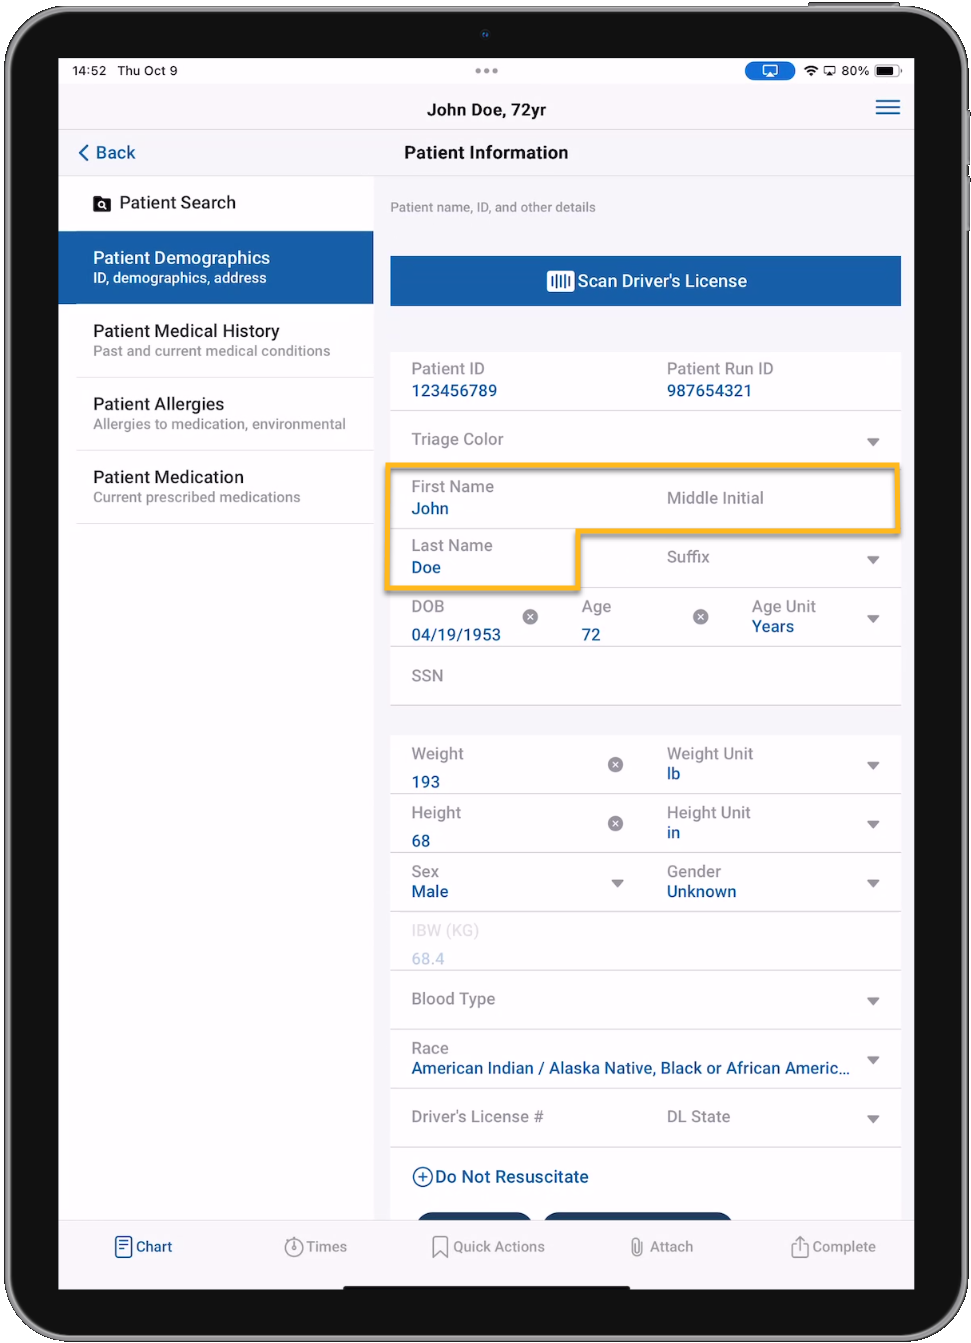
Free-text fields like the 'First Name', 'Middle Initial', and 'Last Name' fields allow you type in values.
Note: If your device has a microphone and dictation is enabled in the device settings, you can use voice-to-text for free-text fields. Voice-to-text capabilities are enabled solely by the native tools on the user's device and are not part of the ZOLL emsCharts NOW functionality provided by ZOLL.
Expandable sections
Expandable sections like 'Immunizations', 'Physicians', and 'Employer' will expand when you tap them and display multiple fields. The Immunizations section is composed of single-select fields, the Physicians section has a combination of free-text and single-select fields, and the Employers section has free-text, single-select, and numeric fields.
When data is entered in any field in an expandable section (whether from a system default or entered manually), a green check mark will display next to the name of that section. Tap the section to expand and see the entered data.
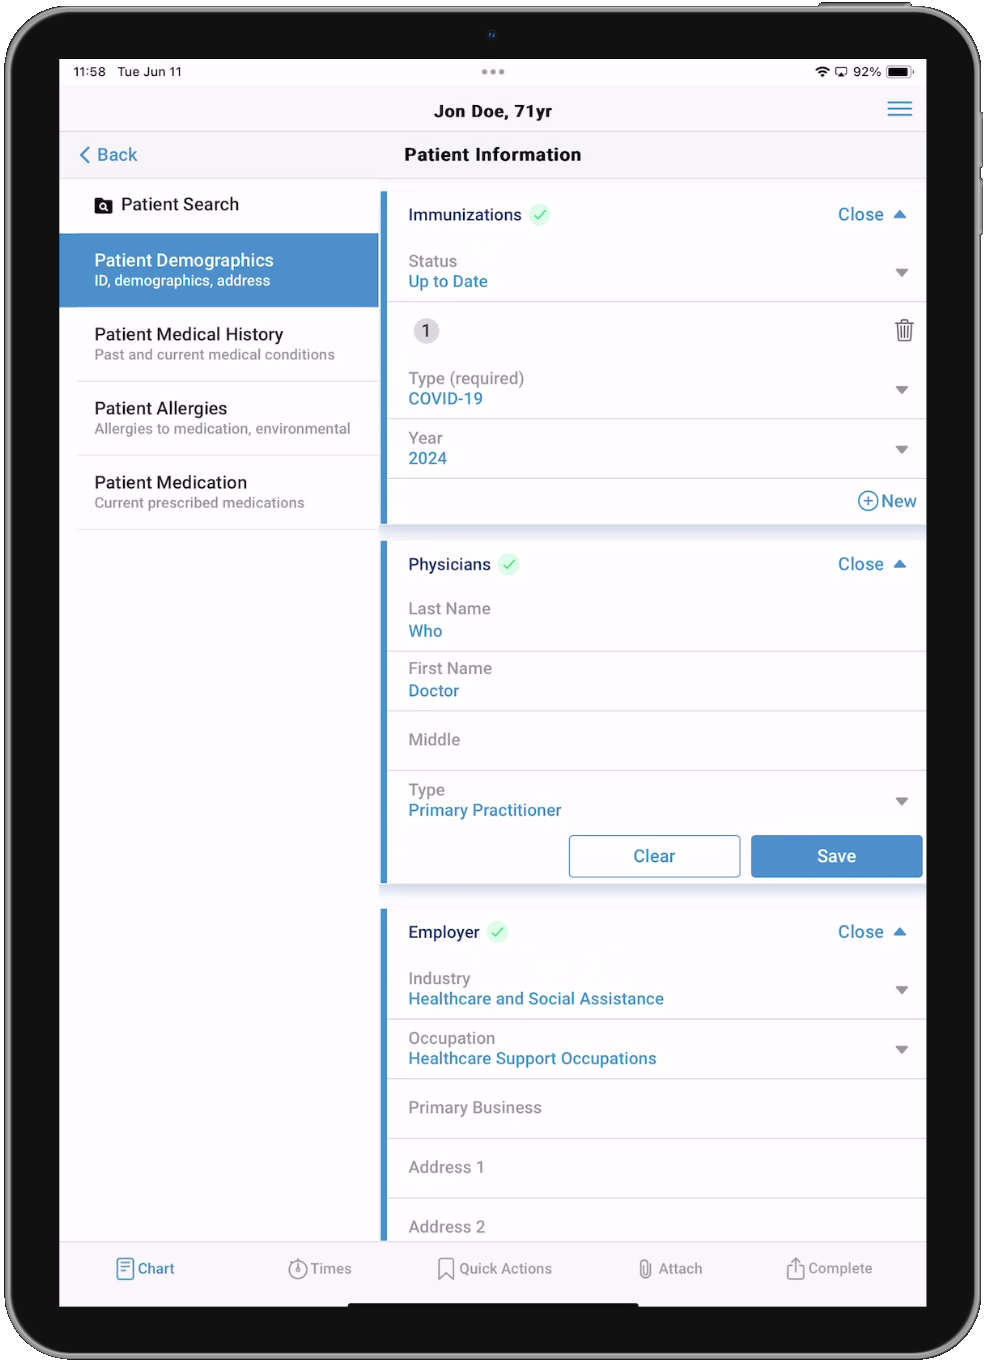

If multiple physicians are entered, they will each display as a chip at the top of the expanded Physicians section.

Address fields
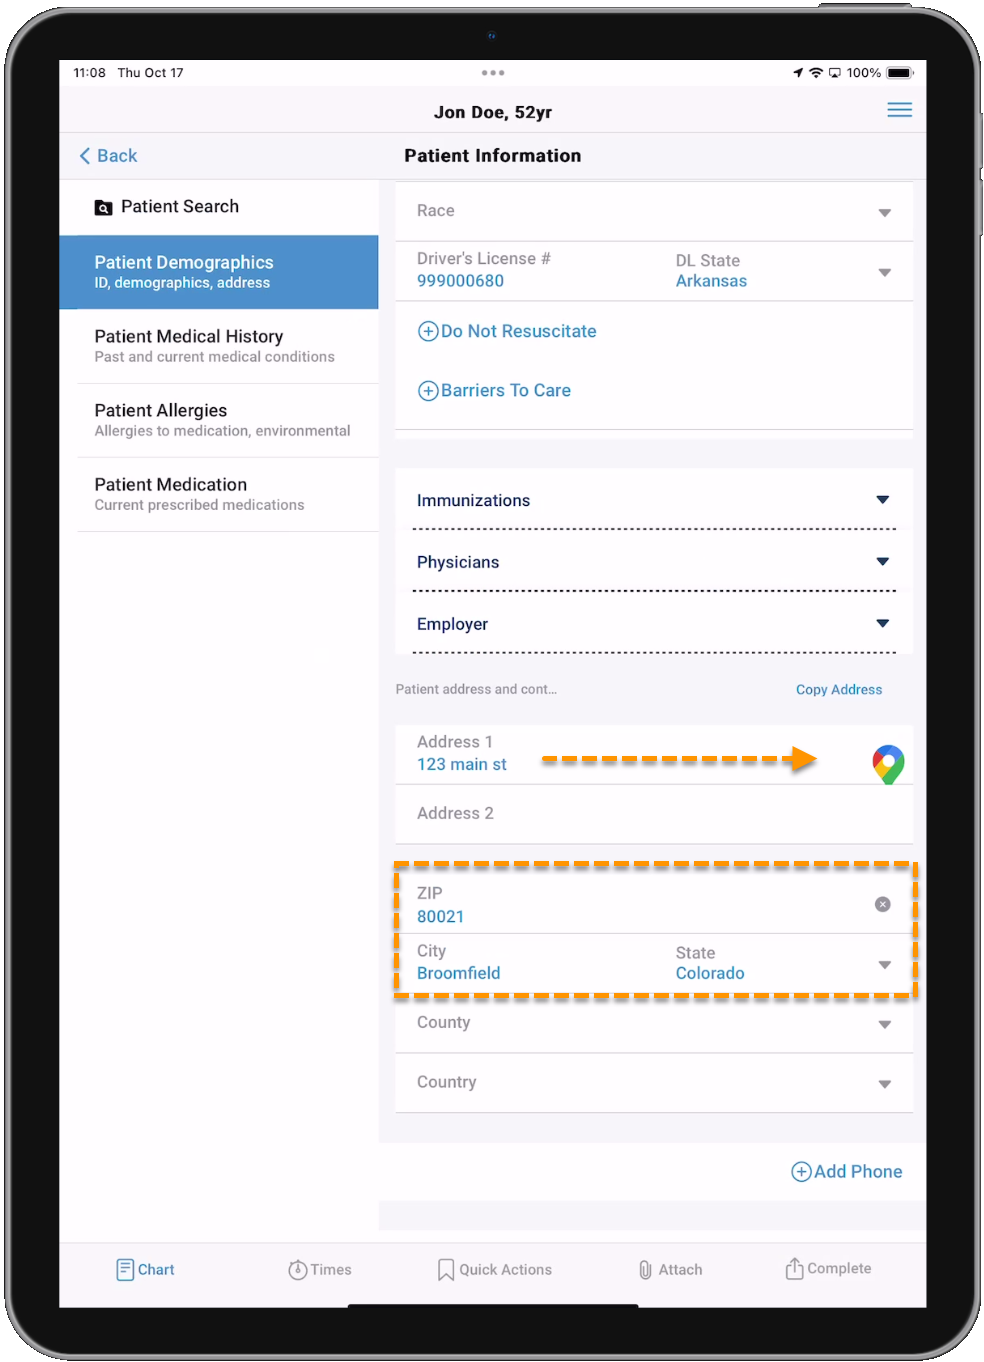
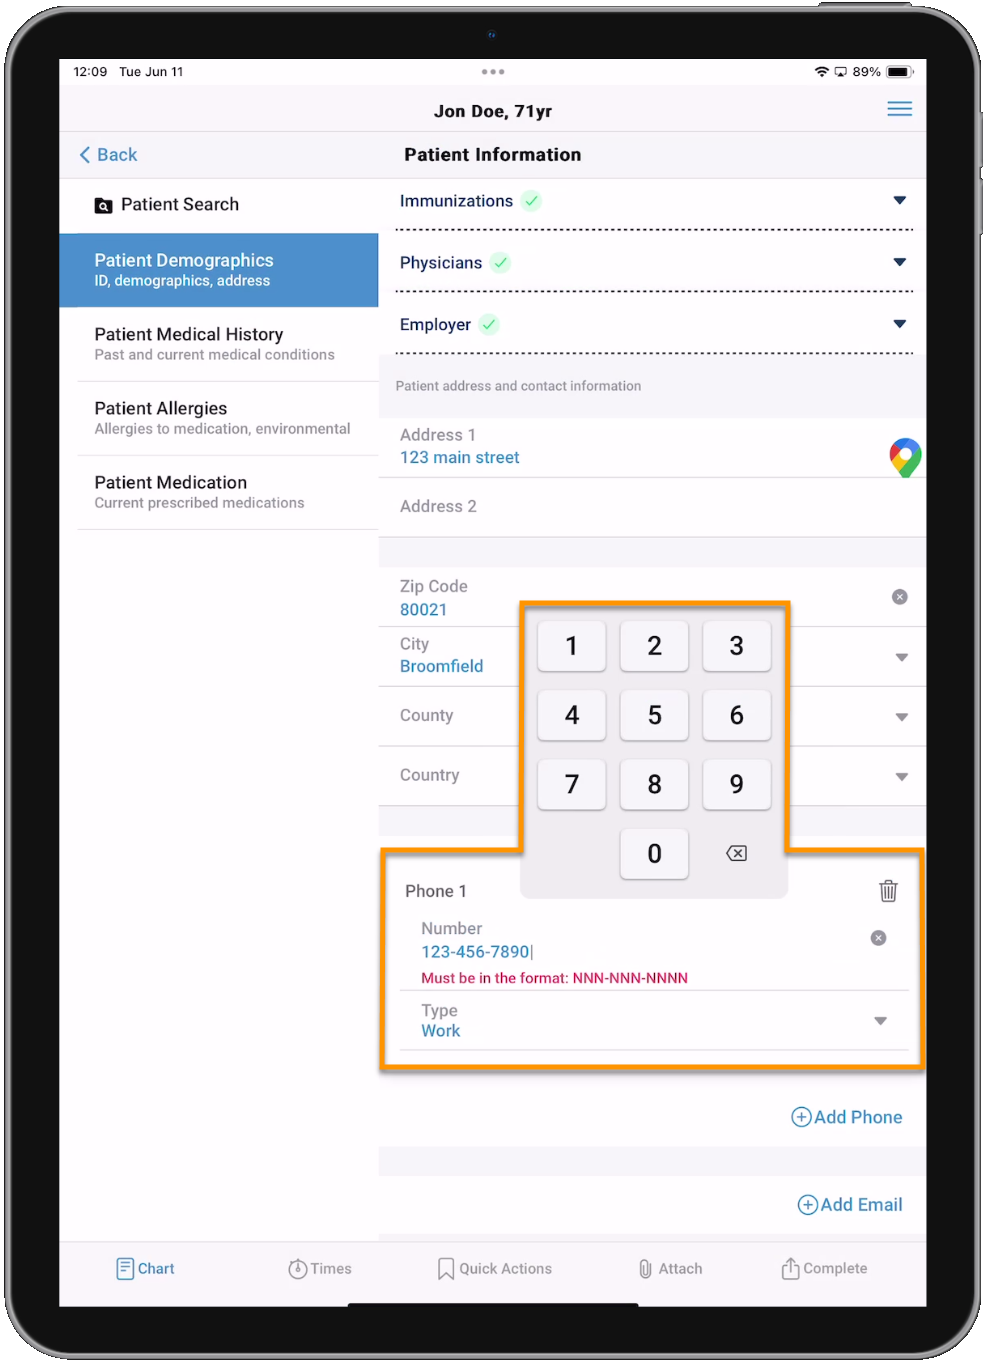
The 'City' and 'State' fields will be auto-filled based on the Zip code entered in the 'Zip' field. Once you have entered a "complete address" (street name, city, and state), the Google Maps icon becomes available. Tapping the Google Maps icon will open the Google Maps app and allow you to search for locations or map yourself to a location. You must have the Google Maps application installed on your device. Tapping Done in the top left corner will bring you back to the ZOLL emsCharts NOW application.
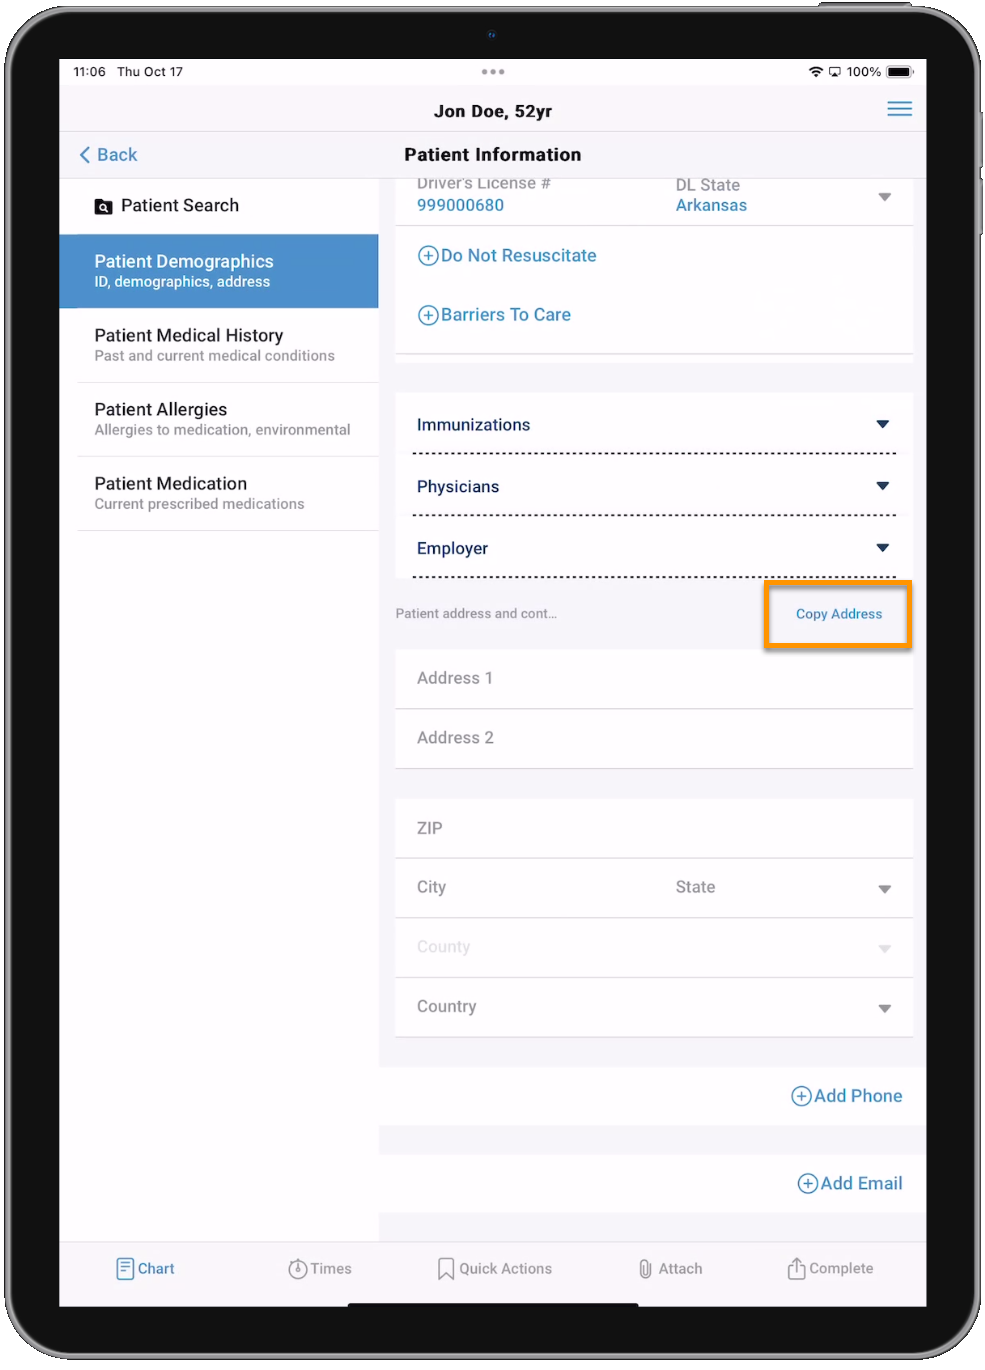
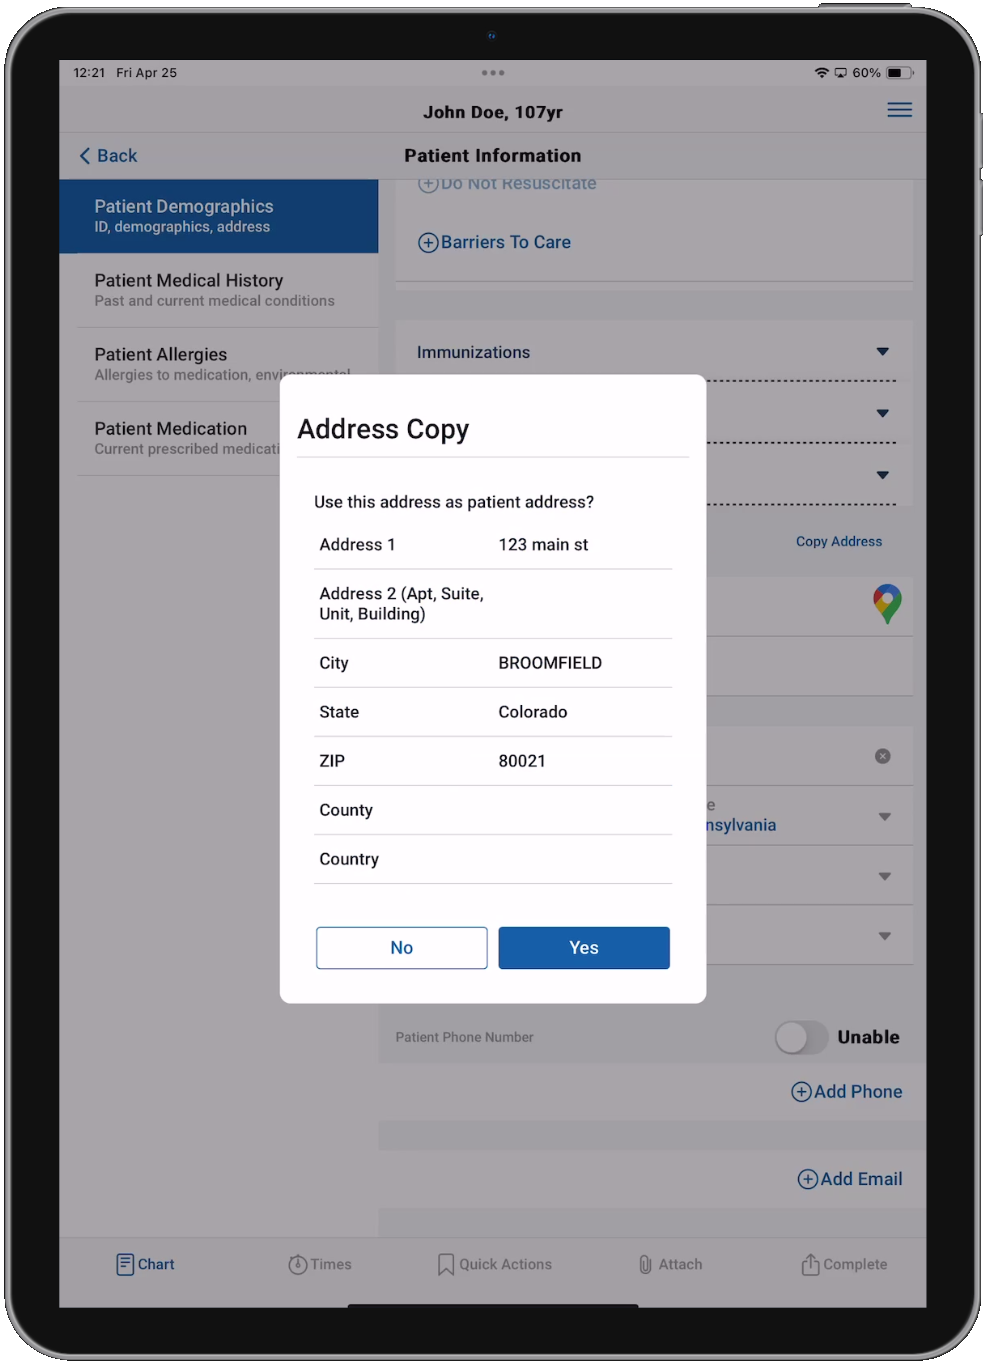
If the address documented on the Pickup Address page is the same as the patient's address, you can use the Copy Address link to import that address into the Patient Demographics page. Tap Copy Address and the Address Import window will appear and display the address to be imported. Tap Yes to proceed with the import or No to cancel. Once the address is imported, you can modify it as needed, and use the Google Maps feature.
Notes:
-
The auto-fill and Google Maps features are not available offline.
-
A State must be selected before you can select a County.
-
The Copy Address link will not display if there is no address documented on the Pickup Address page.
Numeric fields
Numeric fields like 'Phone Number' allow you to enter number values.
Patient Medical History
Here you will document the medical history of the patient. If the patient has no medical history items, you can tap the None toggle. You can also document who the medical history information was obtained from and if there is an emergency information form.

One-tap fields
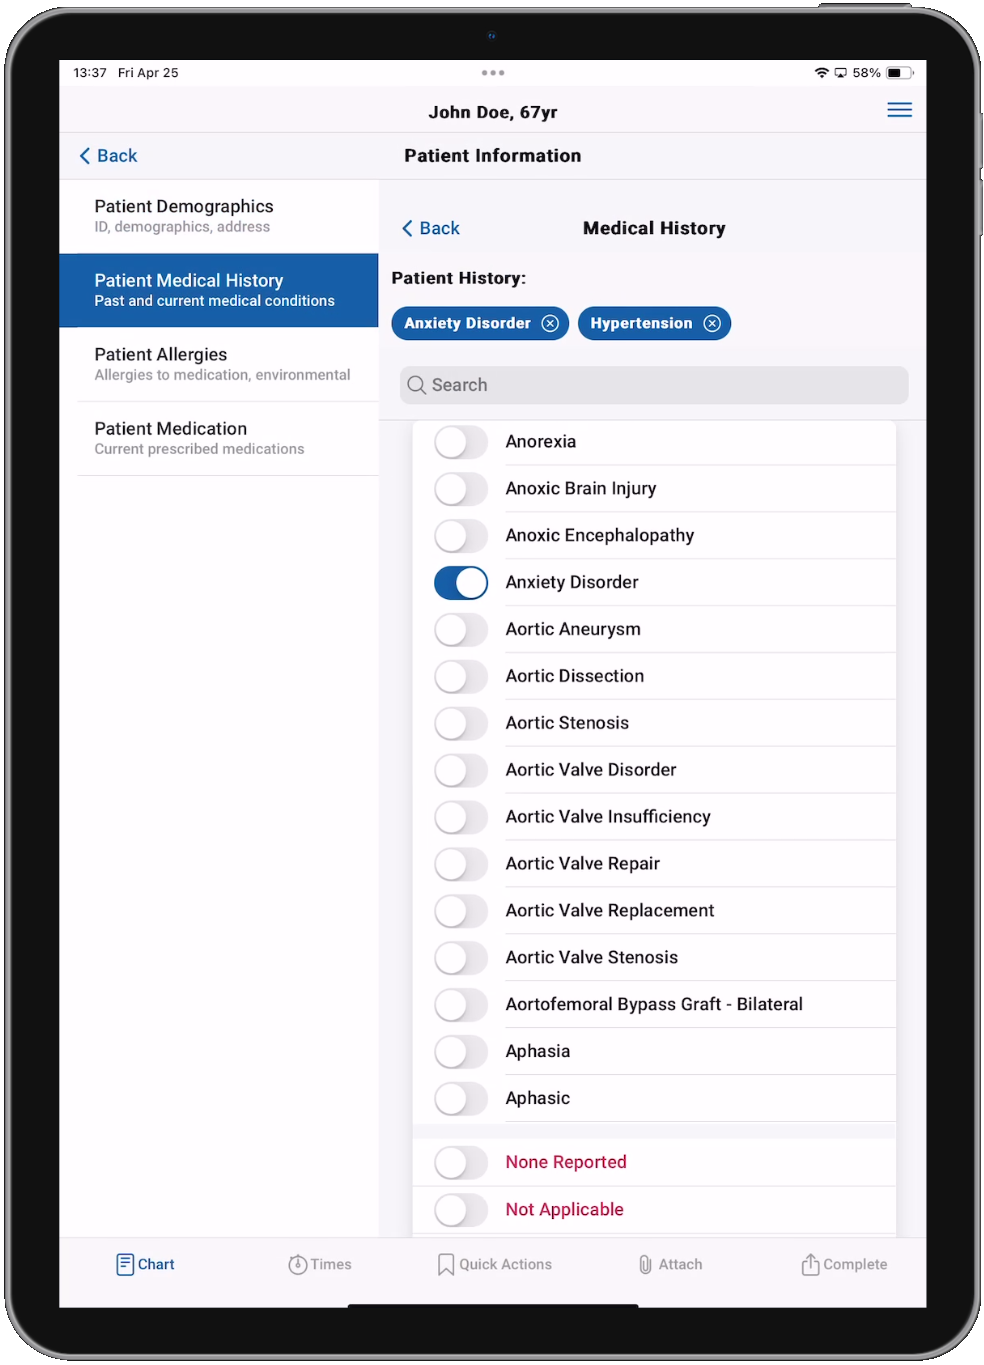
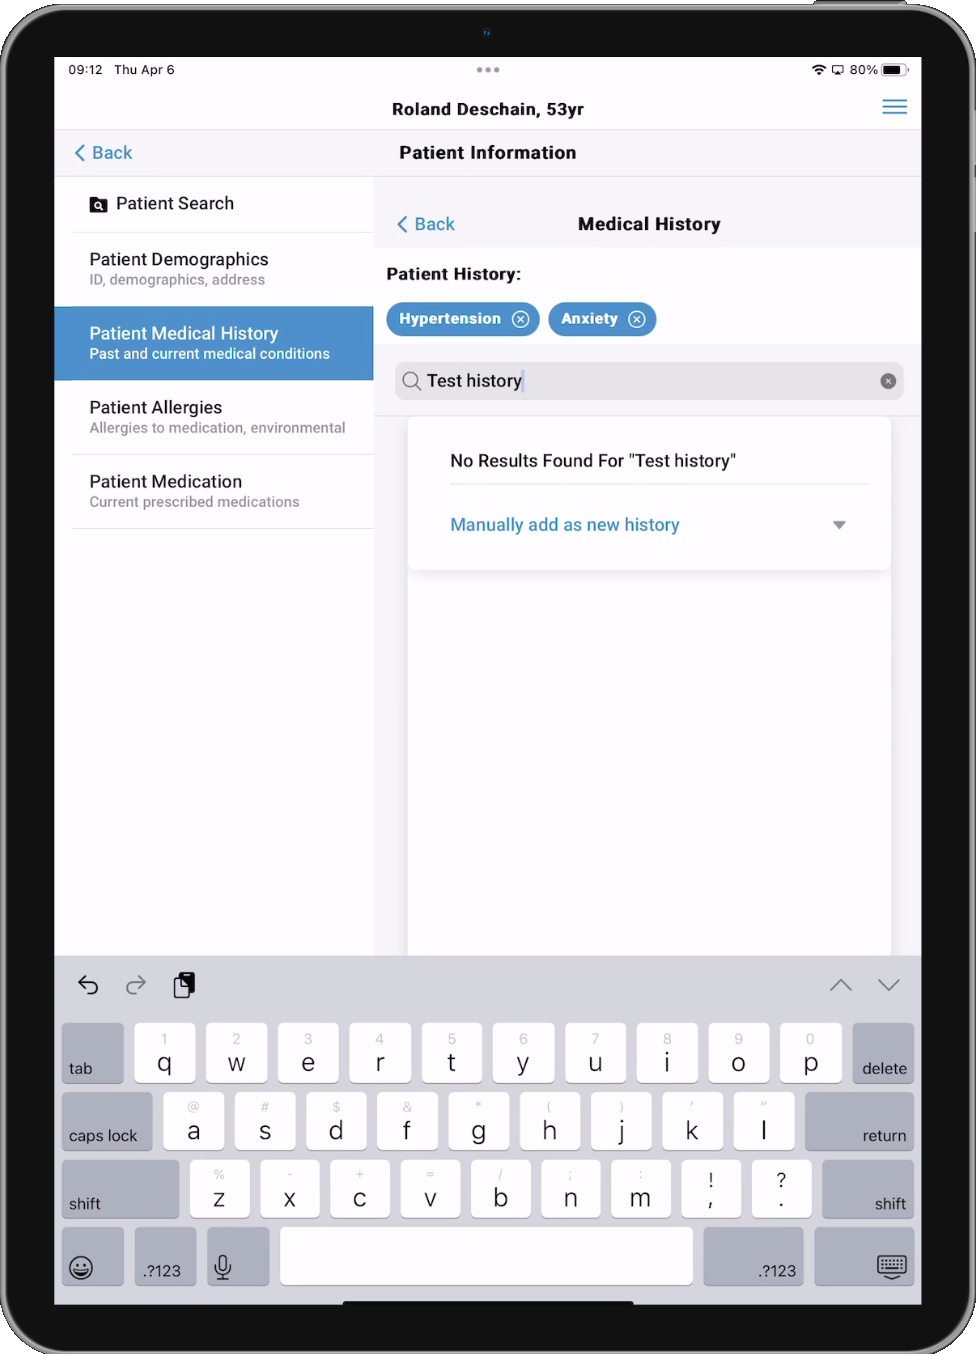
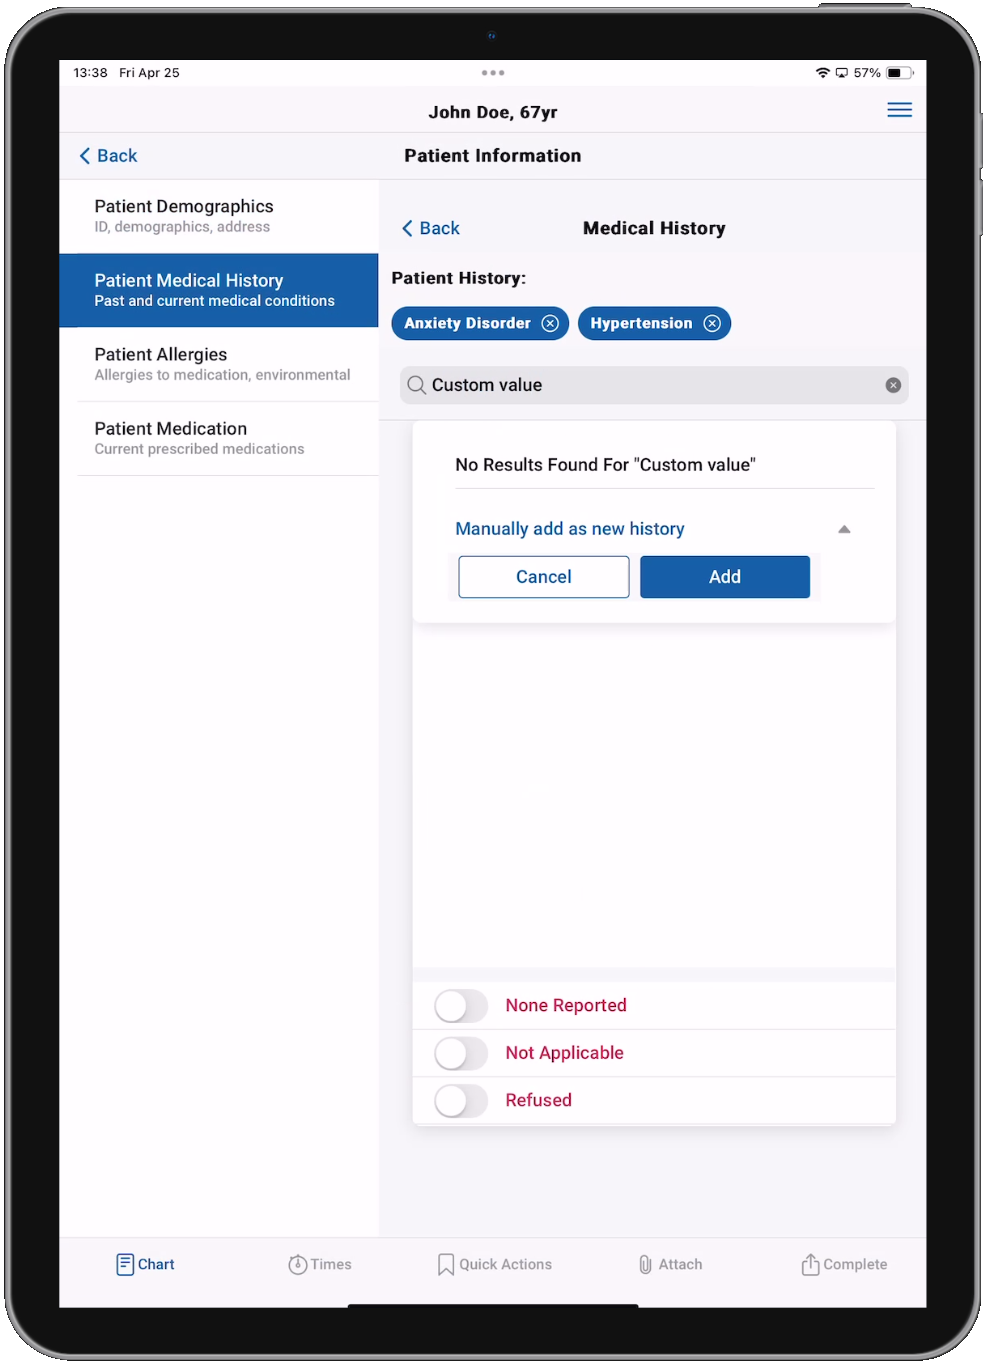
One-tap fields like 'Common Conditions' allow you to quickly document one or more items with a single tap. Simply tap each applicable medical history item to add it to the chart. The most commonly used medical history items are displayed on the first page, but tapping Find More will pull up a full multi-select list of all medical history items. Tapping Find More also allows you to use the free-text search field to quickly find the item you need. If you search for an item that does not exist in the list, you will be presented with an option to "Manually add as new history". Choosing this option will add the custom value to the chart but it will not be permanently added to the Patient History list.
Commonly used medical history items

Full list of medical history items
If you search for an item that doesn't exist in the list, tap Manually add as new history and then tap Add to add the custom value to the chart.
Patient Allergies
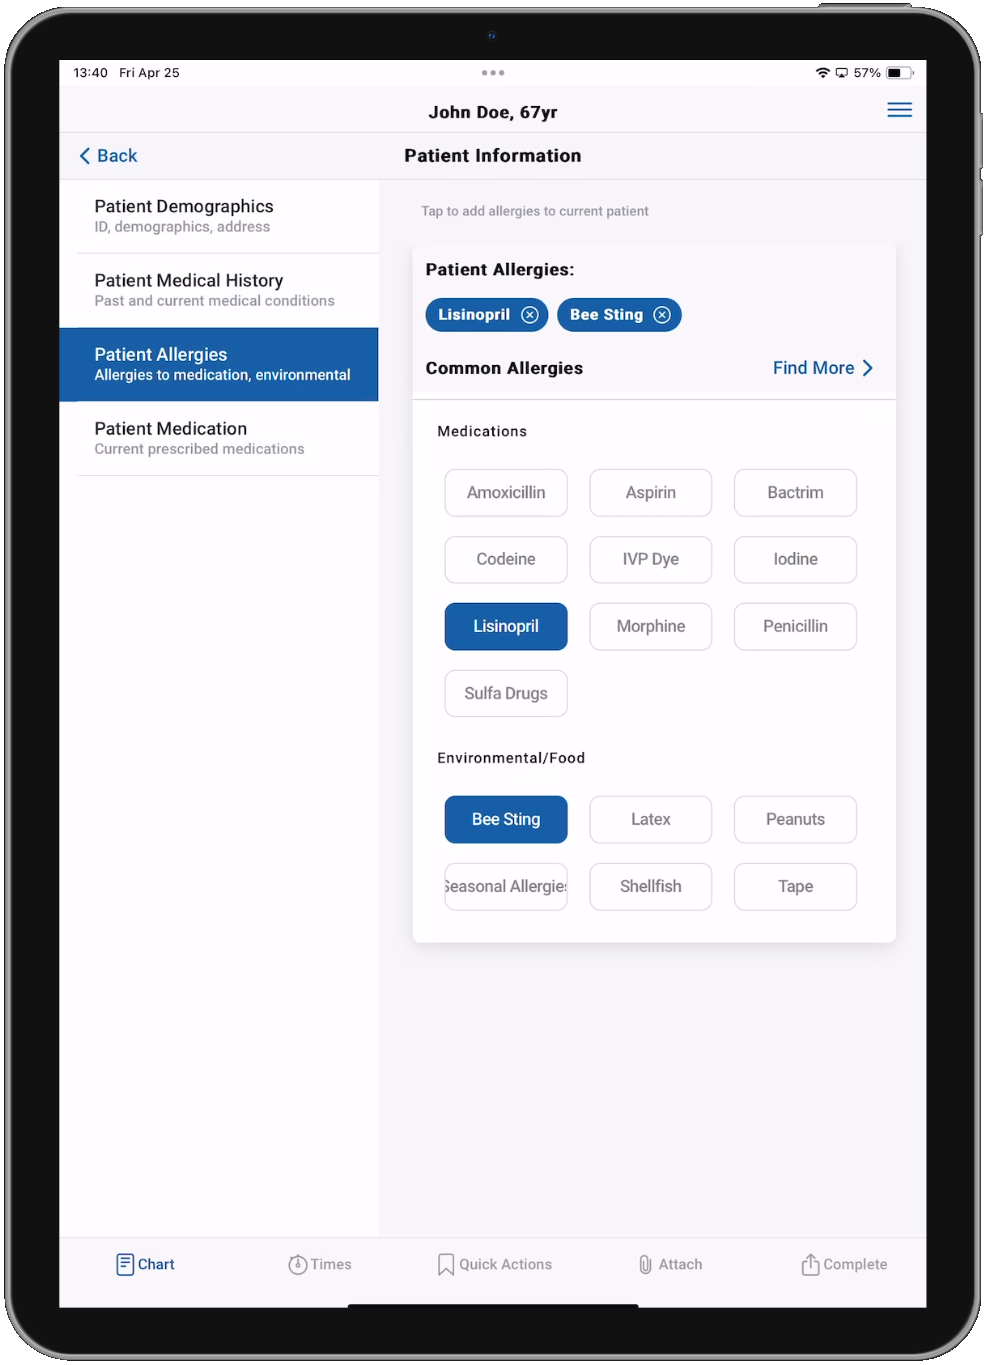
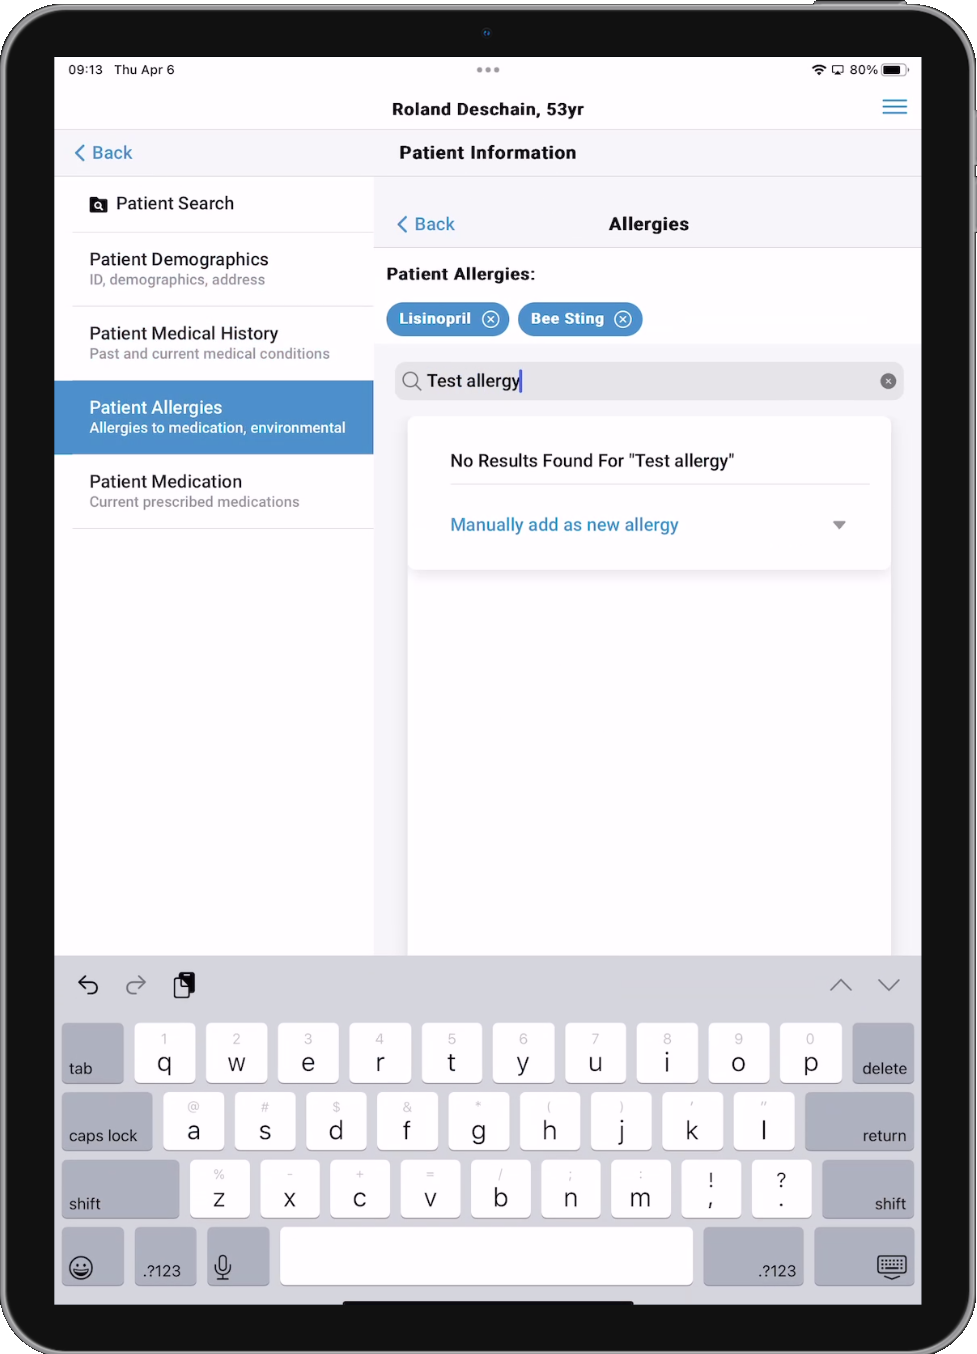
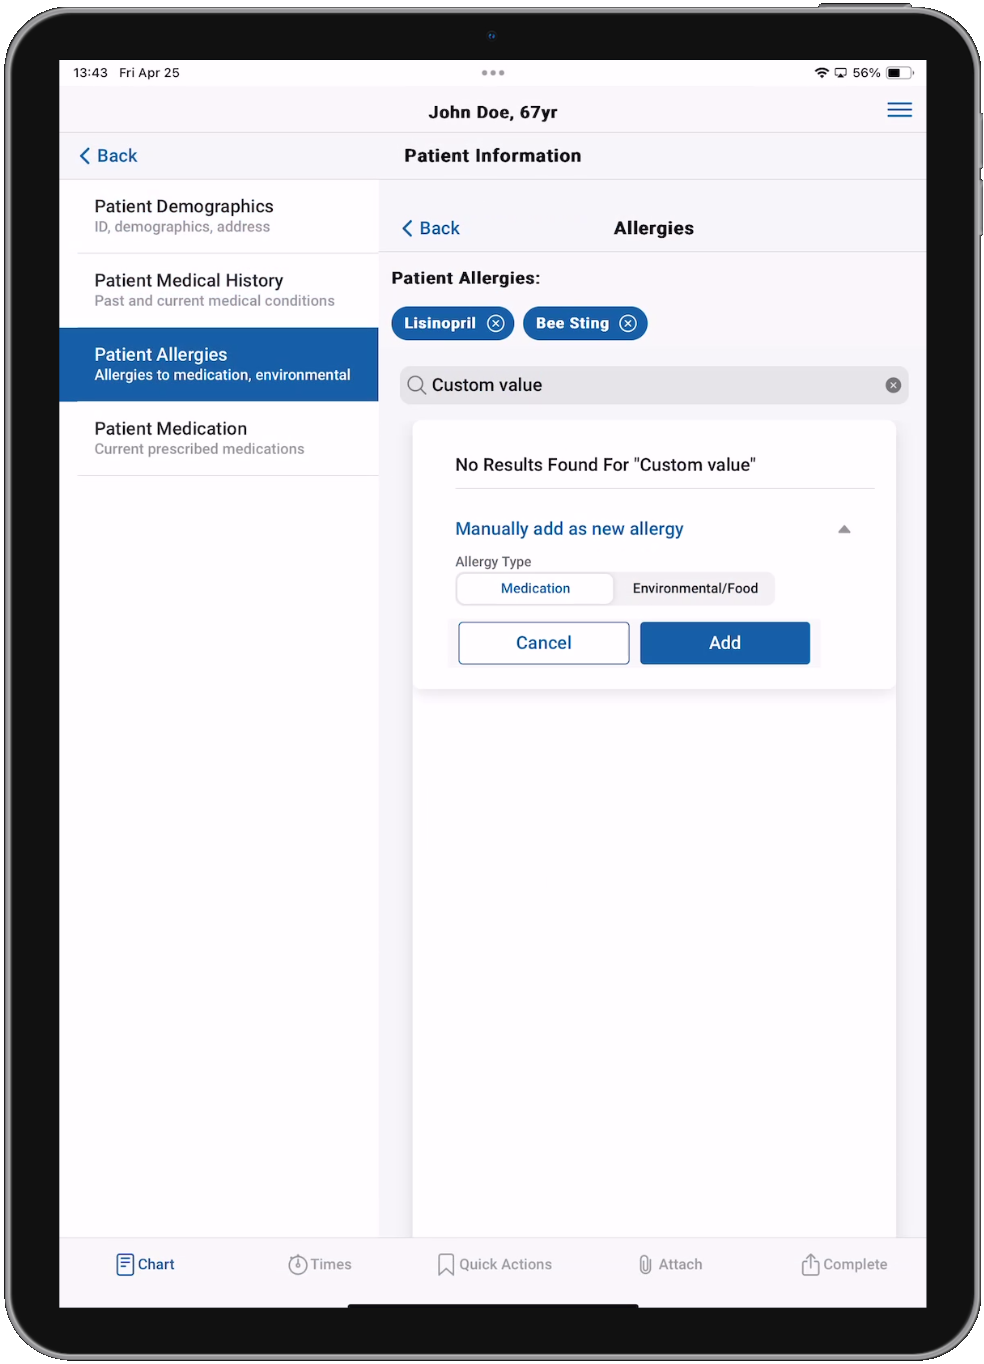
Here you will document any patient allergies. The Patient Allergies tab uses a one-tap field just like the Patient Medical History tab. Simply tap each applicable allergy item to add it to the chart. The most commonly used allergy items are displayed on the first page, but tapping Find More will pull up a full multi-select list of all patient allergy items. Tapping Find More also allows you to use the free-text search field to quickly find the item you need. If you search for an item that does not exist in the list, you will be presented with an option to "Manually add as new allergy". Choosing this option will add the custom value to the chart but it will not be permanently added to the Patient Allergies list.
Commonly used patient allergy items
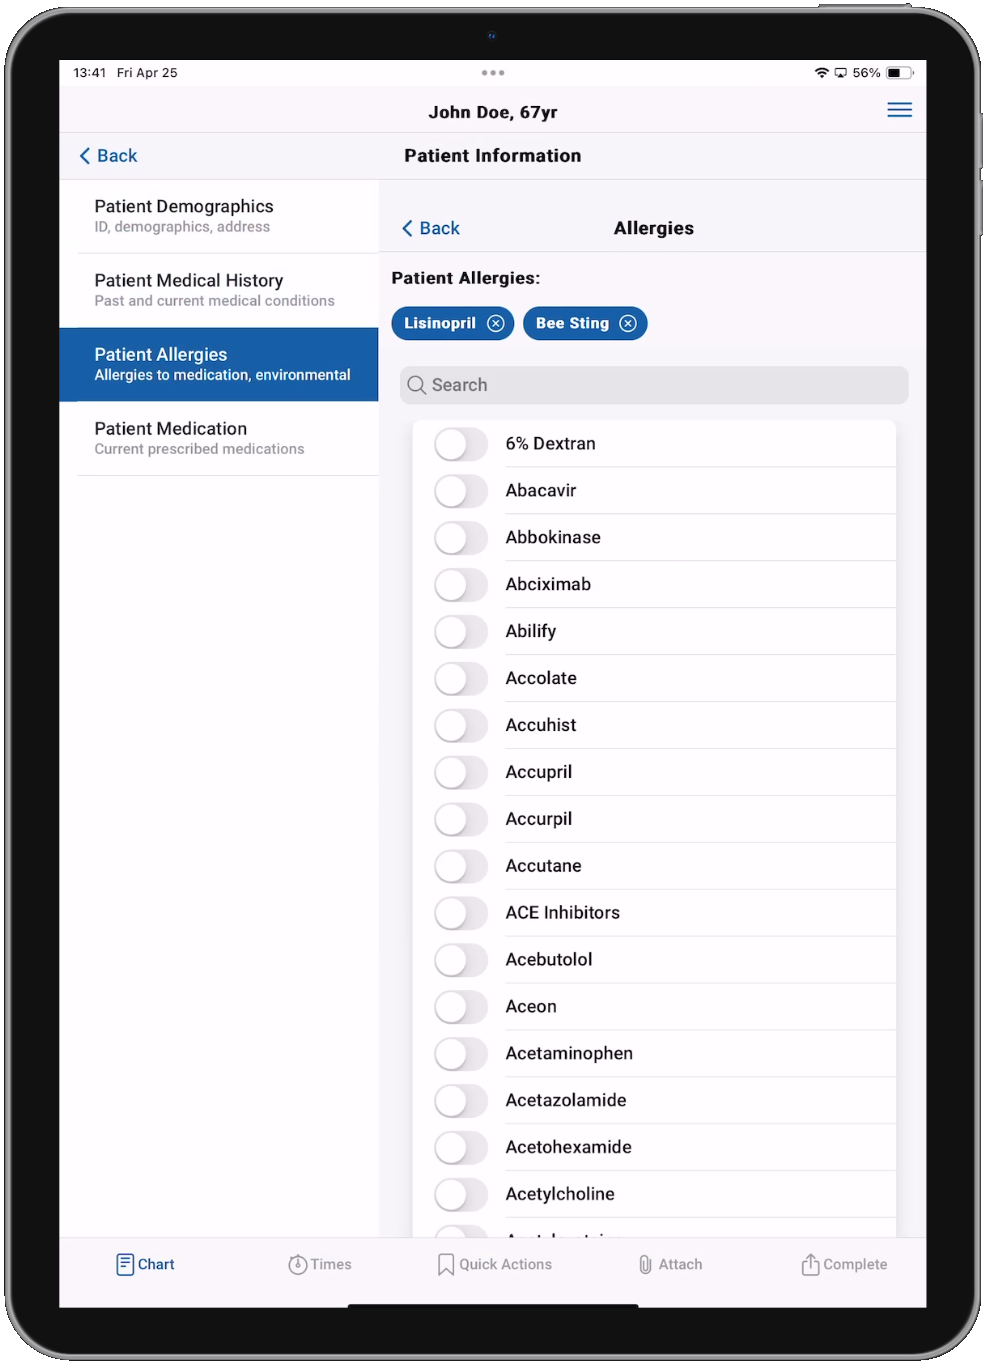
Full list of patient allergy items
If you search for an item that doesn't exist in the list, tap Manually add as new allergy and then tap Add to add the custom value to the chart. Tap the Allergy Type toggle to switch between Medication and Environmental/Food.
Patient Medication
Here you will add any medications the patient is currently taking. This tab is not intended for medications administered during the patient care, only for medications the patient is currently taking. Medications administered during patient care are documented using Quick Actions or Add Actions.
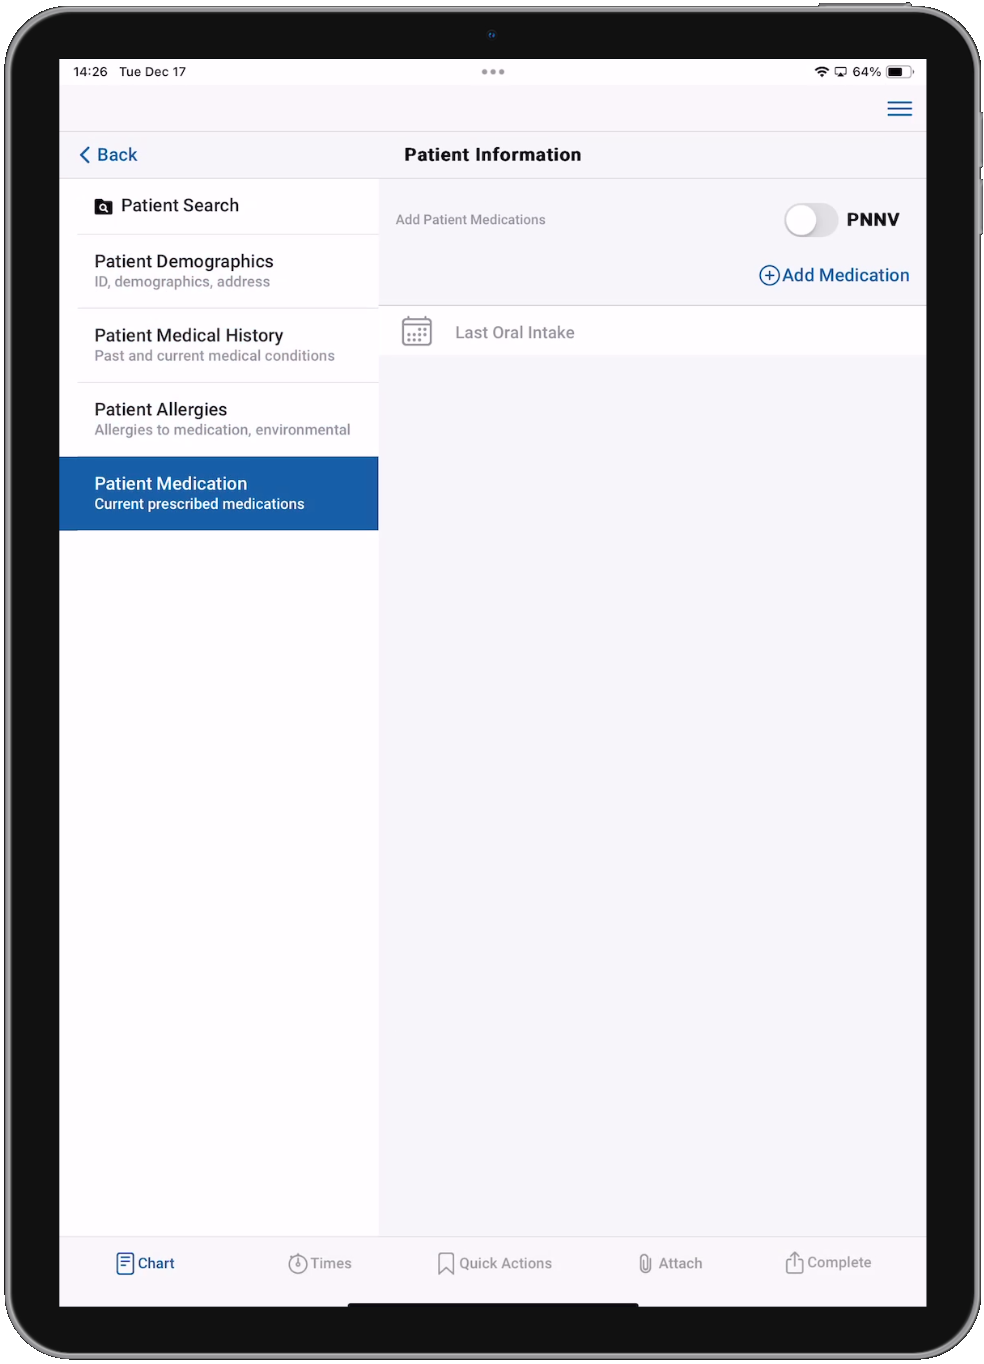
Add function fields
Add function fields like the Patient Medication tab allow you document one or more items that have multiple fields. For example, tapping Add Medication will create a new medication form that has a combination of free-text and multi-select fields. Tap Add Medication again to add another medication to the chart. You can add as many medications as you need.
Note: Use the trashcan icon in the upper right of a medication to remove it. Or you can swipe left on the medication for a larger delete button.

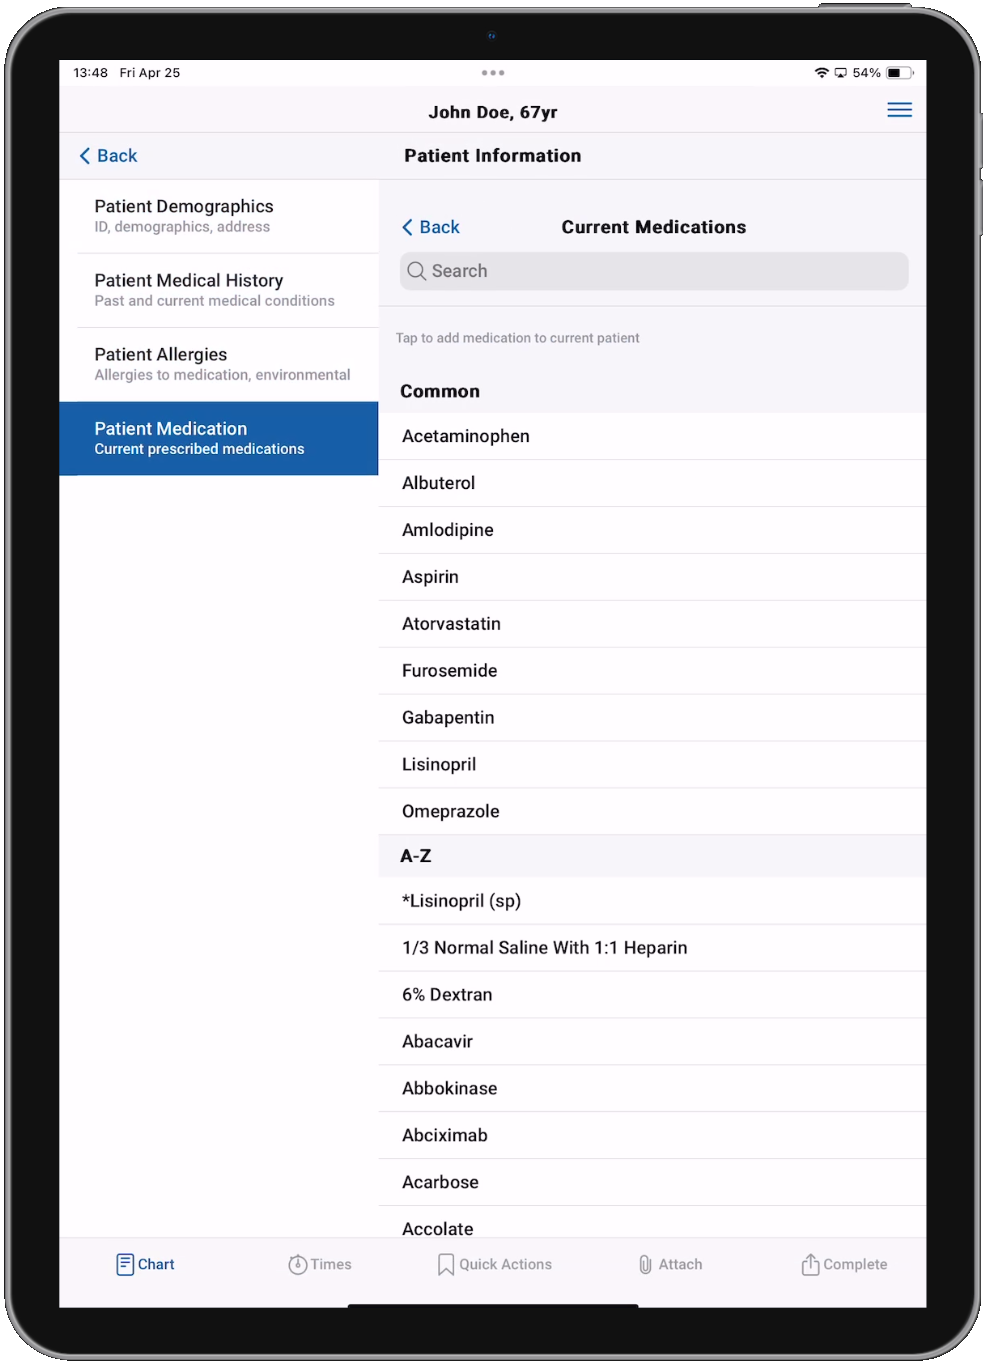
You can tap Lookup to select from a list of medications that can be documented.
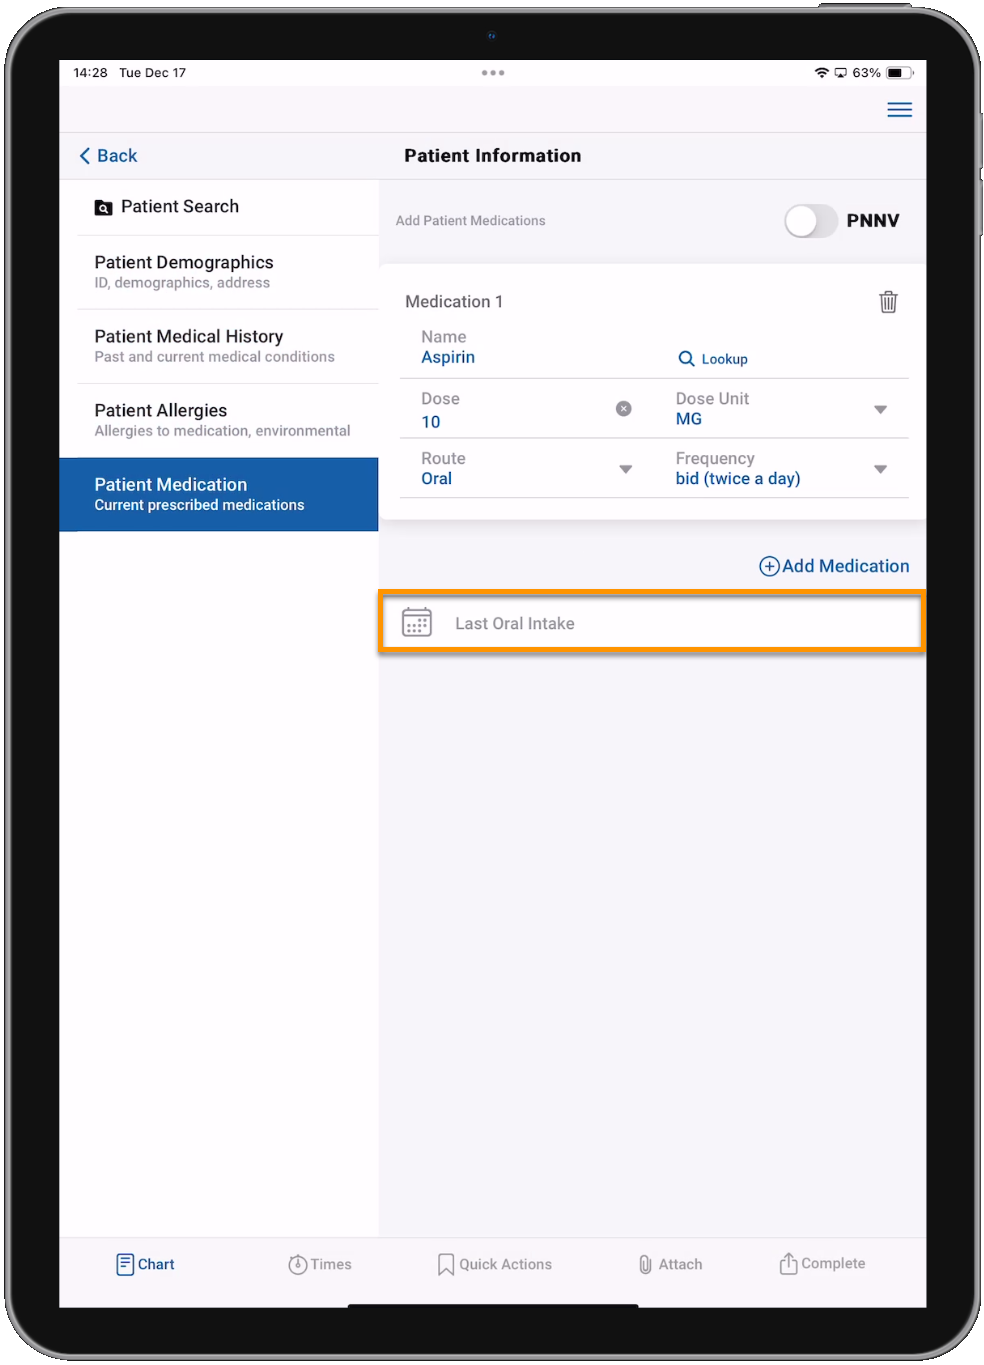
Calendar (date/time)
Calendar fields like 'Last Oral Intake' allow you to choose a date and time from a calendar layout. Tap on the field to display the calendar and set your date and time. Tap Save when you have selected your date and time to save it, Cancel to close out of the calendar without saving a selection, or Clear to delete the selected date and time.
Note: The Patient Medication Last Oral Intake field is intended to document the last time the patient ate or drank food or liquids, not for the last oral intake of medications.


Learn more about Patient Search, continue to the Billing page, or go back to the Patient Care Report landing page.