Import Pulsara Data into PCRs
Once your Administrator has completed the Pulsara Configurations, you can import Pulsara data into your PCRs by following the steps below.
-
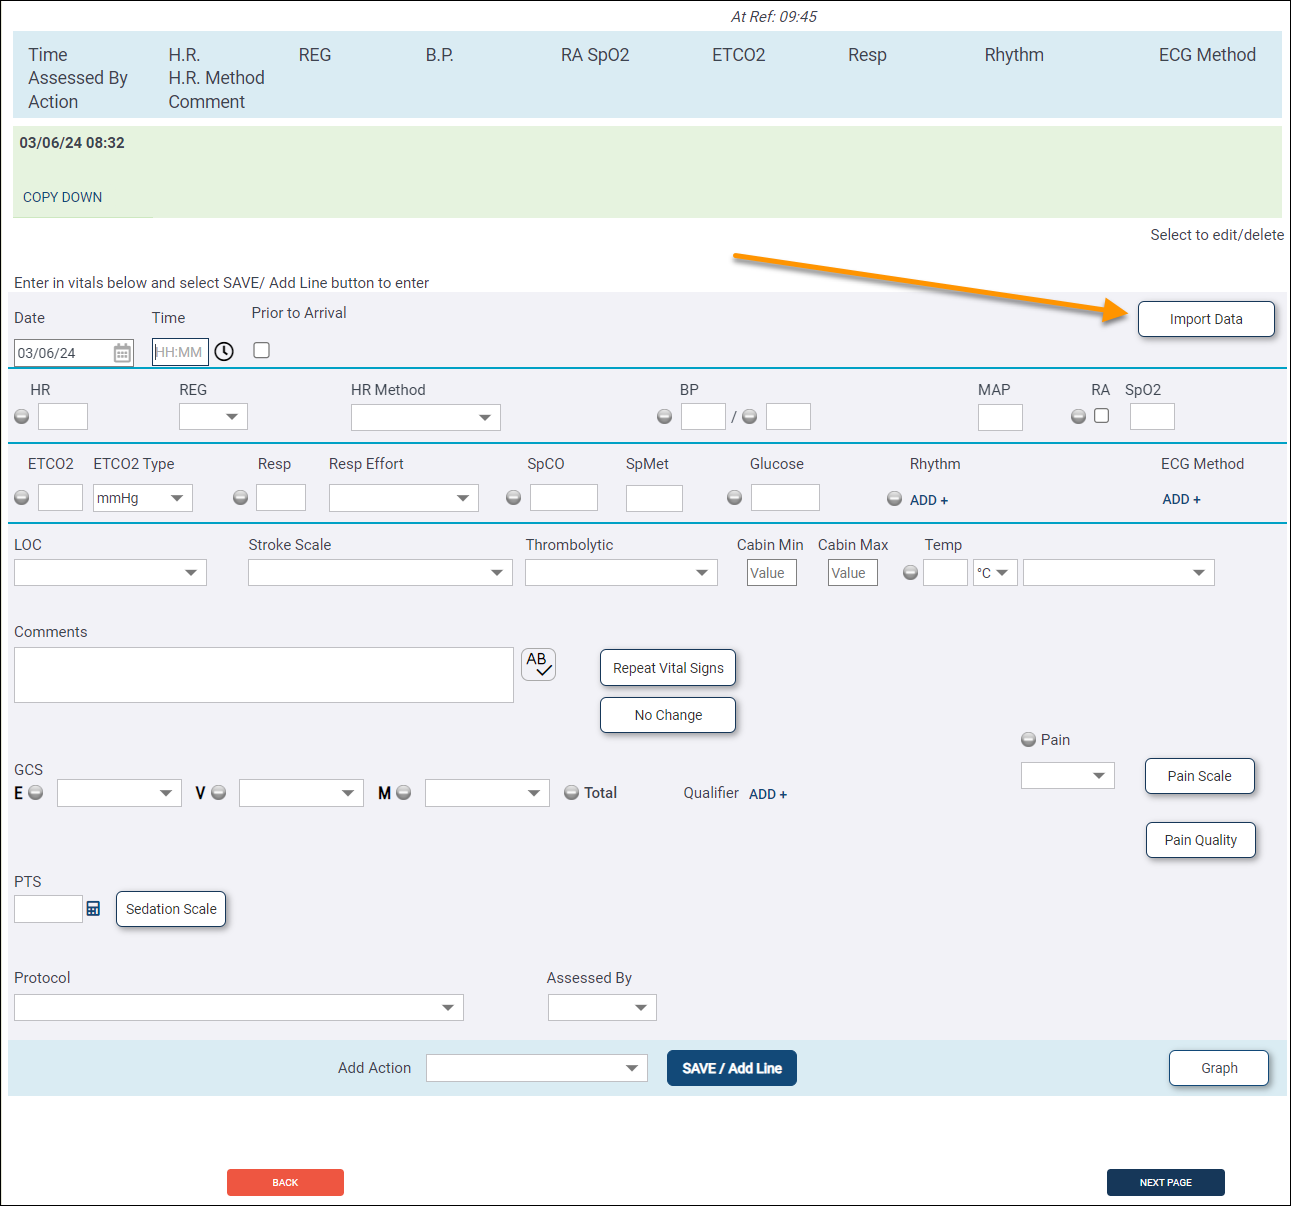
On Page 8 of the chart, click Import Data.
-
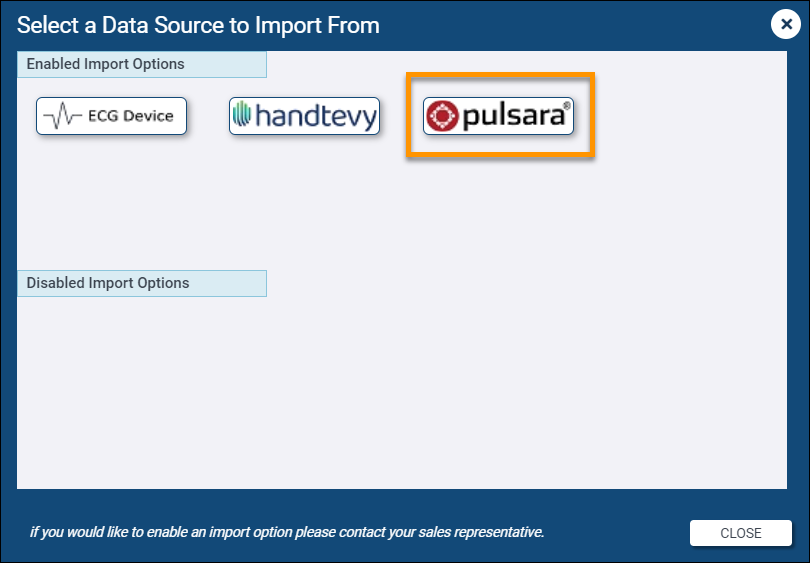
In the "Select a Data Source to Import From" window, click pulsara.
Note: If the Pulsara option is disabled, contact your ZOLL Sales Representative to enable the module. Once the module is enabled, your administrator will need to set up the Pulsara Configurations in emsCharts.
-
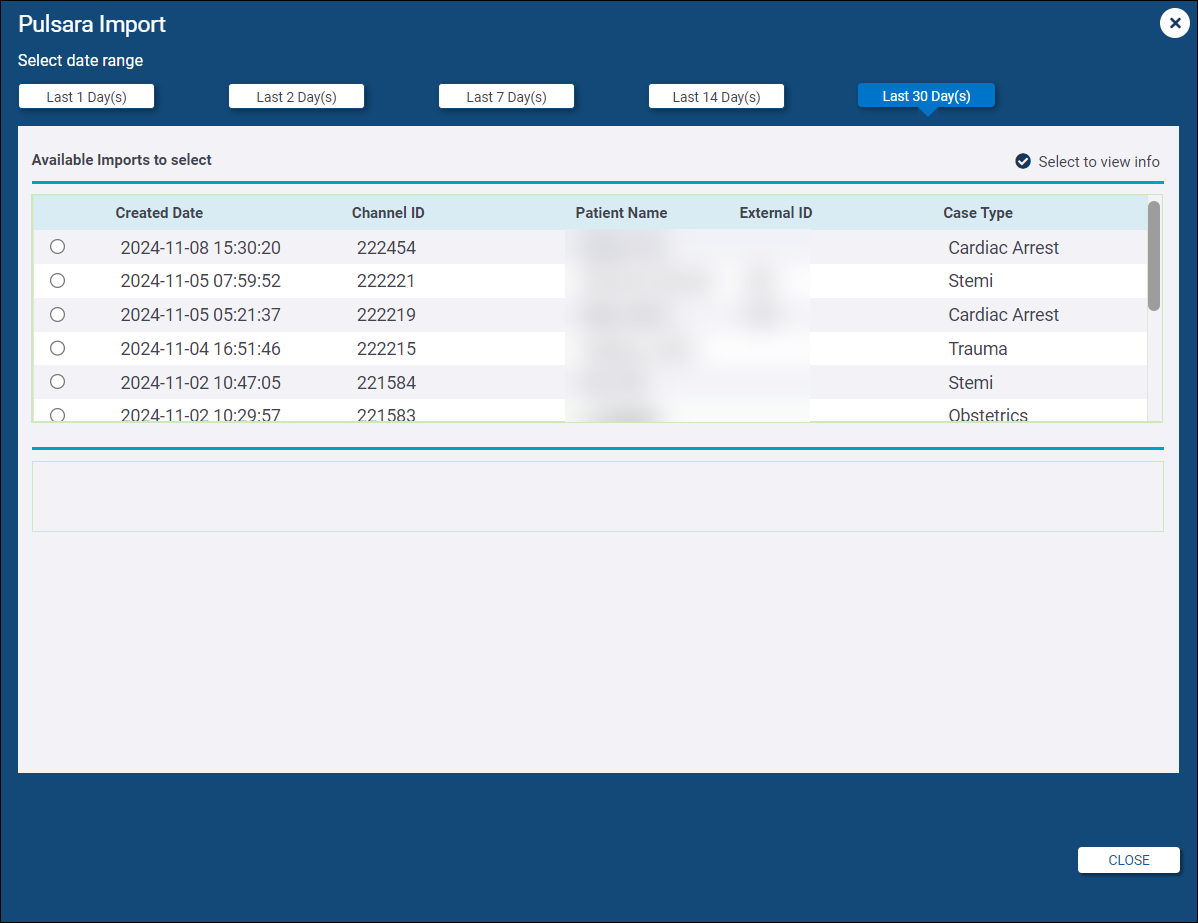
You will be presented with a list of available Pulsara Imports. The default date range is the last day, but you can choose from the other available date ranges, up to the last 30 days. Select the Pulsara case to view the data available for import.
-
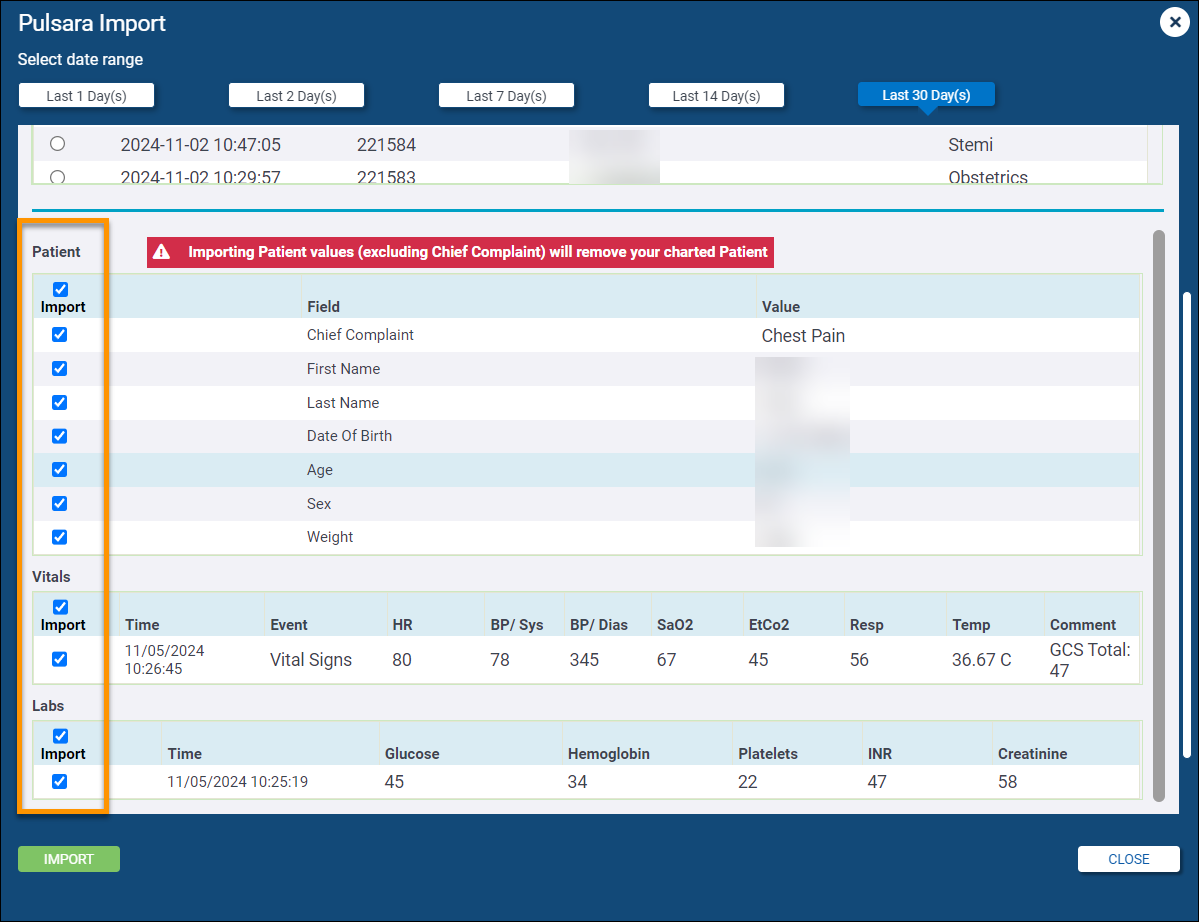
You will be presented with all the data captured by Pulsara that can be imported for the selected item. Choose which datapoints you wish to import, or use the checkbox at the top of each section (Patient, Vitals, Labs) to select all the datapoints for that section. You can un-check specific line items if needed. Click IMPORT when you have made all your selections.
Note: Choosing to import any patient data other than Chief Complaint will remove all patient data already documented on your PCR.
-
Once the import is complete, you can view and edit any of the imported data. The Vitals and Labs will be in the Page 8 Activity Log, and the patient data will be on the Patient page (other than the Chief Complaint which will be on Page 2).