Configuring ZOLL emsCharts Integration with ZOLL Cloud ECG
Powered by AoT™
Important! You must have the following before proceeding:
-
CaseReview or Case Transfer - contact your sales representative to learn more.
Note: Case Transfer is free of charge but must be enabled for your ZOLL Online account. Please email supportdata@zoll.com for access to Case Transfer.
-
ZOLL emsCharts 'EKG Import for Web' module enabled - contact your sales representative to learn more.
-
Software administrator access for both ZOLL emsCharts and CaseReview. If you don't have administrator access, contact your software administrator for assistance.
These instructions are for integrating ZOLL emsCharts with CaseReview. This integration is also referred to as ZOLL Cloud ECG import. For instructions on configuring your system to import non-ZOLL case files from the cloud, refer to Cloud ECG Import for non-ZOLL Devices.
-
Before proceeding with your ZOLL emsCharts ECG configurations, you must first setup your data access key (DAK) to upload to the cloud. Once finished, come back to this page and continue with steps 2-4.
-
Configure three code tables in ZOLL emsCharts.
 Web ECG Server Setup
Use Web ECG Server Setup to enter the Data Access Key information from CaseReview that you recorded in step 1.
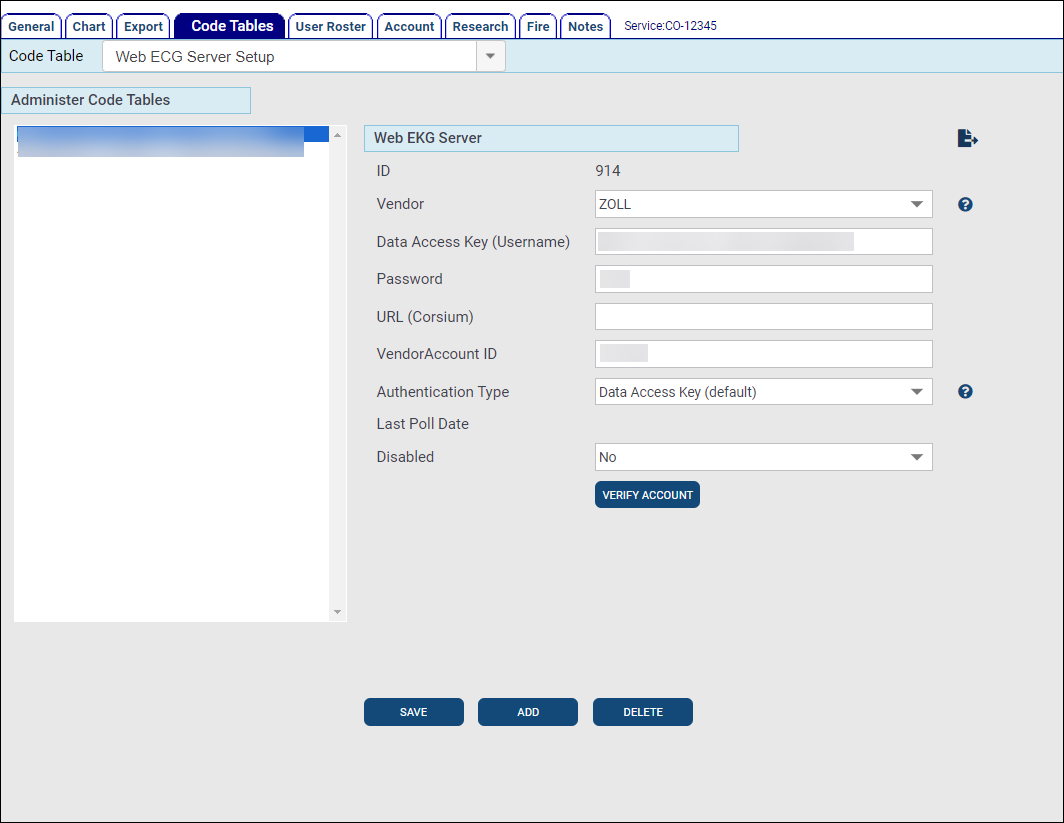
- Vendor: Select ZOLL.
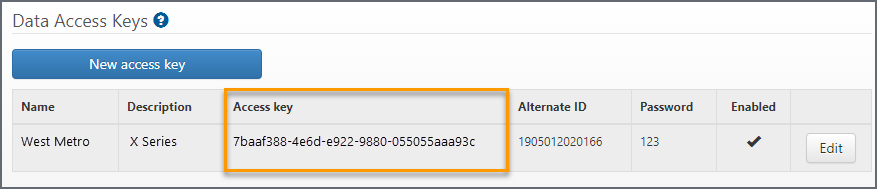
- Data Access Key (Username): Enter the DAK's access key.
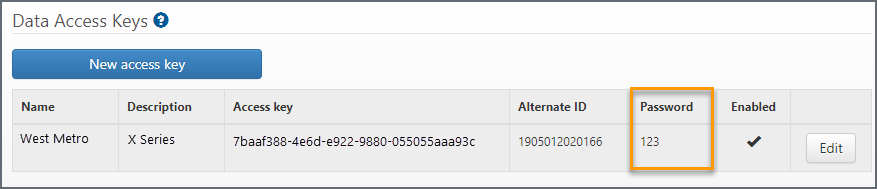
- Password: Enter the password you configured for this DAK in CaseReview.
- URL (Corsium): Leave blank. This is only used for Philips ECG integration. It is not for ZOLL emsCharts CaseReview integration.
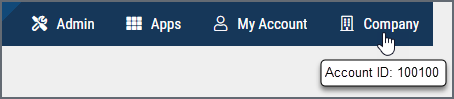
- VendorAccount ID: Enter your ZOLL Online account number. You can find it by logging into ZOLL Online and hovering over the Company icon on the navigation bar.
- Authentication Type: Select 'Data Access Key'.
- Last Poll Date: The account’s last verified poll date.
- Disabled: Select No to enable the configuration, Yes to disable it.
- Click Save.
Web ECG Configuration
Use Web ECG Configuration to set up your default ECG device manufacturer and vitals and events import and print options.
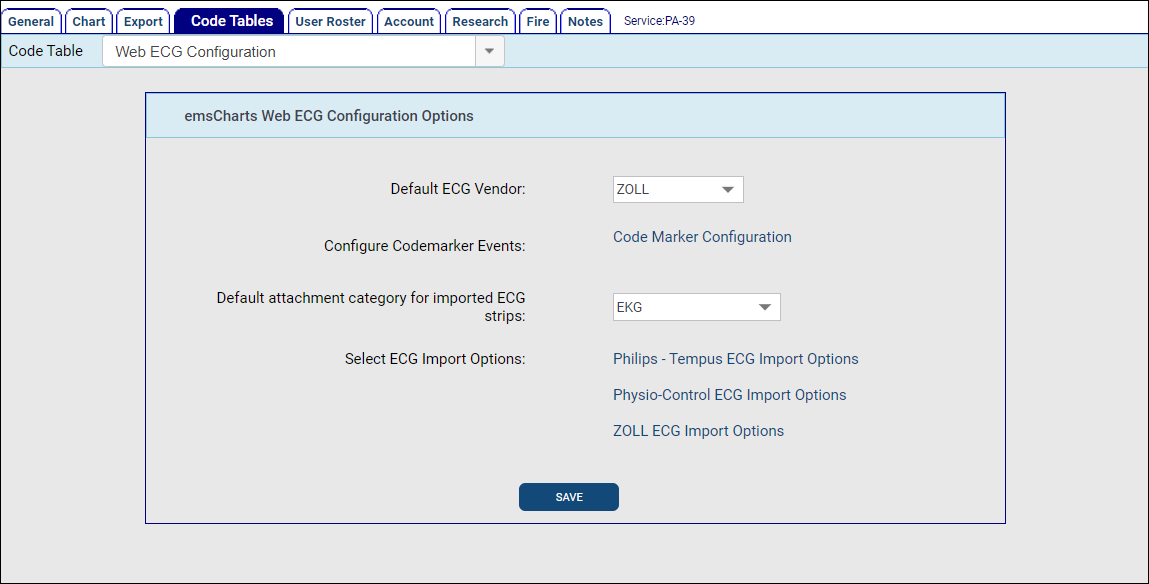
- Default ECG Vendor: Select ZOLL.
- Default ECG Image Attachment Category: Select EKG.
- Click ZOLL ECG Import Options: Choose which vitals and events to import, which events to display on printed reports, and ECG image options. Scroll down to the bottom and click Save after making your selections.
Web ECG Monitor Registration
Use Web ECG Monitor Registration to set up your ZOLL monitors.
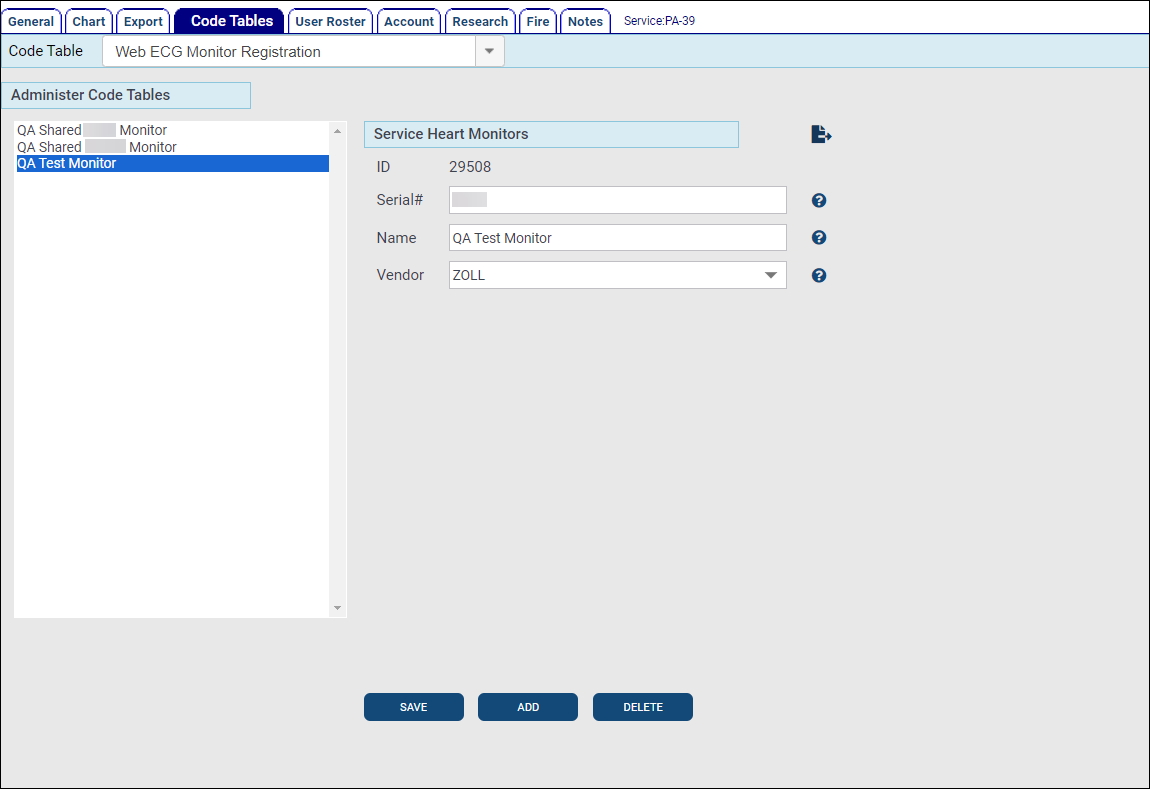
- ID: Enter the device’s ID number.
- Serial#: Enter the device’s serial number.
- Name: Enter an identifying name for this device.
- Vendor: Select ZOLL.
- Click Save.
- Repeat these steps until all ZOLL monitors are configured and appear in the list.
The following video covers steps 2 and 3.
-
Configure your ZOLL emsCharts service Chart tab to turn on the ability for your users to import cases on Page 8 of their charts.
Note: This option is not required to import ZOLL case files into emsCharts, but it does provide a link in emsCharts to view imported case files directly in CaseReview.
-
Under your service, click Configuration, then the Chart tab.
-
Scroll down to find the 'Page 8' section and set ZOLL Online CaseReview to Yes.

-
Click Save.
-
If you want to use ZOLL Cloud ECG import into ZOLL emsCharts for Windows, you will need to complete steps 5-6 below in addition to steps 1-4 above.
Important! You must have the following before proceeding:
-
ZOLL emsCharts for Windows 'EKG Import for Mobile' module enabled - contact your sales representative to learn more.
-
ZOLL emsCharts software administrator access with the 'ZOLL emsCharts Mobile Administration' Security Role permission. If you don't have administrator access, contact your software administrator for assistance.
The following video covers steps 5 and 6.
-
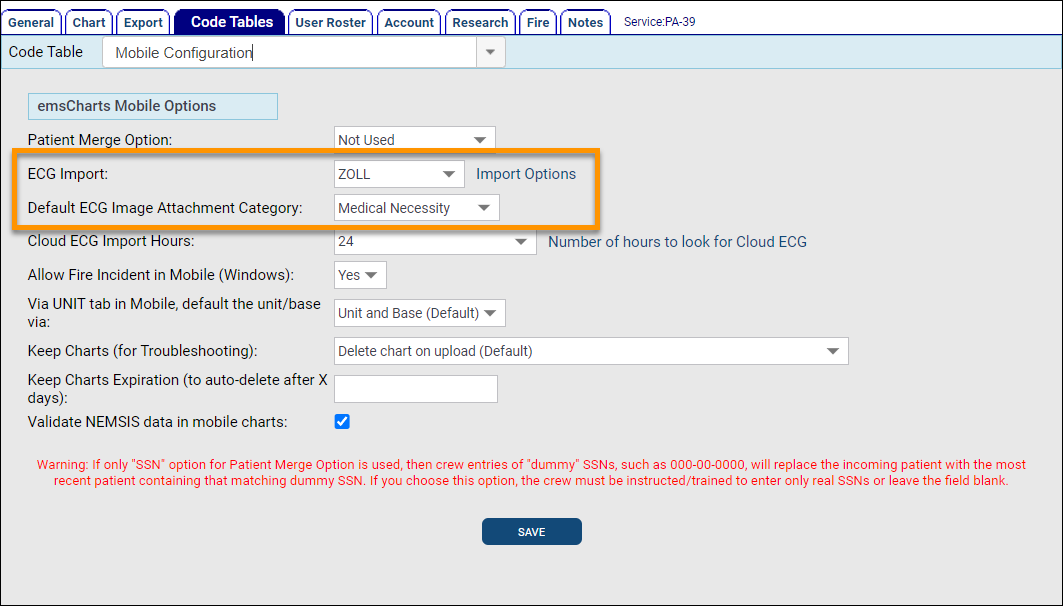
Use the Mobile Configuration Code Table to setup your ZOLL emsCharts for Windows ECG Import options.
-
ECG Import: Select ZOLL.
-
Click Import Options: Choose which vitals and events to import, which events to display on printed reports, and ECG image options. Scroll down to the bottom and click Save after making your selections.
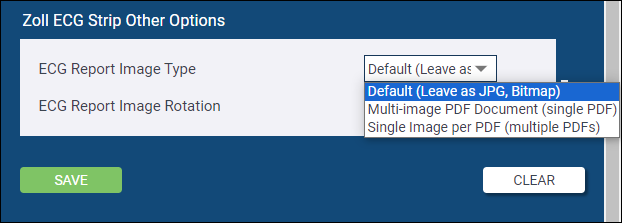
Important!The ZOLL Cloud ECG Import for emsCharts for Windows currently only functions correctly when ECG Report Image Type is set to 'Default (Leave as JPG, Bitmap)'. Any ECG's imported with ECG Report Image Type set to either 'Single Image per PDF (multiple PDFs)' or 'Multi-image PDF Document (single PDF)' will show "Unexpected error".
-
-
Default ECG Image Attachment Category: Select the attachment type for your ECG image attachments.
-
-
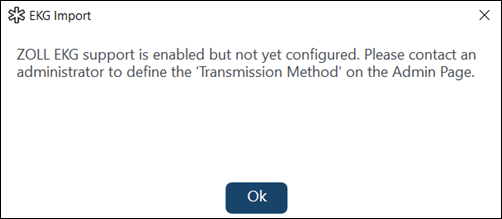
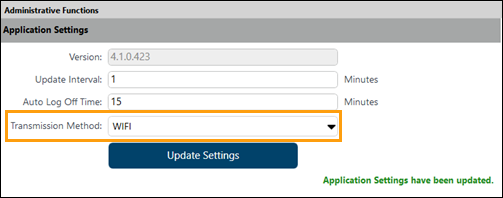
After the initial install or upgrade to ZOLL emsCharts for Windows version 4.1.0+ on your mobile Windows devices, a Service Administrator must log in and set up a Transmission Method under the Application Settings on the Admin tab.
Note: It does not matter which Transmission Method is selected. A warning message will show every time ZOLL emsCharts for Windows is launched until one is configured. Click Update Settings after selecting the Transmission Method.
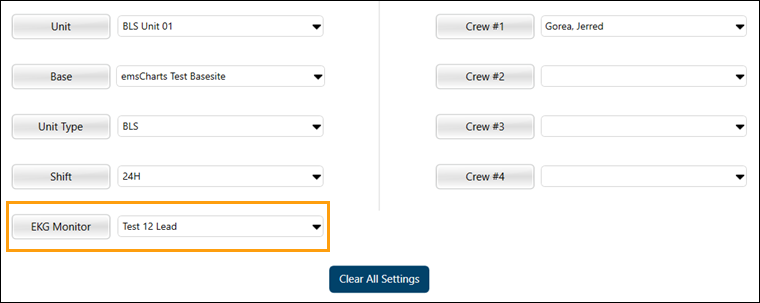
The administrator can then log out and crew members can log in and select the ZOLL medical device they are using.
Next, learn how to: