Publish Custom Reports to SFTP Folders
Your agency may need to publish Custom Reports to an external Secure File Transfer Protocol (SFTP) folder to make them accessible to parties outside of ZOLL emsCharts. The instructions below will walk you through setting up a Custom Report to be published to an SFTP folder.
Important! Data shared outside of emsCharts is no longer protected by ZOLL's security. Make sure you have an established relationship with any entity receiving your data and that they have all of the proper mechanisms in place to support your security requirements.
Create the Custom Report
First create the report that you wish to share.
-
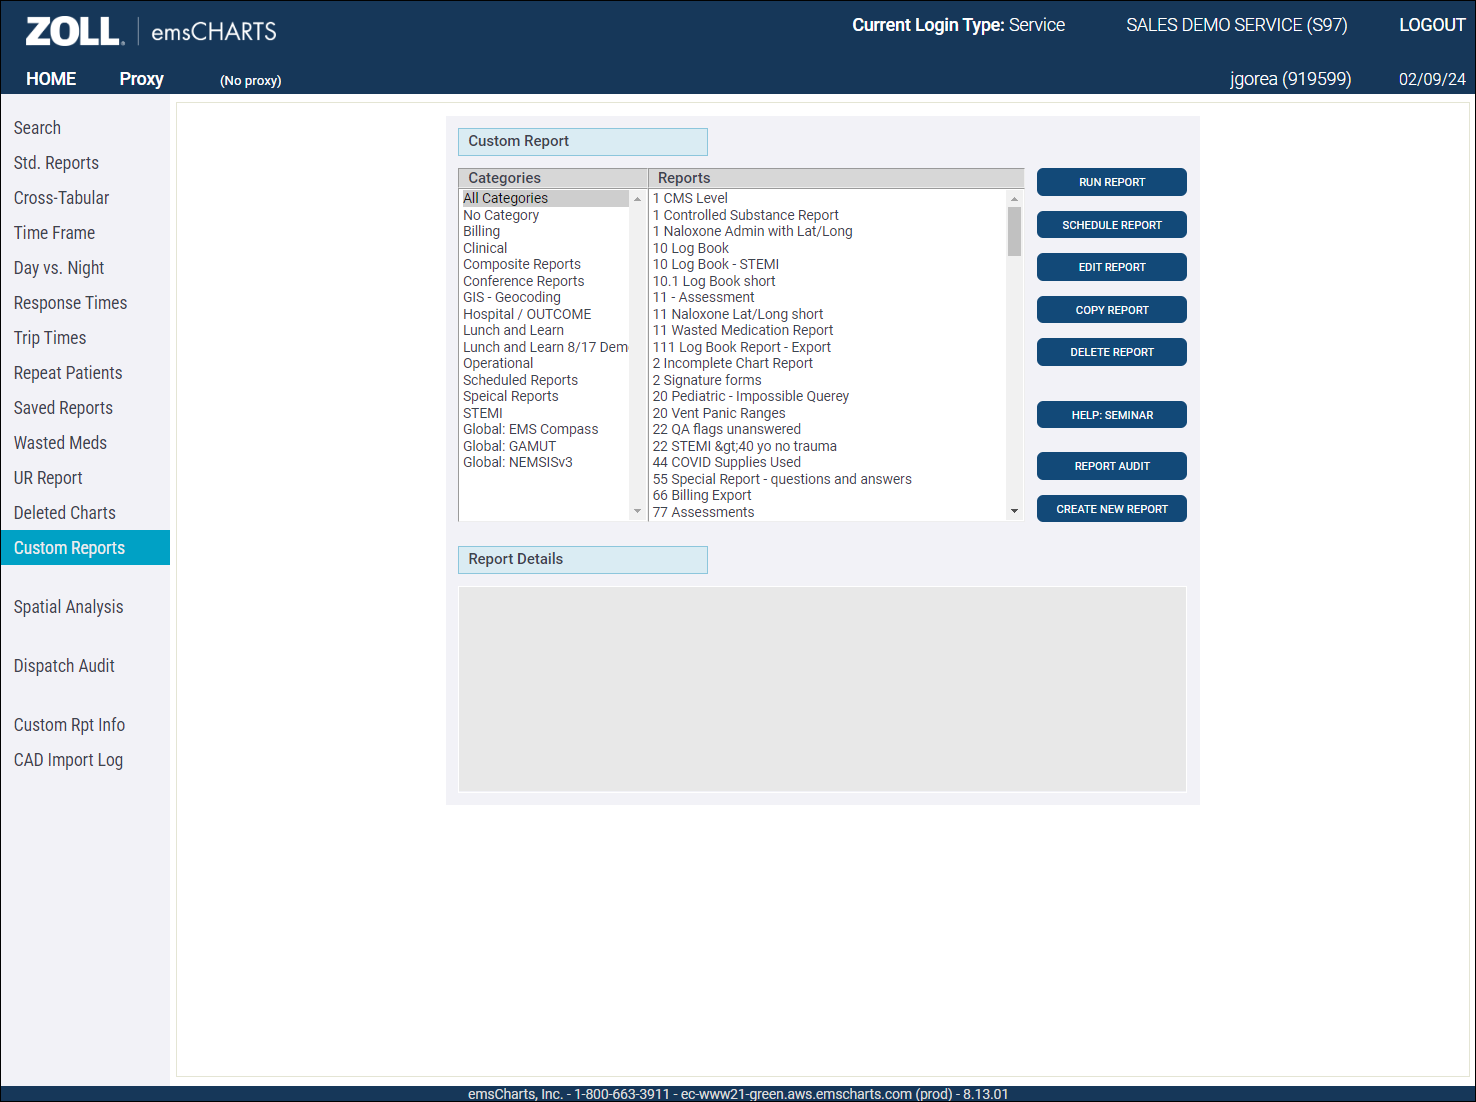
From the emsCharts homepage, go to Reports > Custom Reports.
-
Click CREATE NEW REPORT.
-
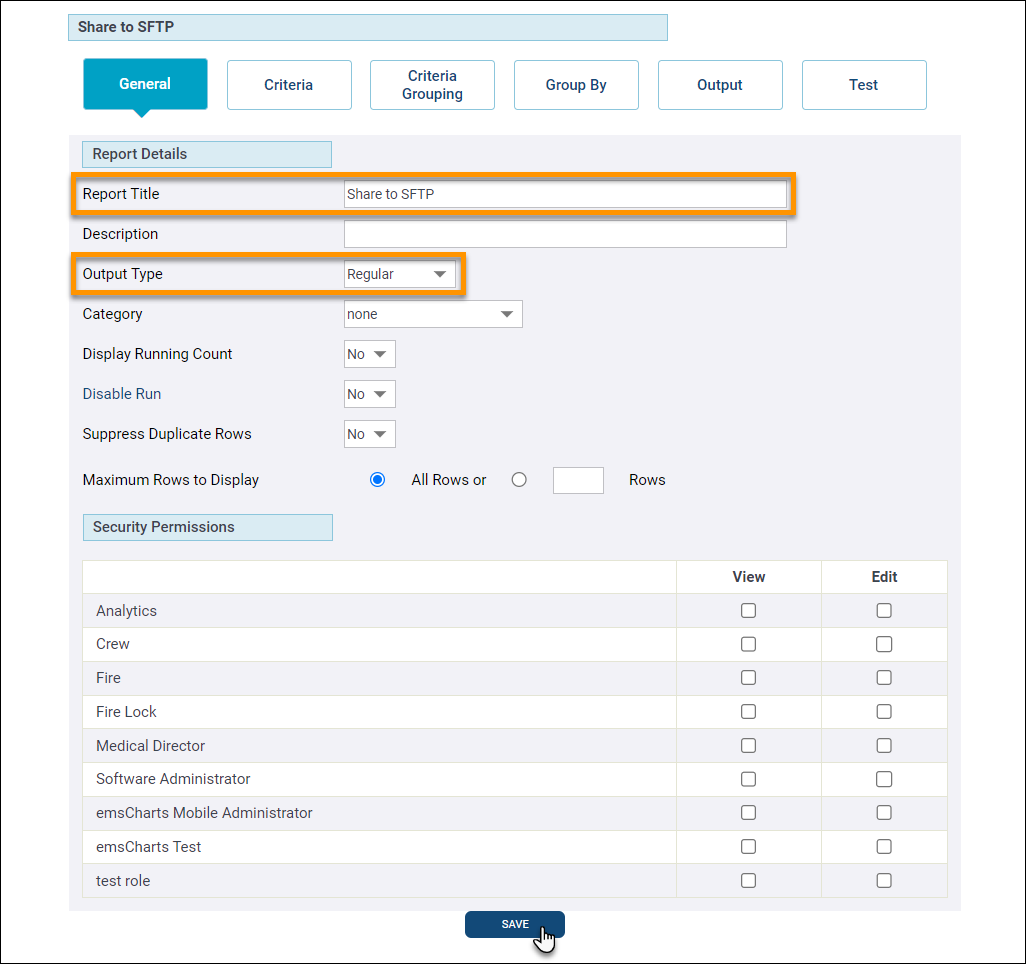
Enter the name of the report in the Report Title field.
-
Set the 'Output Type' to Regular.
-
Click SAVE.
-
-
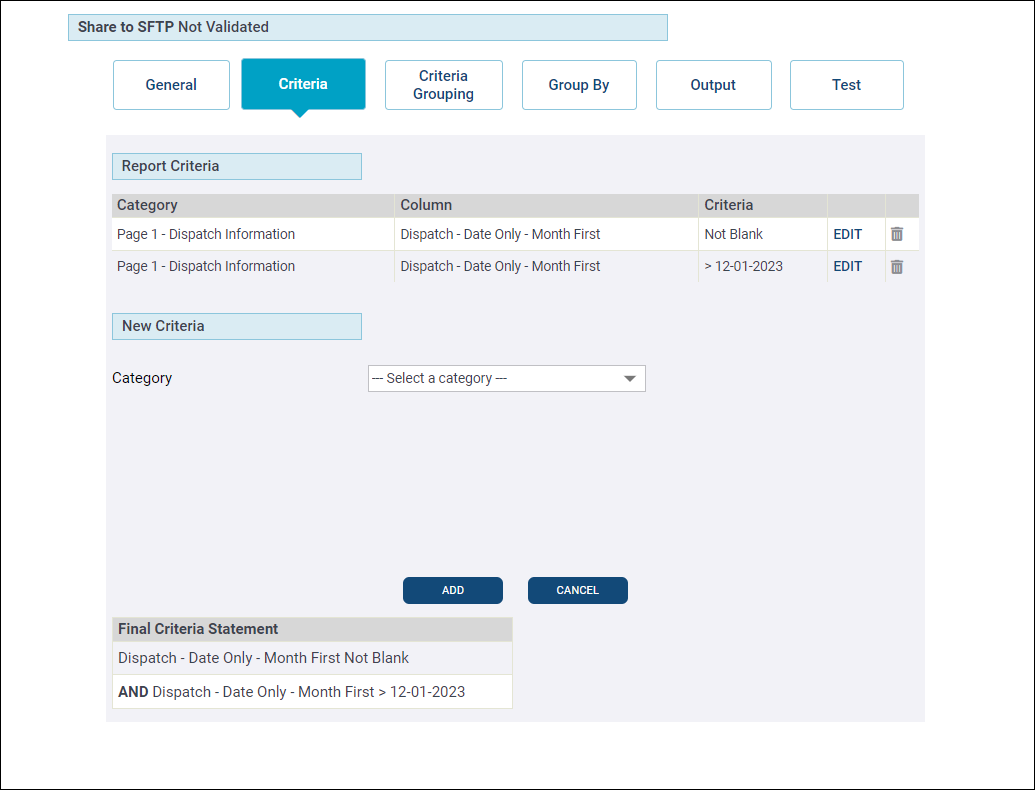
Click Criteria and set the filters you need.
-
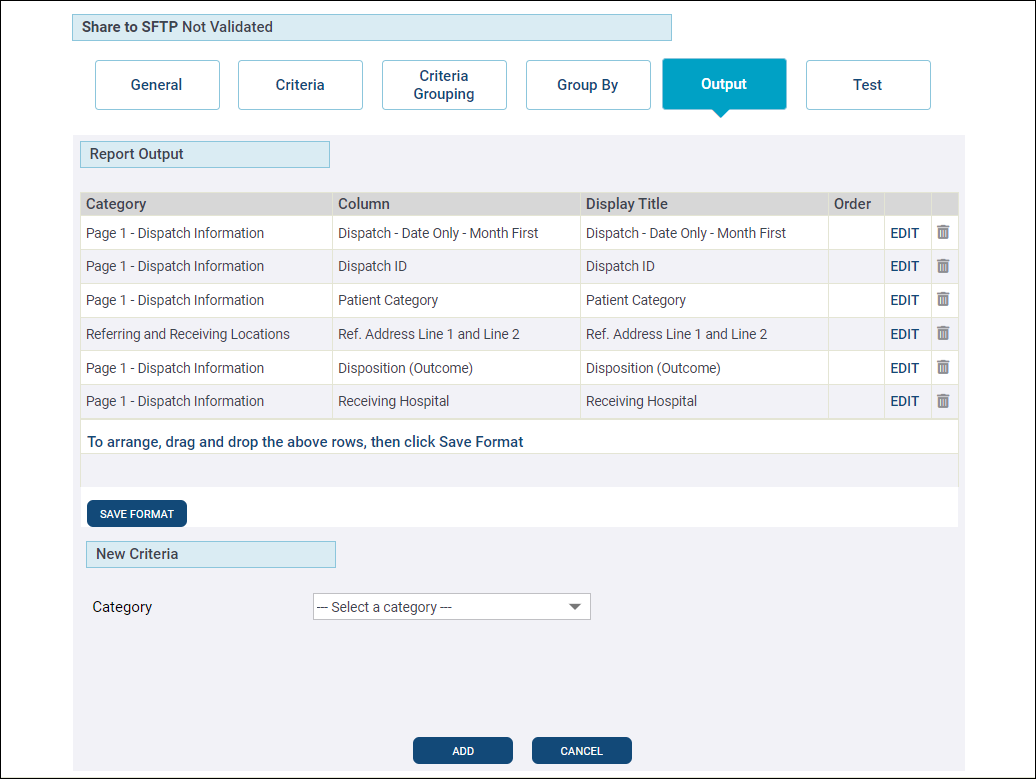
Click Output and select the data to be included in the report.
-
Click Test to validate your report.
Obtain SFTP credentials
You must have the SFTP credentials to send your report. The credentials will include a target location, user name, and password. The credentials are usually provided by the entity receiving the report.
If your environment is locked down, your administrator may need to add the following IP addresses to the firewall whitelist to allow SFTP connections:
-
52.41.116.78
-
35.164.101.173
Schedule Report to send
You will setup the destination and frequency for publishing the report.
-
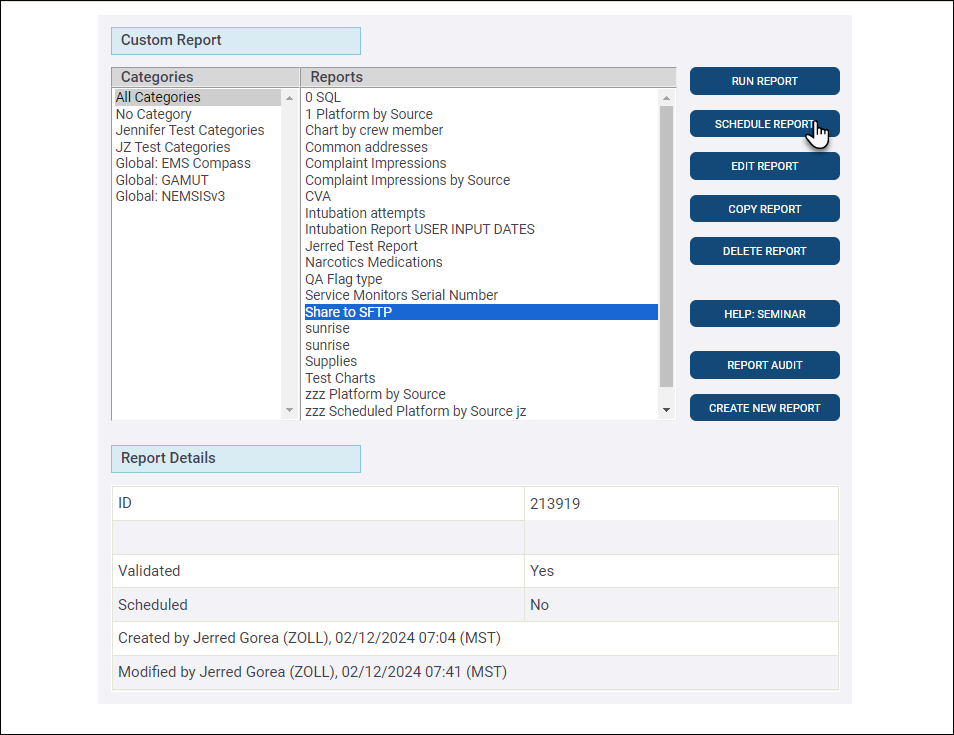
From the emsCharts homepage, go to Reports > Custom Reports.
-
Select the report to send to the SFTP and click SCHEDULE REPORT.
-
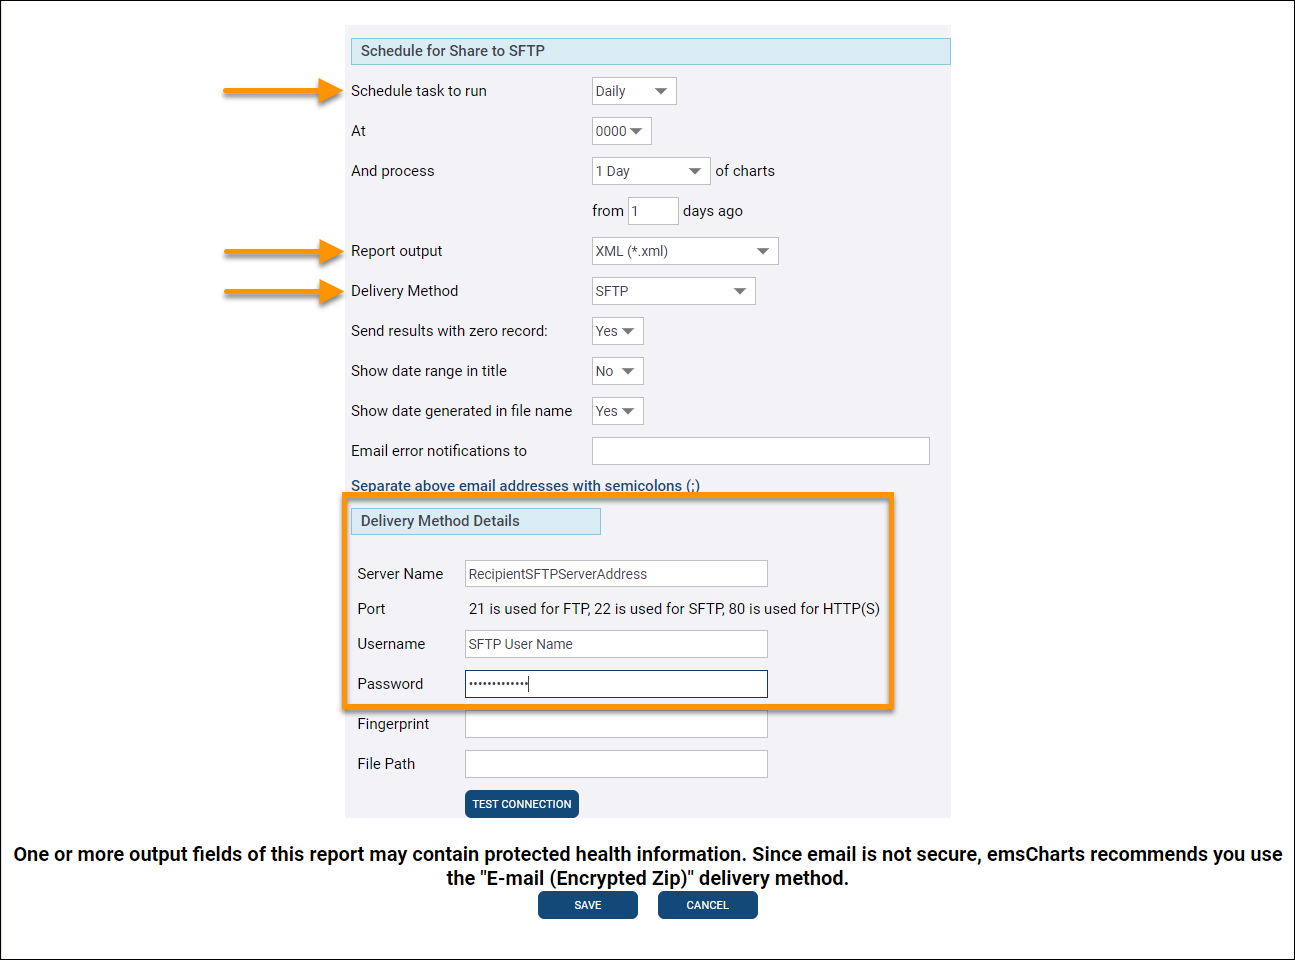
Configure the details for sending the report. At minimum, set the following:
-
Choose the frequency using the 'Schedule task to run' drop-down.
-
Set 'Report output' to the file type needed by the recipient.
-
Set 'Delivery method' to SFTP.
-
Under 'Delivery Method Details', enter the receiving entity SFTP server name, user name, and password. If necessary enter the 'Fingerprint' and 'File Path'.
-
Click TEST CONNECTION to verify the configurations are correct and you can connect to the SFTP server.
Note: If the connection is unsuccessful, double-check the SFTP credentials. If the credentials are correct and you still cannot connect, your administrator may need to add the following IP addresses to the firewall whitelist to allow SFTP connections:
-
52.41.116.78
-
35.164.101.173
-
-
Click SAVE.
-
Verify receipt
Once the scheduled report has been sent, contact the receiving entity to ensure they received it in the expected format.