Static IP Settings
Setup the X Series for static IP
- Obtain an Ethernet to USB cable.
- Plug the USB side of the cable to the X Series and the other side to your computer.
- Power on the X Series.
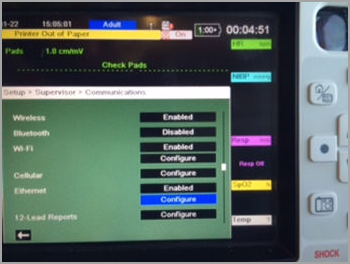
- Go to Setup > Supervisor > Communications > Wireless and change setting to Disable Wireless.
-
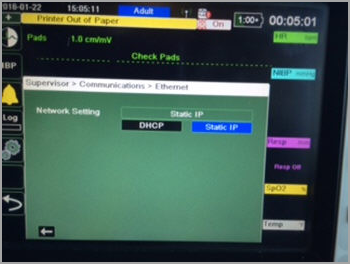
Go to Ethernet > Configure and change setting to Setup Static IP.
-
Enter your static IP address information.

- Save your changes.
- Wait for one to two minutes until the communication shows that the Ethernet is connected (three green boxes).
- Go back to Supervisor > Communication and find the IP address for Ethernet.
Static IP address settings
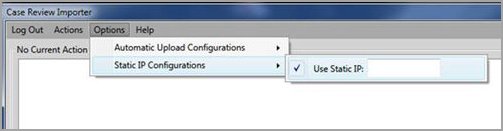
- Launch CaseReview Importer and log in with a valid DAK key/alternate ID and password.
-
Go to Options > Static IP Configuration and enter your Ethernet IP address from the X Series.
-
Click Get Cases.
Note: The system marks cases that were already loaded as "Previously Uploaded." -
Select cases and click Upload.
The Output Log displays uploaded messages.