Posting a Full Denial - Applying a New Insurance to a Claim
Important!: The system waits for ten days before changing a claim's status from "Denied - Full Denial" to "Denied - Denial Unresolved."
Posting the Denial
- To post a full denial, click Payments in the navigation bar and then click Create a transaction.
- On the New Transaction page, enter your deposit date.
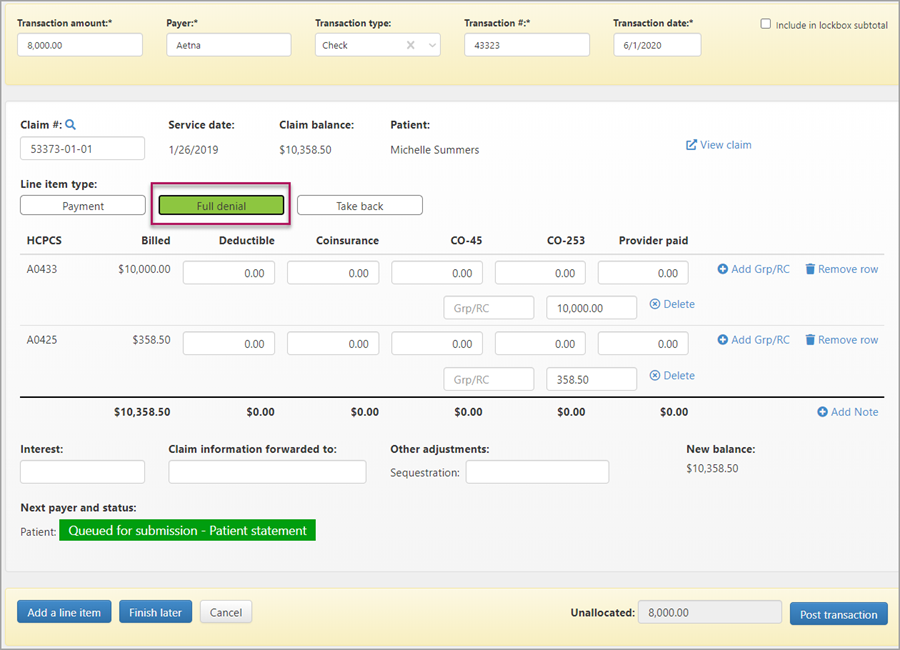
- Enter the transaction amount, then enter the payer, the transaction type, transaction number, and the date from the EOB or remit.
- Enter the claim number. When the claim information loads, click the Full denial button. The status of the claim changes to "Queue for submission - Patient statement."
- Enter a value in each of the Group/CARC fields. The value indicates the reason for the denial and can be found on the EOB.
- Scroll down to the bottom of the page and verify that the unallocated amount is zero. You can't post the denial until the unallocated amount is zero.
- Click Post Transaction.
After Posting - Apply a New Insurance to a Claim
After a primary payer denies payment, you can change the primary payer to a new payer.
- Enter the claim number in the search field. When you get the search result, click the claim number.
- On the Claim page > Coordination of benefits, click Edit .
- Click Apply a new commercial insurance.

- Enter the commercial insurance information and click Save changes.
The new payer displays under the original payer. The original payer name is grayed out.
