Working with Facilities
Note: Facility modifiers can be found here.
There are several ways to create facilities:
-
Add a facility record on the fly as you create or work claims
-
Import a list of facilities from a spreadsheet
-
Add, edit, and delete facilities on the Facilities page
A list of facilities can be found by clicking Facilities on the navigation bar. Click the facility name to add contracted charges and mileage. Contracted charges override your company’s standard charges and will be applied to any invoice sent to this facility.
Add or find facilities
Add or find a facility during claim creation
You can add or find a facility on the "Incident details" tab during claim creation or on the Claim page.
- On the navigation bar, click Claims and then click New claim.
- On the first page, enter the service date and patient information. Click Next.
- On the Incident details tab on both the origin and destination boxes, you can:
- Check for an existing facility: In the Enter facility name or address field, start typing the name of the facility. If there is a match, it will display after you type three characters.
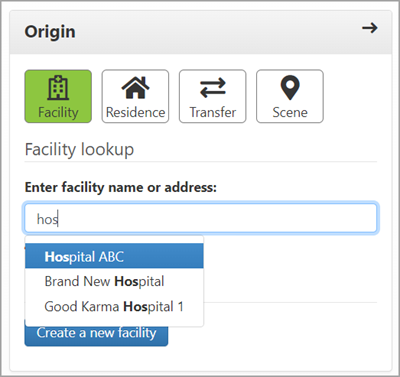
Create a new facility: Click "Create a new facility" to add a facility to the system.
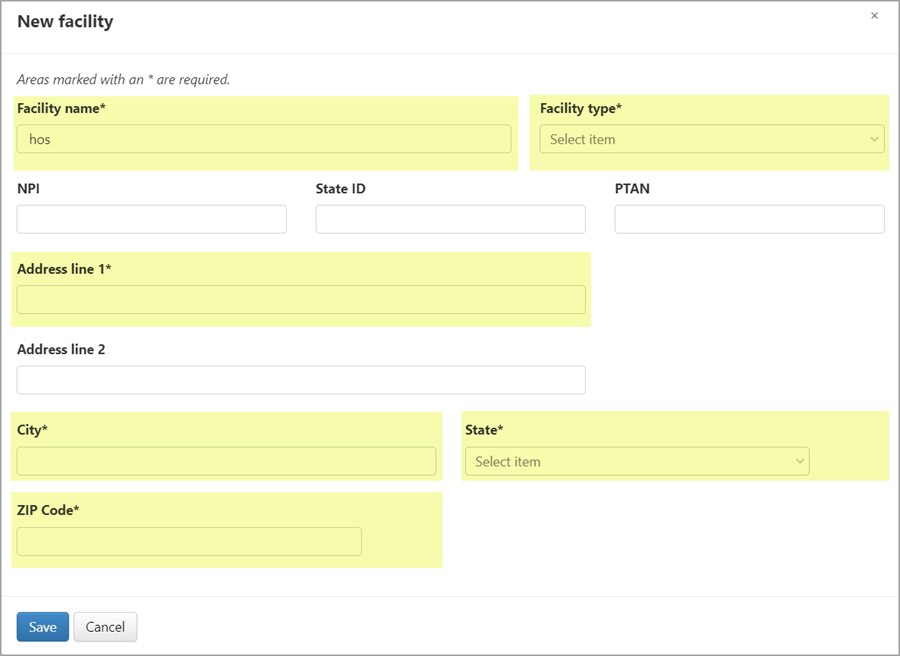
On the New facility dialog box, enter information in the required fields (highlighted in yellow in the above image). The facility type will determine the modifiers that display on the Charges page. When you are done, click Save.
- Check for an existing facility: In the Enter facility name or address field, start typing the name of the facility. If there is a match, it will display after you type three characters.
Add a facility from the Facilities page
-
Click Facilities on the navigation bar.
-
Click the Add a facility link.
-
In the pop-up window, enter the required information.
-
Click Save.
After hitting Save, the new facility will display in the list of available facilities on the Facilities page.
Enabling and disabling a facility
-
Click Facilities on the navigation bar.
-
Look for the Enable column. The icons in this column toggle.
-
Click the enable icon
 to disable
  the facility.
 -
Click the disable icon
to enable the facility.
Note: A disabled facility remains in the system but can no longer be searched, assigned to a claim, or used in a transaction.
-
Deleting a facility
-
Click Facilities on the navigation bar.
-
Look for the Delete column:
-
 : This icon indicates that the facility can be deleted. When clicked, a confirmation window displays. If you are sure, click Yes to continue. You cannot undo this action.
 -
 : When this icon displays the facility cannot be deleted because it is associated with a claim or transaction. This icon will display if the facility has been selected in any open claim as a drop-off or pick-up location.
-
Import a facility list
You can import bulk facility data directly into ZOLL Billing.
Create the import file
First, create an import file. Because the import file has to be in a specific format, there is an available template. Here's how to find the template:
-
On the navigation bar, click Facilities.
-
On the Facilities page, click Upload facilities.
-
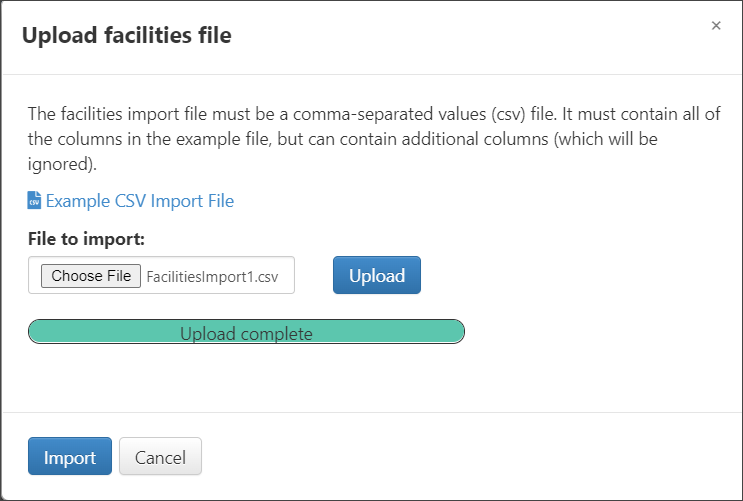
A pop-up window displays. Look for the blue link called Example CSV Import File. When you click this link Excel will open. Delete the example content and then add your own. We have another example file that you can use.
-
Save the file with a different name in a place you will remember. If that is all done, use the following steps to complete the import.
Important! The facility designations names must be an exact match and must contain the designation with the code. Use the following list as a reference:
Facility designation names
-
Assisted Living Facility - E
-
Clinic - P
-
Community Mental Health Center - C
-
Diagnostic/Therapeutic Site - C
-
Dialysis Free Standing - J
-
Dialysis Hospital Based - G
-
Federally Qualified Health Center - F
-
Hospital - H
-
Landing Zone - I
-
Mental Health Facility - D
-
Nursing Home - E
-
Physician Office - O
-
Rehabilitation Facility - D
-
Skilled Nursing Facility - N
-
Urgent Care - P
-
Urgent Care - U
-
Import your bulk facility list
Note: If you haven't created the import file, do that now and then come back here.
Important!: The import facility functionality does NOT include logic that indicates an existing facility. It is your responsibility to ensure that duplicate facilities are not included in the import file.
-
On the top navigation bar, click Facilities.
-
On the Facilities page, click Upload facilities.
-
On the "Upload facilities file" window, click Choose File and navigate to the file's location. Click the file and then click Upload.
-
When the status bar completes, click Import.
-
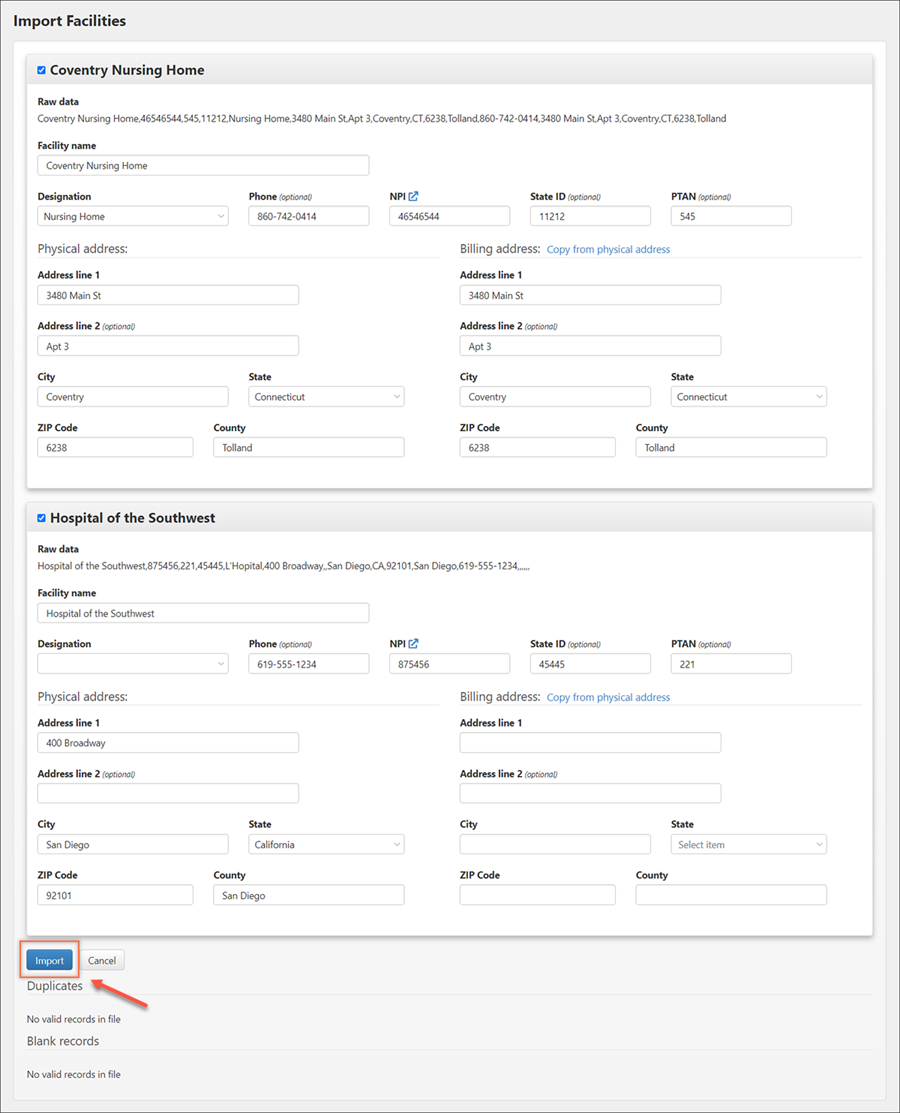
So far, no facilities have imported. Before that happens, you have the opportunity to verify that everything is correct and make changes if necessary.

Here you can:
-
Remove a record by unchecking the box next to the facility name
-
Change the data for a facility
-
Manually add a billing address or click Copy from physical address
-
Click
 to verify the NPI with the NPPES NPI Registry
 -
Scroll down to the bottom and view duplicate records
-
-
When you are ready, click Import. The facility records will be imported into your system.
Export a facility list
Use the same format used for importing facilities to export a facility list.
-
On the navigation bar, click Facilities.
-
On the Facilities page, click Export all facilities.
Note: If the exported file is used to import facilities back into ZOLL Billing, be sure and change facility information before the import. Failure to change facility information may result in the creation of duplicate facilities.
Create a Facility Claim
- On the navigation bar, click Claims and then click Create Claims.
- On the first page, enter information such as the service date, patient name, DOB, sex, address. Click Next.
- On the Patient Details tab, verify the patient information and either find patient insurance or click Next.
- On the Transport details tab, select the transport type.
- To bill this claim to a facility:
- Click the Facility tile in the Origin and/or Destination box.
- If this is an existing facility, click the Facility lookup field and start typing the facility name.
- If this is a new facility, click Create a new facility, enter the facility information, then click Save.
- Fill in the rest of the Transport Details page and then click Next.
-
On the "Coordination of benefits" tab, click the Facility tile. If you enter a facility as:
-
the origin or destination, the facility information for that facility displays in the primary payer box.

-
both the origin and destination, you can choose which facility to bill.

-
-
On the Charges tab, enter the signatures information and verify the charges. At this time, either queue the claim for submission or suspend the claim. If the claim is queued for submission, the claim's status changes to "Queued for submission - Facility invoice."

View a facility list
- On the navigation bar, click Facilities.
- Click the All facilities tab to view the list of configured facilities.
View facilities with new charges
-
On the navigation bar, click Facilities.
-
On the Facilities page, click the With new charges tab.
Click the facility name to see facility details including open submitted and queued claims, past invoices, and running balance.
To download the new charges to a CSV file, click Download CSV.
View facilities with facility balances
-
On the navigation bar, click Facilities.
-
On the Facilities page, click the With facility balances tab.
Click the facility name to see facility details including open submitted and queued claims, past invoices, and outstanding claims.
To download the new charges to a CSV file, click Download CSV.