Manual Submission - Drop to Paper In-house
How do I know what the payer rules are?
Insurance companies have rules on how they want to receive claims. There are two options, you can submit through a clearinghouse or drop to paper in-house (manual submission). If the insurance is the primary or secondary payer, the rule could be different. The short answer is, you can go to your clearinghouse to find out. Let's use Waystar as an example.
- Log onto Waystar.
-
Go to the bottom and click Payer list.

-
Enter the name of your payer in the search bar.

-
Check the rule for the payer - primary or secondary submission.

Set manual submission in Admin
If the rule for the payer requires a paper submission, you will need to configure that setting for the payer in Admin. Here's how:
-
Click Payers on the navigation bar.
-
Click the name of the payer or start typing the payer name in the search bar to find the payer in the list.
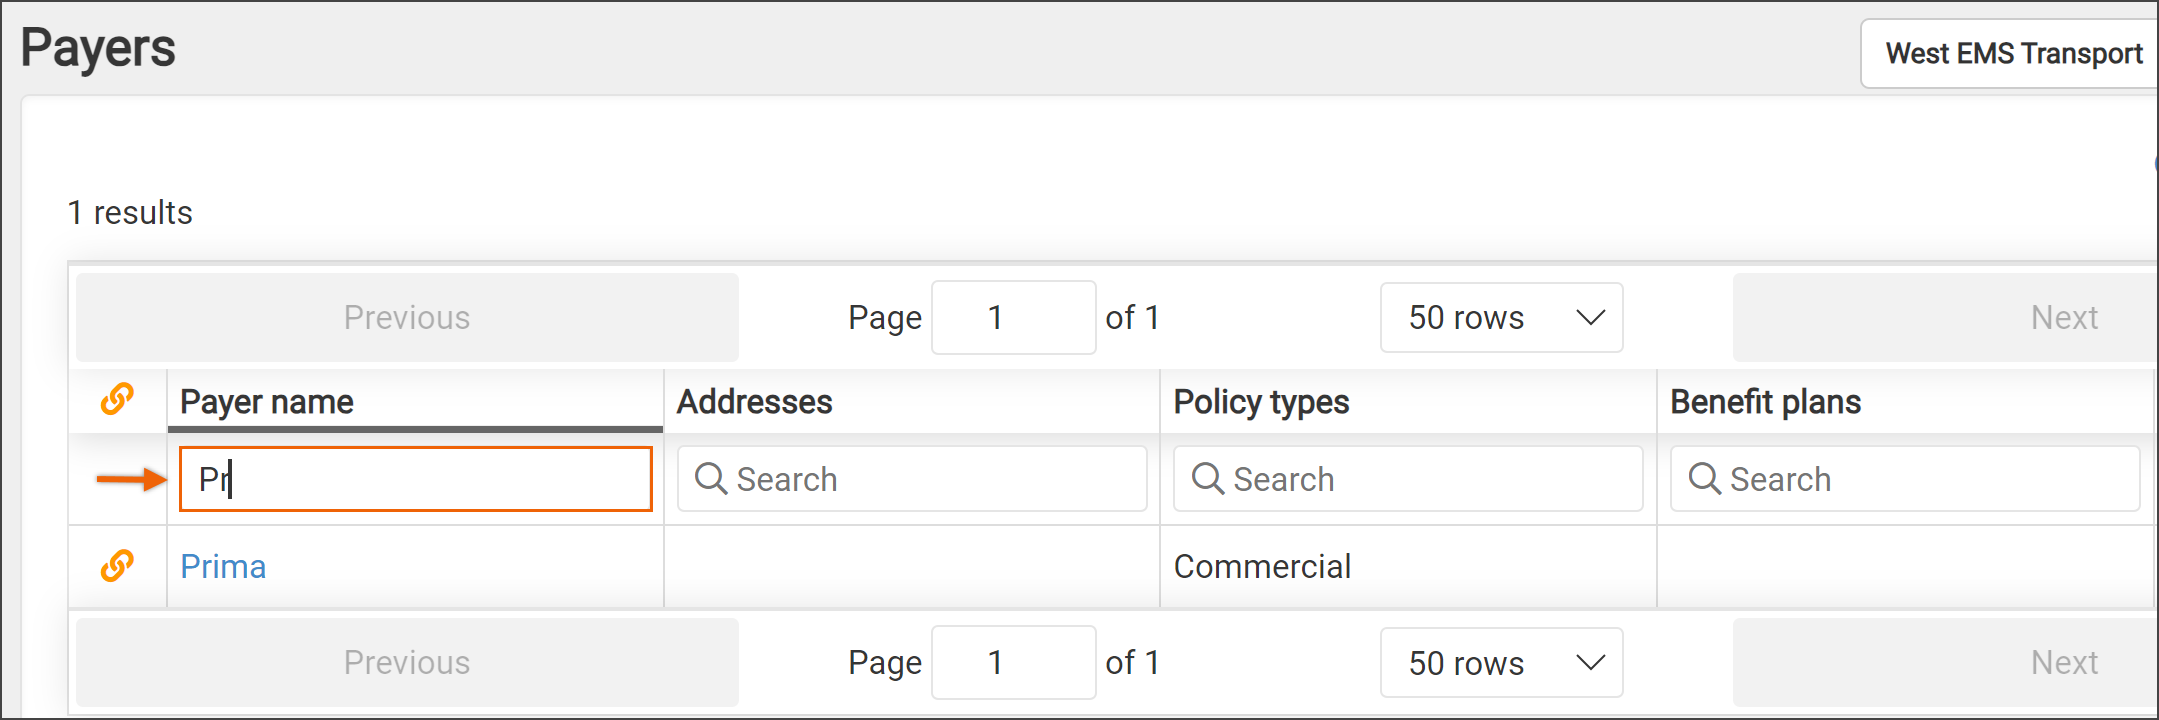
- Click the insurance name in the search results.
- Click the Policies tab and select the policy from the list.
-
Click the "Primary submission" and/or the "Secondary submission" field and select Manual submission from the drop-down list.
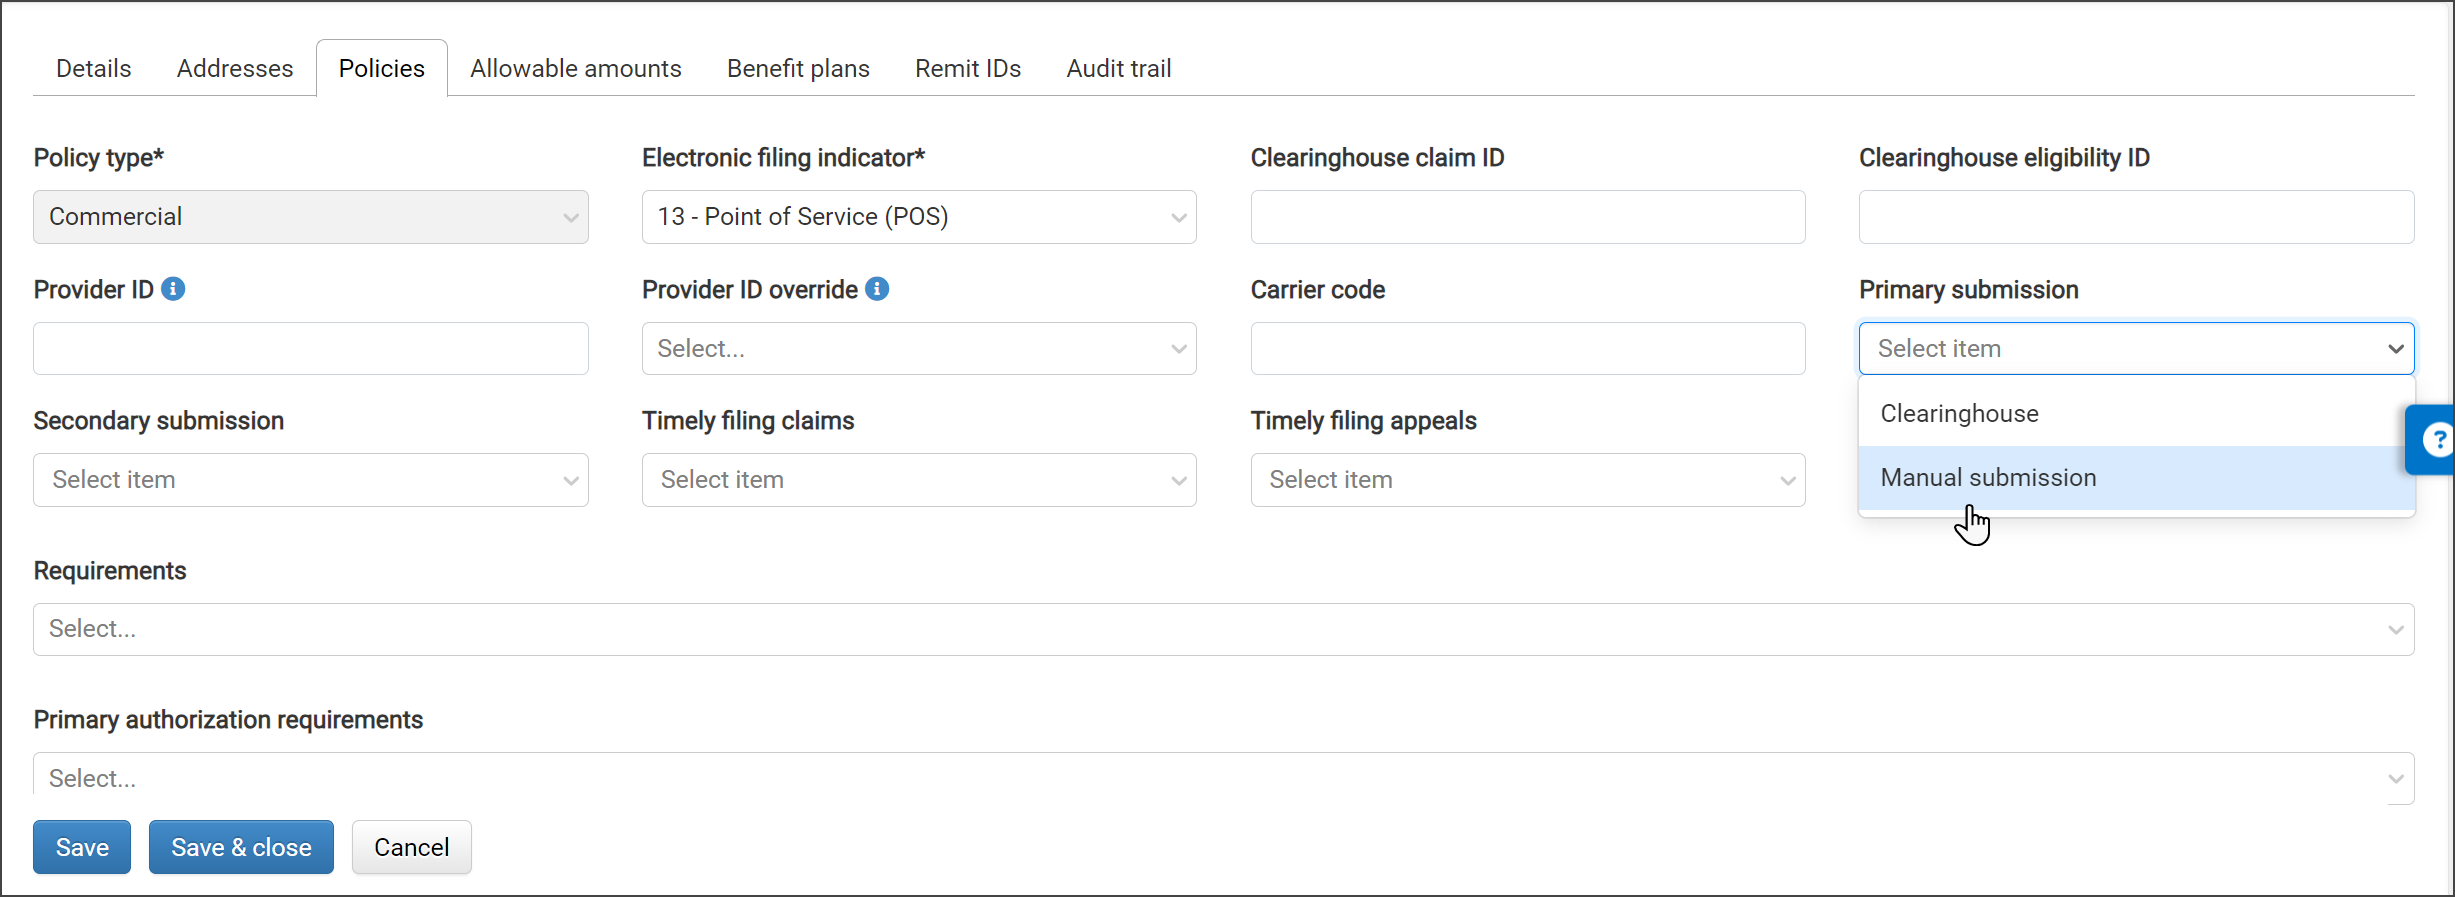
- Click Save & Close.
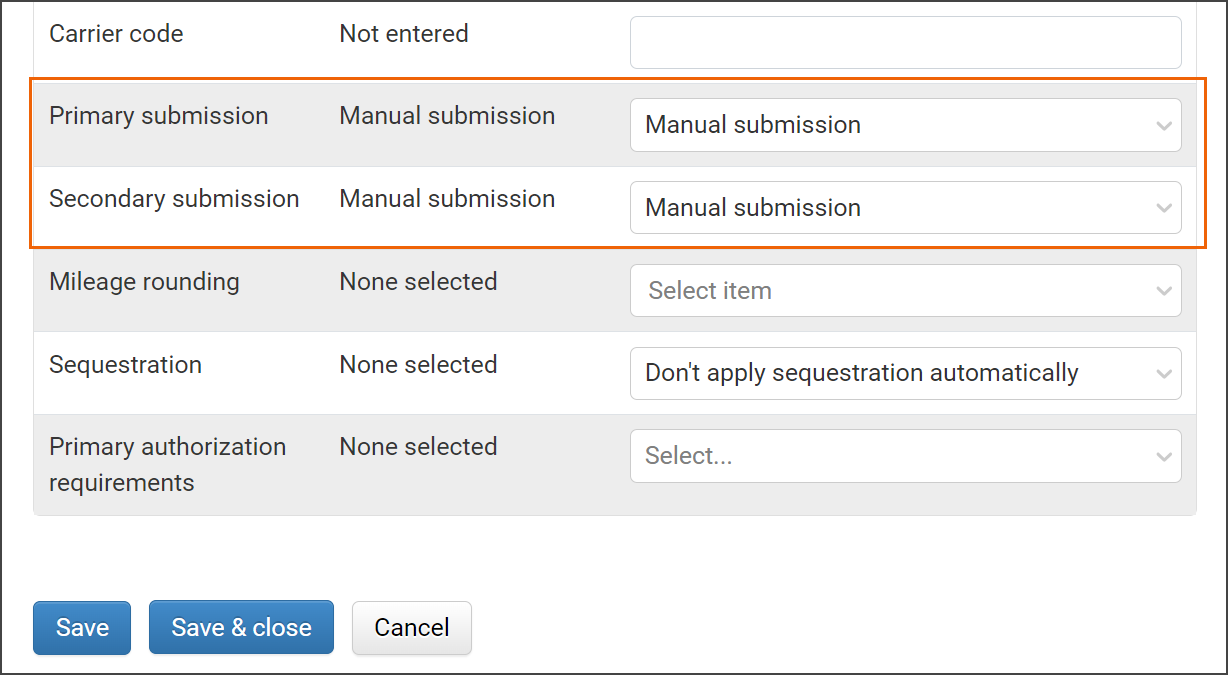
- Select the Benefit plans tab.
-
Scroll down and find the 'Primary submission' and/or the 'Secondary submission' sections. Ensure that these fields are set to Manual submission.
-
Click Save & Close.
From this point on, queued claims for this payer will appear on the Manual Submission Queue page under the Claims menu.
Accessing claims for manual submission
There are a couple of ways to access claims that require manual submission.
Dashboard: Click Dashboard on the navigation bar. The number of manual submission claims displays next to the "Queued for submission - manual submission" banner. If the number is greater than zero, a Work button displays. Click the Work button to get started.
Submit a manual submission batch: On the navigation bar, click Claims and then select Manual Submission Queue. This page lists all batches that are waiting for manual submission. Find the payer name in the list or use the search field to enter the payer's name. On the line associated with your selected payer, click the Submit button. A manual submission form will display.
Note: Before clicking Submit, click "CMS 1500 margin settings" to verify or change the margins.

Submit a single manual submission claim: Go to the Claim page and click Print 1500. A manual submission form will display.

Once printed, the claims will change from a "Queued for Submission" status to a "Submitted – Manual Submission" status. Both the Audit Trail and Billing Lifecycle will reflect the submission and the actual printable PDF can be seen from the Submission History tab on the claim page. If you need to reprint the entire batch navigate to Claims > Claim Batches and reprint from there.
Modify what prints out on the 1500 & submit
-
For a batch: On the navigation bar, click Claims and then select Manual Submission Queue. Click Submit on the payer line.
Note: Before clicking Submit, click "CMS 1500 margin settings" to verify or change the margins. - For a single claim: Enter the claim in Search and click the claim number in the search results. This will bring you to the Claim page. Click Print 1500.
-
You will see a list of options that you can set.
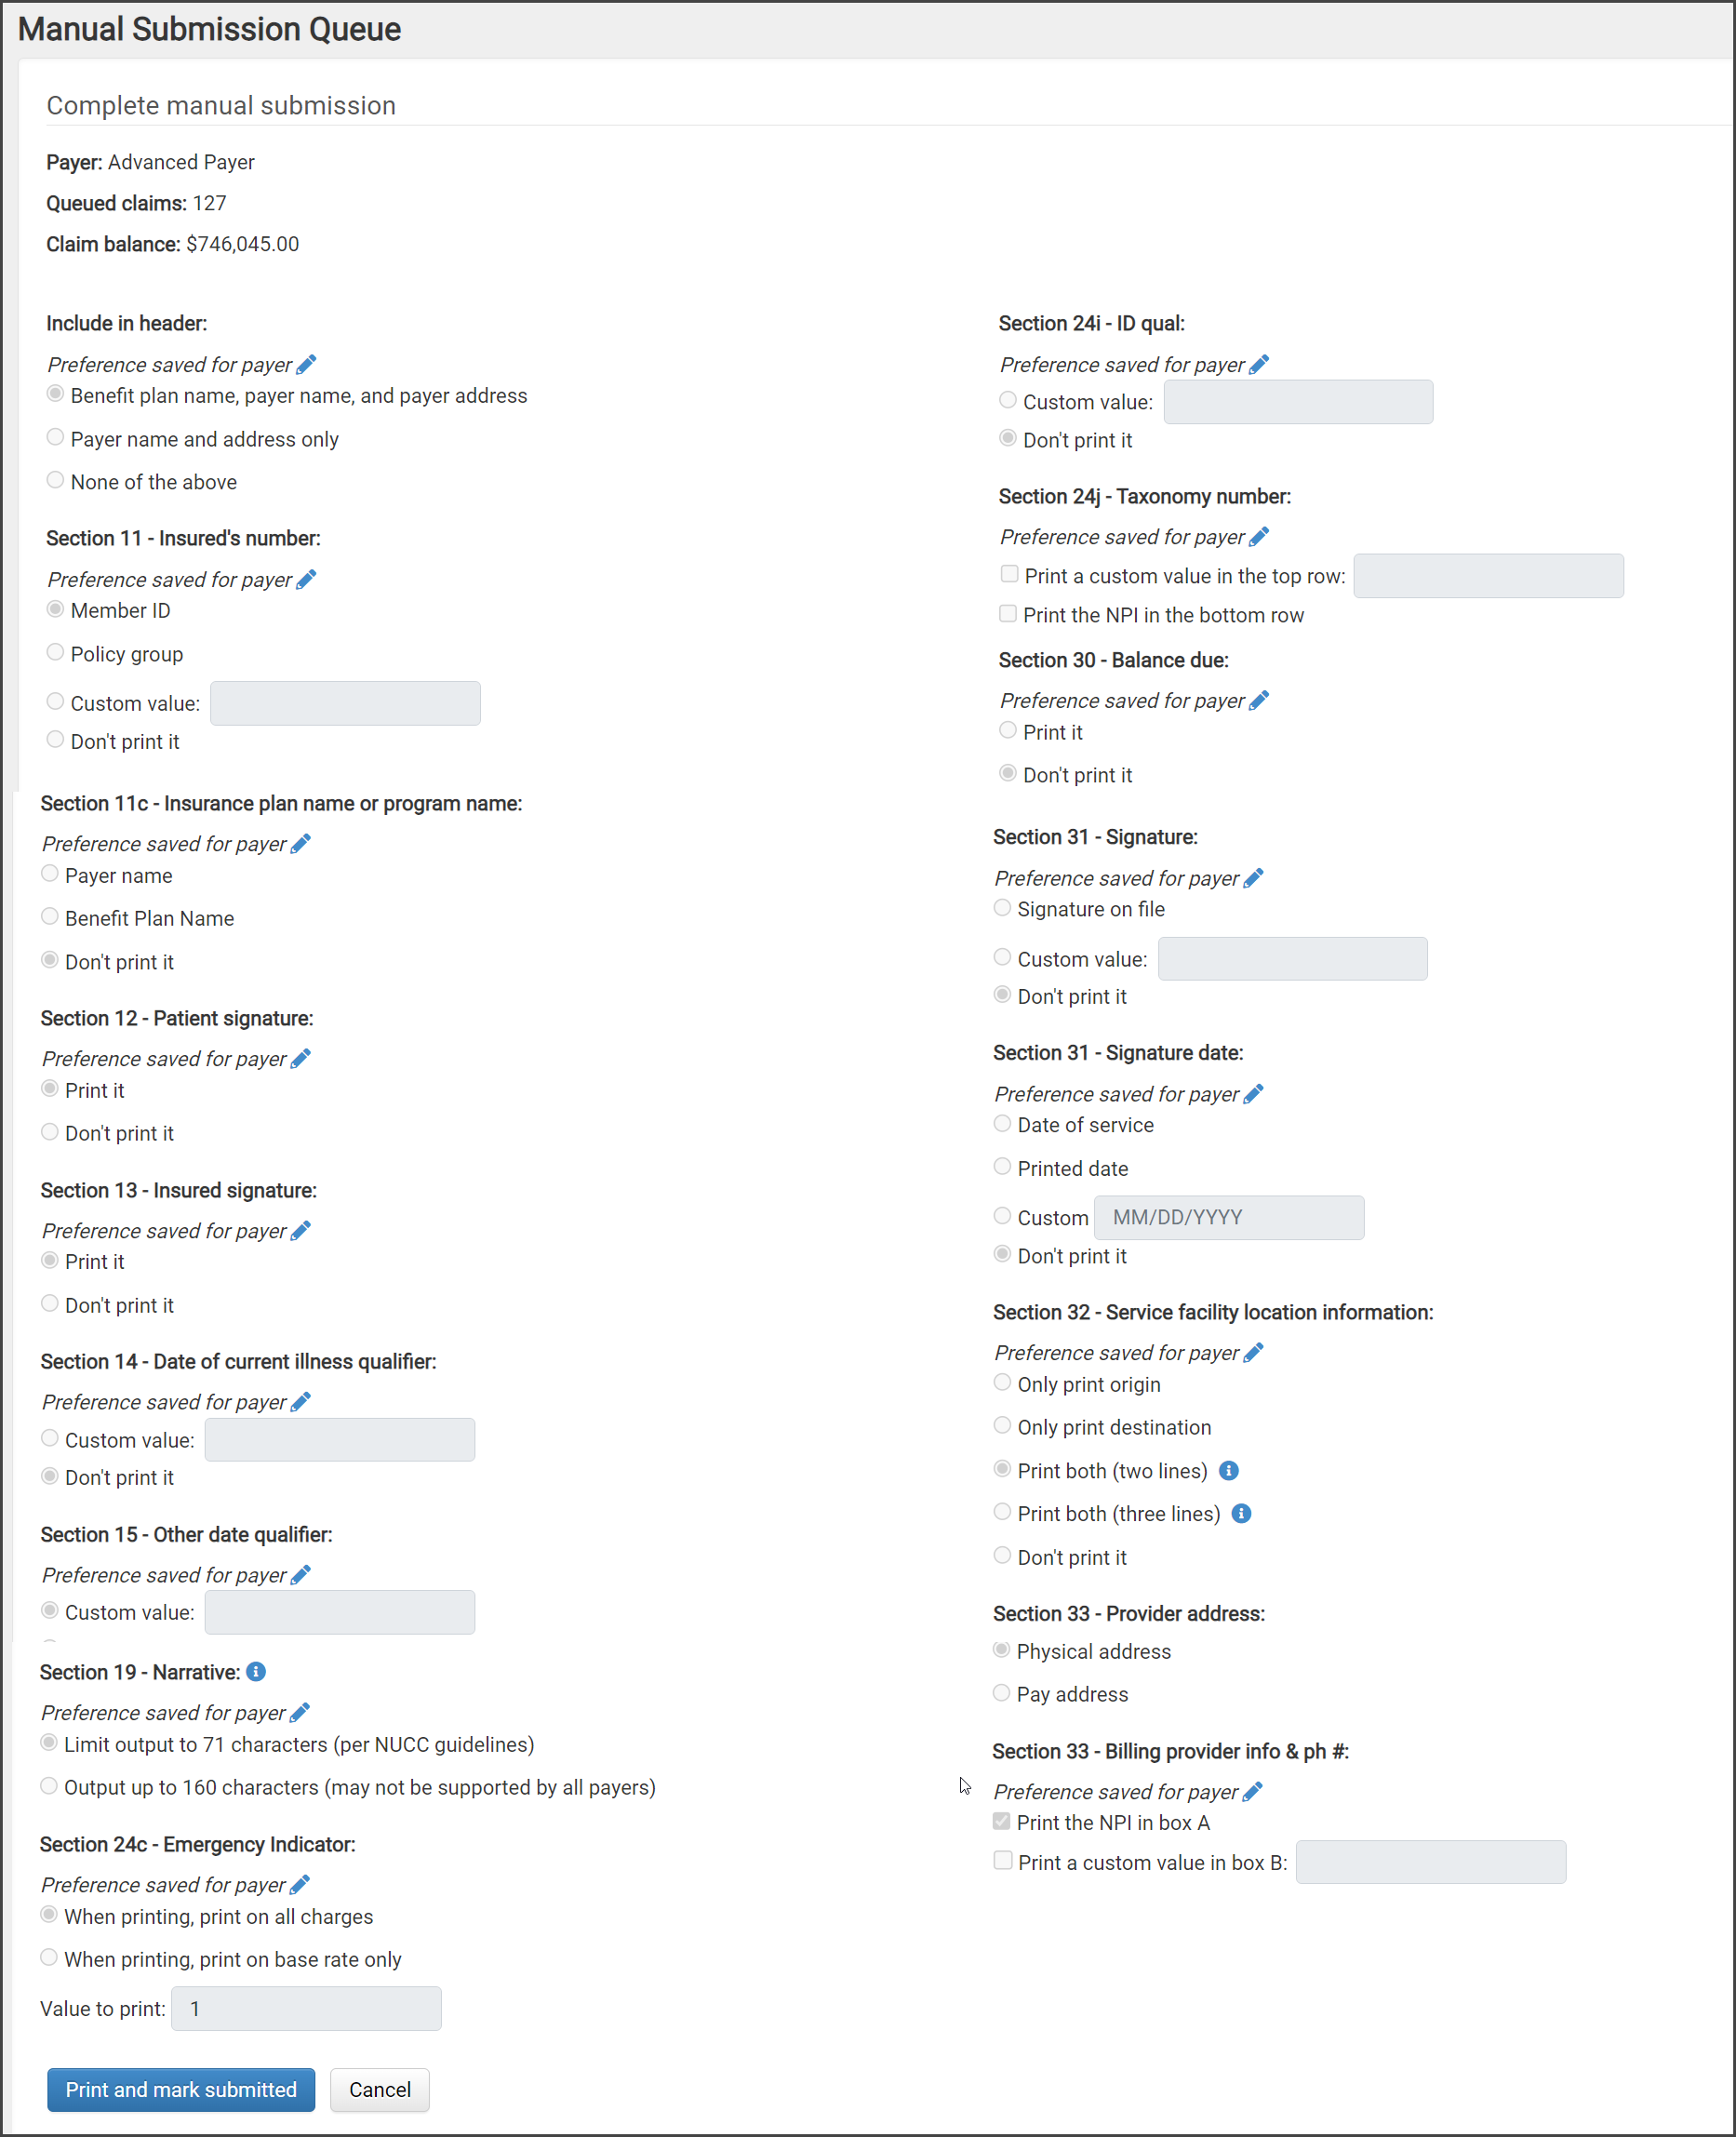 Note: Options you select will stay selected for this payer so they can be used in the future. If you wish, you can change them anytime.
After selecting the options, click Print and mark submitted. This marks the claim(s) as done and removes the claims from the Manual Submission Queue page.
The 1500 form displays in a separate tab in your browser.
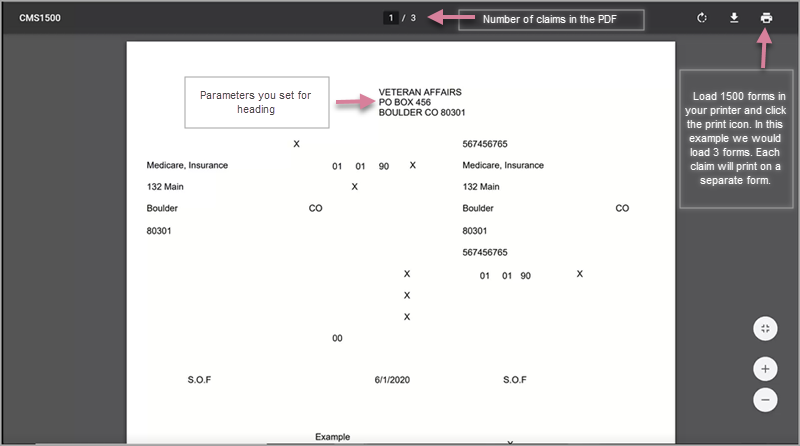
Load 1500 forms in your printer and click the print icon.
Note: For printer setup, see Setting up your printer.
Ad hoc drop to paper
Use this procedure to drop a claim to paper that is usually sent electronically.
-
On the Claim page, click Print 1500.
-
If you have not set this payer up for 1500, select the desired options.
-
On the bottom of the form, click Print and mark submitted.
A PDF will display in another tab on your browser. Load 1500 forms in your printer and click the print icon.
Note: For printer setup, see Setting up your printer.
Submission history
Submission history can be found in the "Audit trail" and "Billing lifecycle" tabs on the Claim page. You can also go the "Submission history" tab to view the 1500.

Setting up your printer
Use the information in the following video to setup your printer for manual submission.